
NOTE – If you plan on controlling this light with a Shelly smart home control module, now’s a good time to wire in the module and replace the switch. READ HERE for more information.
I had plenty of the LED strips left over from my Closet Lighting project, so decided to convert the kitchen and living room fluorescent lights to LED’s.
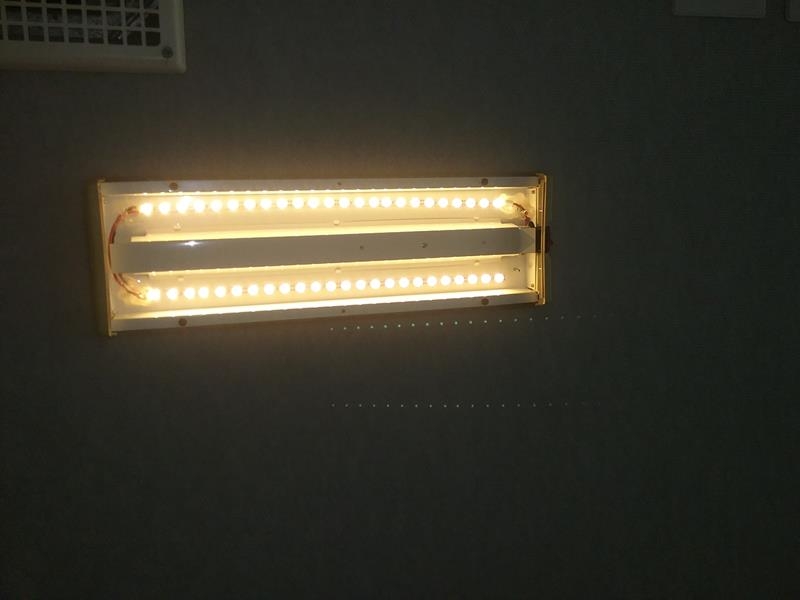
The original fluorescent fixtures had cool white bulbs, this is a harsh bluish color. I prefer warm white, its more the color of a standard incandescent light bulb. Also, The LED’s use about 1/2 the energy as their fluorescent counterpart. I now have all the lights in my Southwind converted to LED’s. This is a significant energy savings when boondocking.
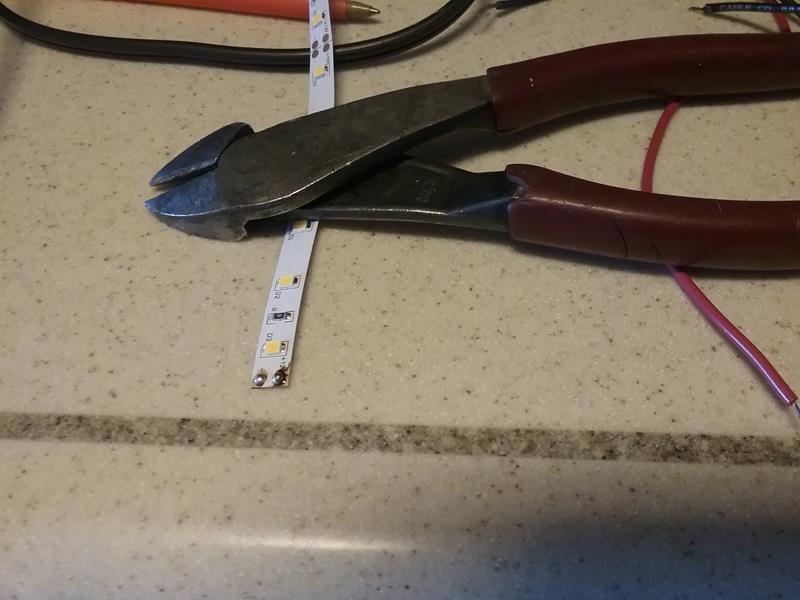
The LED’s I chose came in a long 15ft strip. I cut off the length I want. Although they sell push on connectors for the strips, I decided to solder wires to the strips when I hooked them up. The adhesive on the back of the strips is very good quality and stands up well to heat and cold. To date I haven’t had any problems with it coming off.
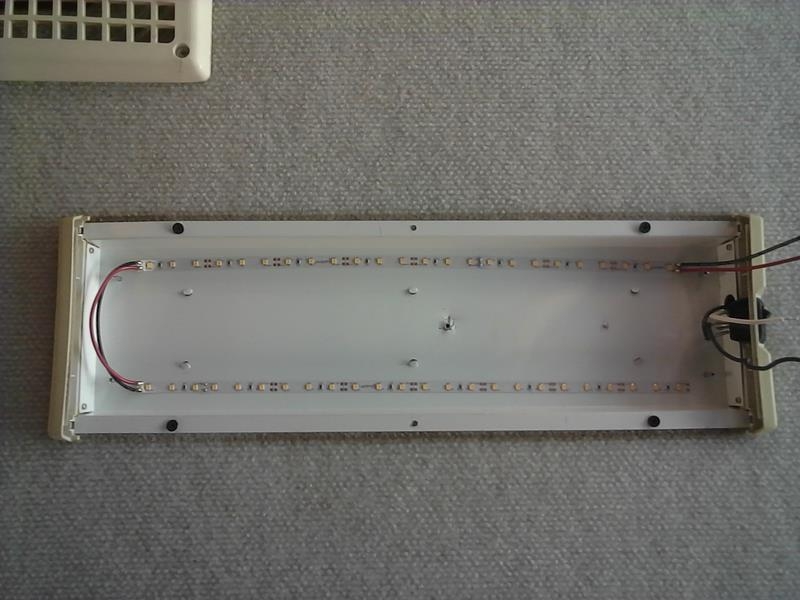
I installed the LED’s in both of my fluorescent fixtures, the living room and the kitchen. In the living room fixture I installed two 15 inch strips of LED’s. This seems like it was just a little bit brighter than the original fluorescent tubes. However, in the Kitchen, I installed three strips of LED’s. This is a lot brighter and illuminates the counters and kitchen area significantly better.
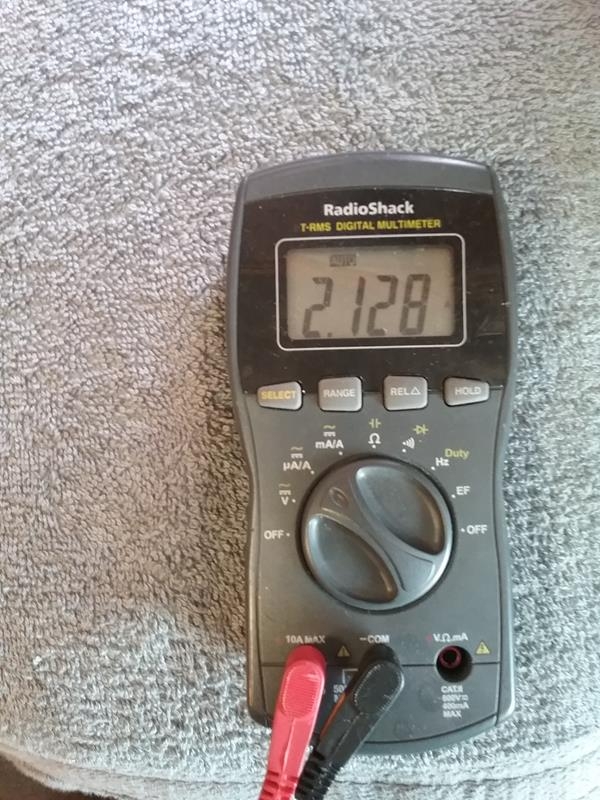
Before disassembling the fixture, I checked the current draw, It was 2.1 amps for the fluorescent. After the modification, the 2 strip LED’s in the living room was 1.0 amp. I installed three strips in the kitchen fixture, it has 1.5 amps of draw.
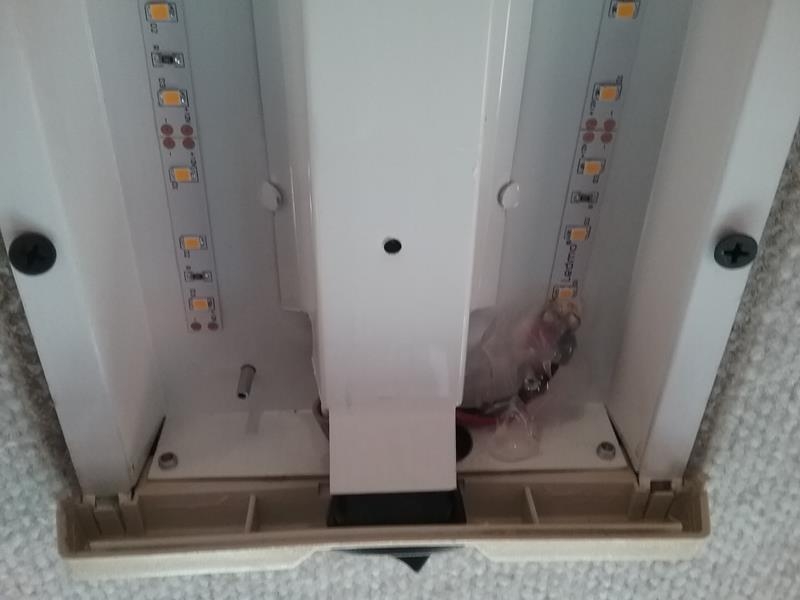
Remove the lens cover and the center cover plate.
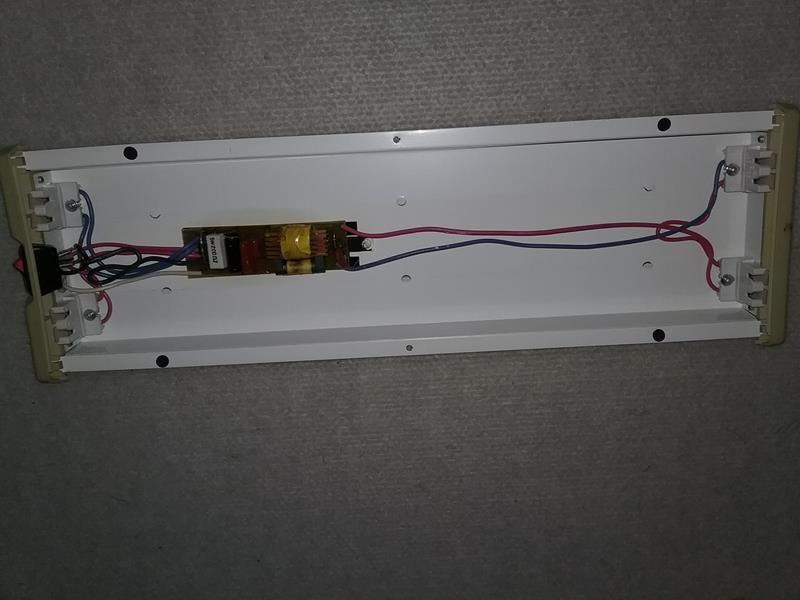
The bulb and circuit board are held in with aluminum rivets, I used my side cut wire cutter pliers to cut through the rivets and they popped off. Remove the wires, bulb connectors and ballast out of the old fixture. I cut the power wires where they were attached to the ballast. This left a couple inches of wire to attach to the LED wires with wire nuts.

Clean the surfaces off the interior of the fixture with alcohol to remove any residue so the LED strips will stick.
Using scissors, cut the LED strips to 15 1/2 inches. The place to cut is marked with the large copper pads. If you use the slide on connectors, this is where they connect, or do as I did, solder the wires on these pads. Each strip will have about 24 LED’s. Carefully solder the wires to the strips, make sure to observe polarity. PLUS and MINUS are marked on the solder tabs on the strips.
Remove the backing from the strips and center them about where the old bulbs went. Connect the wires to the switch, again, observe polarity. The switch is usually PLUS. I used small wire nuts to attach the LED wires to the power wires.
 Do a test to make sure the LED’s light.
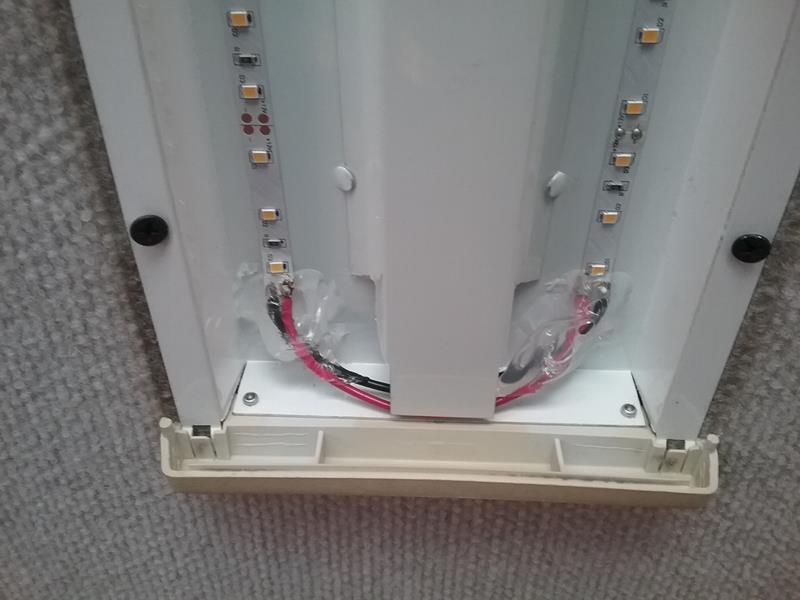
Put a large dab of clear silicon sealant on each end of the LED strips. Also dab some on the wires against the light frame. This keeps the wires from vibrating and breaking off.
 Reinstall the center cover and lens cover.
NOTE – I added another strip on top of the center cover for more light.
I tried this conversion on our coach and didn’t like the light temperature. I am glad you had better luck. I eventually bought conversion kits from a well known LED lighting provider.
I specifically went for “warm white” (about 3500k). The normal florescent light is more white (bluish) around 4000k-4500k. This hurts my eyes. You can get these LED strips in either color range, I think you can even get color LEDs.
That’s a great DIY project! Very well done. Where do you find this type of LED strip? You mentioned “push on connectors”, would these make replacement of the strip easier in the future? Or, considering the service life of the LEDs, replacement effort is not really a big issue?
The self adhesive LED strips and connectors are available at Amazon or ebay. These are similar to what I used:
https://www.amazon.com/Flexible-16-4ft-Kitchen-Christmas-Non-waterproof/dp/B00HSF64JG/
https://www.amazon.com/LightingWill-Solderless-Conductor-Connector-Single/dp/B01DM7EXX2
Very nice! Thank you Waiter! Are you a pilot?
Thanks. Yes, I’m a Pilot. But had to give up flying a couple years ago as my eye sight is bad.
Just wanted to say i just bought a 99 fleetwood southwind with 32000 miles on it…….ill likely be doing zll the mods that you have done with a few of my own…..
Great work and write ups !
I finally did this conversion. My “thin lights” were just a bit different. My “center cover” goes most of the way to the sides so I put the strips on it. I like the new shade and temperatures. They are bluish. The old T8s were ugly yellowish. Thanks for the “kick start” and encouragement to tackle this job. I did all 12 lights with 1, 2, or 3 strips, depending on needed output in each area.
Pingback: LED Conversion - 1999 Southwind 35S