
The following article is a summary of my painting project. While working on the project, I kept a day-to-day log, It contains a lot more info and photos READ HERE for the log.
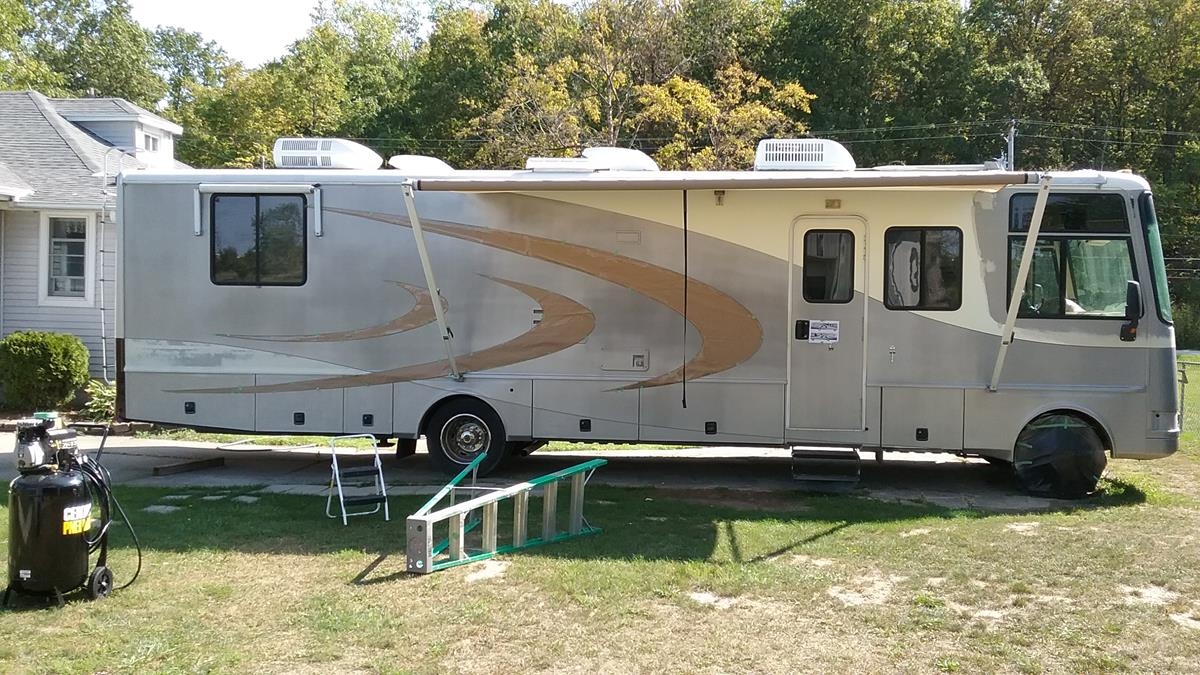
For many of us who own older RVs, we generally do our own maintenance and like to keep our older RVs in tip top condition.. Our Southwind is in excellent condition, all the systems work just as good as the day they left the factory, and mechanically, its in good shape and trustworthy. Sadly, I can’t say the same thing about the exterior as its showing its age with faded color and cracked and dated graphics. Unfortunately, to bring the exterior up to good presentable condition can present a significant financial challenge. I researched various options for a paint job, but the best I could come up with was $5,000 – $7,000 from a shop in Mexico, and a minimum of about $10k for a stateside shop. These estimates are close to what I paid for the RV. Its difficult for me to justify this expense for one single item on an RV of this age. HOWEVER – There is another option… Do it Yourself….
For any DIYer who’s willing to take on the challenge and perhaps learn a new skill, a decent looking paint job can be had for l/10th the cost of the shop estimate. My total cost was just under $1000. This was for paint and materials needed to do a 35 ft Southwind.
Disclaimer – Just because I painted one RV doesn’t make me an expert. Any professional who reads this will question some of the techniques or has better recommendations. This article is meant to show a fellow newbie what I learned and to give insight into the reality that almost anyone with reasonable mechanical skills could certainly take on the task of painting their motorhome, and it should turn out reasonably well.
This paint job may not compare to a $30,000 professional paint job that highlights 5 different colors with fancy graphics and a mirror finish found on a new automobile, but it could.
Given the amount of time, energy, I put into this job, And my lack of experience, I’m perfectly happy with what I call a 5 footer: From 5 ft away it looks like the 30k paint job, When you get closer than 5 ft, you’ll see the minor imperfections, some orange peeling, a blotch or two, a couple small runs, and an occasional spec where a bug landed while painting.
For less than $1,000 in materials and 100 hours of labor, a faded and out dated RV paint job can be transformed into a very nice modern looking RV paint job. The more time put into preparation, the better the job will look.
Below is a general HOW-TO on painting an RV, You can also see a detailed day-to-day progress of my project, with a lot of photos by clicking HERE ..
GRAPHICS REMOVAL
All of the vinyl graphics and glue need to be removed. My Southwind is 18 years old, the upper portion of the sides and the end caps are gel-coat with vinyl graphics. The lower portions, compartment doors, are painted metal. I suspect the vinyl graphics are original. But at some point over the years, someone painted the vinyl graphics to revitalize them.
I tried many different methods of graphics removal with different procedures and chemicals, etc. I came down to three processes that worked. None of these are fast or any easier than any other. The process I used was determined by the condition of the vinyl. All of the procedures are tedious, there is no such thing as fast or easy… so take your time and just keep plugging away. After a few days, it’ll be done.

 1) Pull vinyl off or apply a little heat and pull off. This is the preferred method as it usually pulls the adhesive off with the vinyl. Heat helps to soften the glue, but also softens the vinyl. I used a heat gun to heat the surface, blowing the heat away from the piece that’s already lifted and I’m using to pull on. Slowly pull the graph at a 90 degree angle. Another method is to heat an area a foot or so long, then pull. It doesn’t take a lot of heat to soften the graph adhesive. But to much heat softens the vinyl and then it stretches and pulls apart as you’re pulling on it. Practice. By the time you have all the graphics off, you’ll be very good at it.
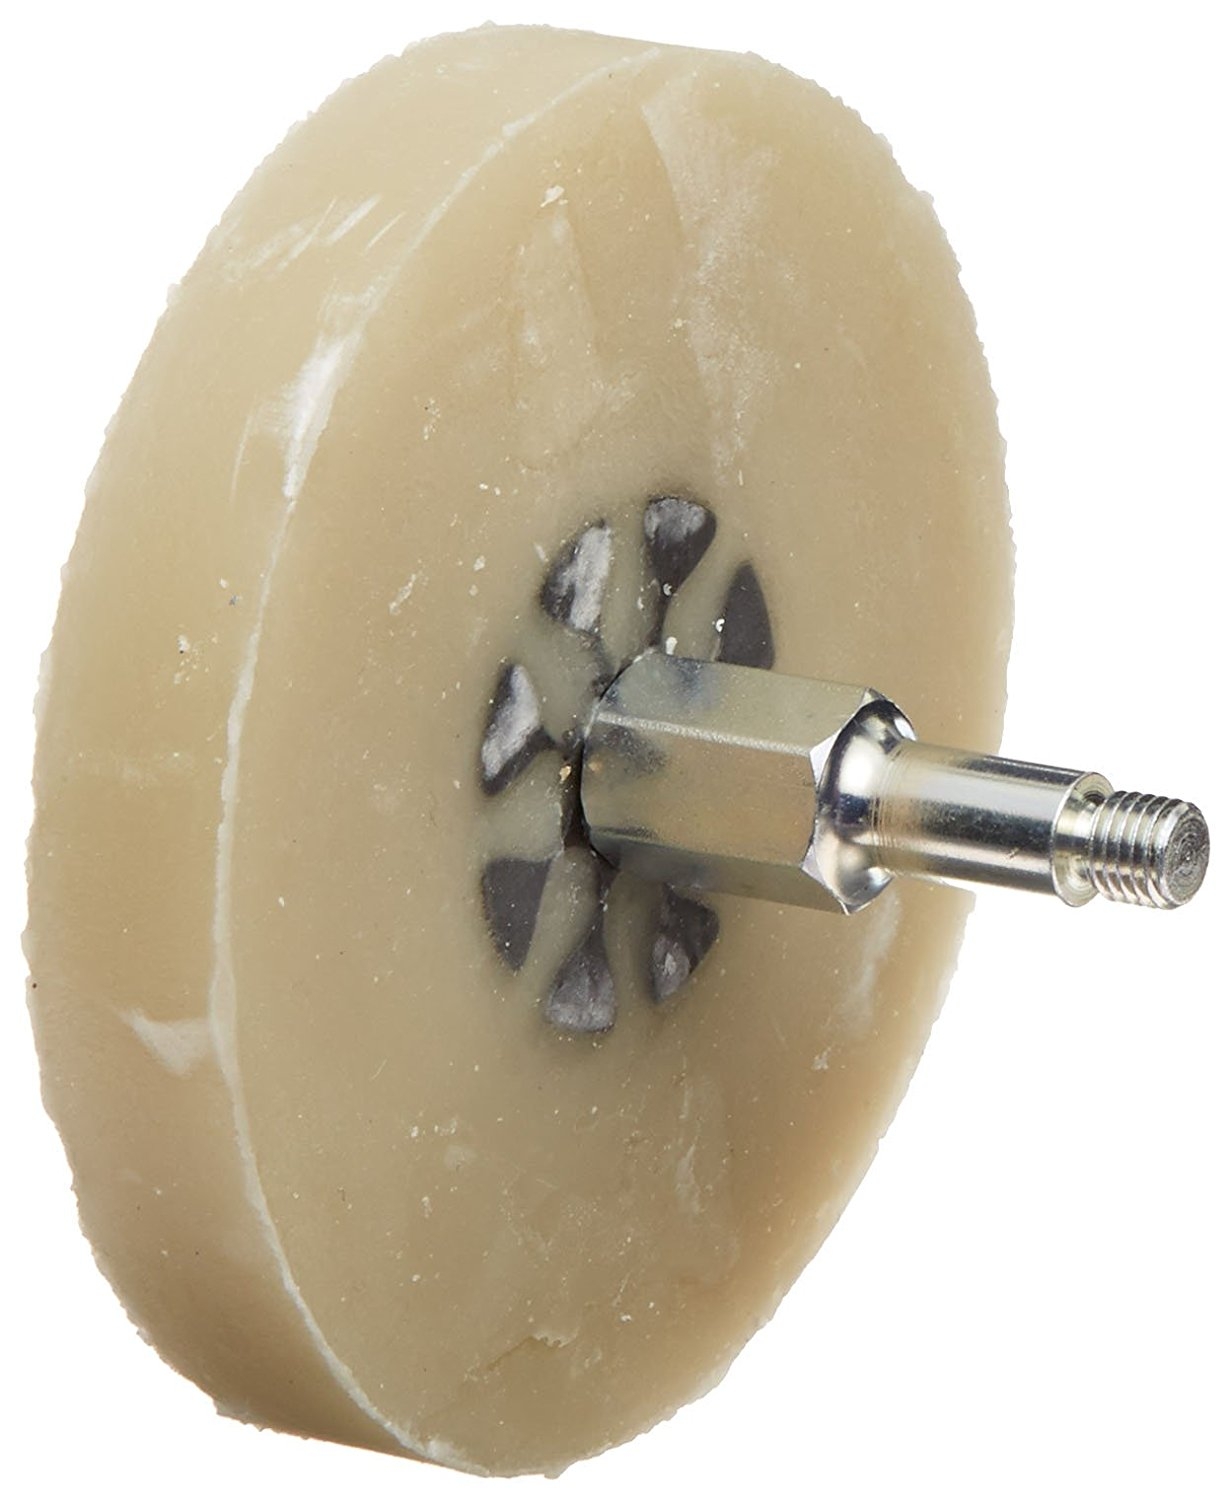 2) Eraser – this works where the graphics are old and brittle. This method also removes most of the glue. When using the eraser, I tried to slowly work in a direction so that the debris that was kicked up by the eraser would blow on the graphic in front of the eraser. Having the debris on the vinyl seemed to help in the erase process. It doesn’t take a lot of pressure, but this is a slow, methodical method that works very well. This method blows residue, so wear work clothes. AND – Wear eye protection.
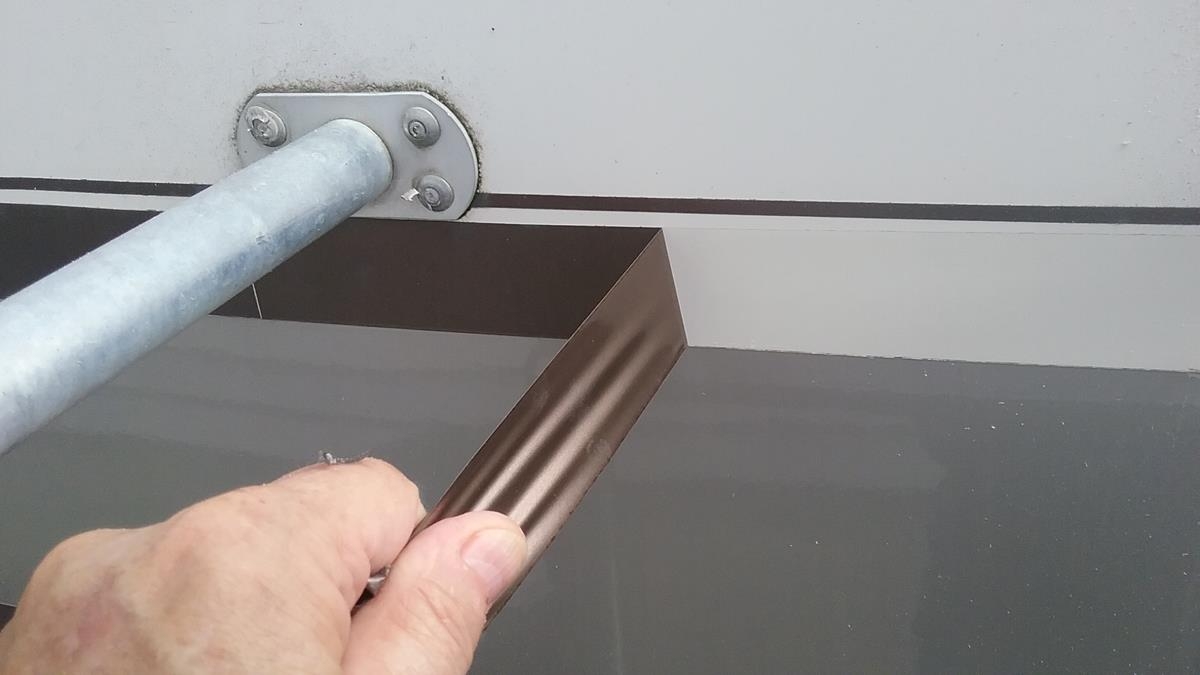
 3) Heat and razor – This seemed to work best on the graphics that were painted over and wouldn’t pull off, or the eraser wasn’t effective. I’d heat the graphics, then using a new sharp straight razor blade, kind of slice under the graphic, in a sweeping motion. each swipe would lift about 1/4 to 1/2 inch swath of graphic. Keep the razor blade at a very shallow angle and it will not dig into the gel-coat. This method does a good job of removing the graphic, but leaves adhesive on the surface.
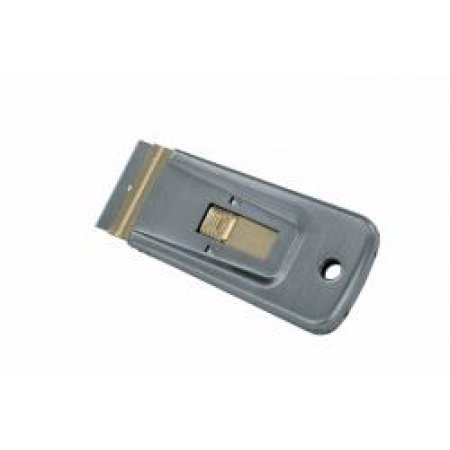
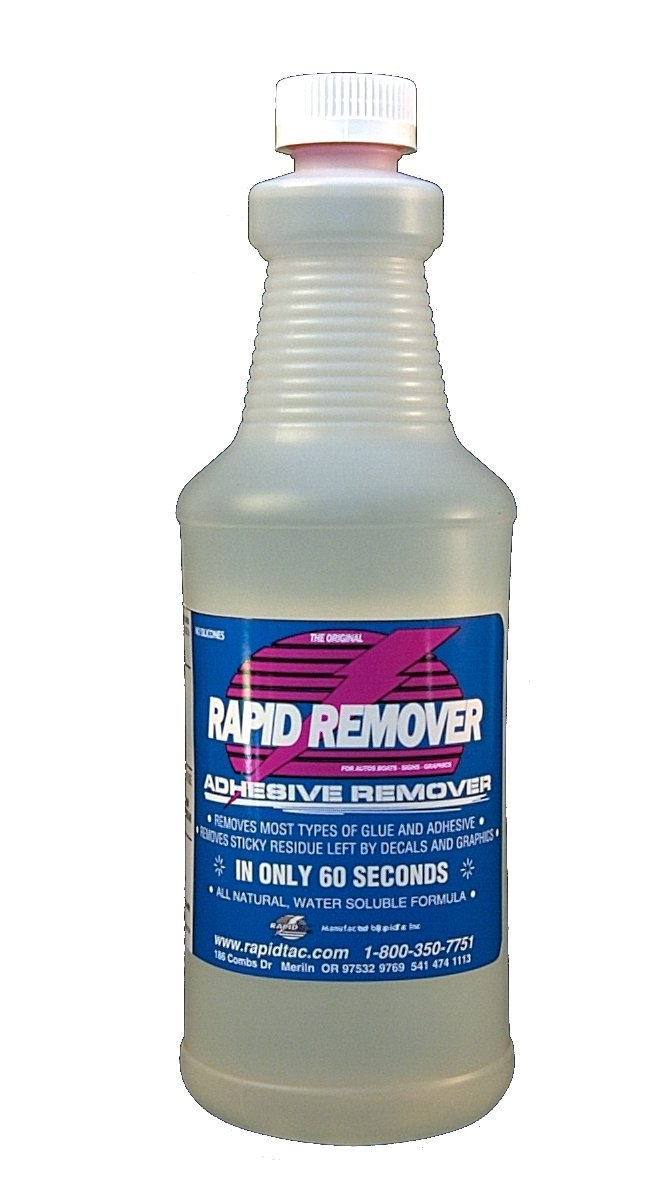 Adhesive Removal – I tried several methods, but always came back to the “Rapid Remover” spray.. This stuff is a little pricey, but it does the job very well.. Spray on the Rapid Remover, give it about 60 – 90 seconds to soften the glue, then use a plastic razor and scrape off the residue. wipe the razor with a paper towel. This removes the majority of adhesive on the first pass.
I often needed to repeat this process a second time to remove residue missed on the first try. As a final pass, spray Rapid Remover on the small blotches of glue were missed, give it 60-90 seconds, then wipe it off with a paper towel.
Regardless of the method of removal, do a final wipe of the surface with lacquer thinner to make sure all graphics and adhesive is removed.
PREPARATION
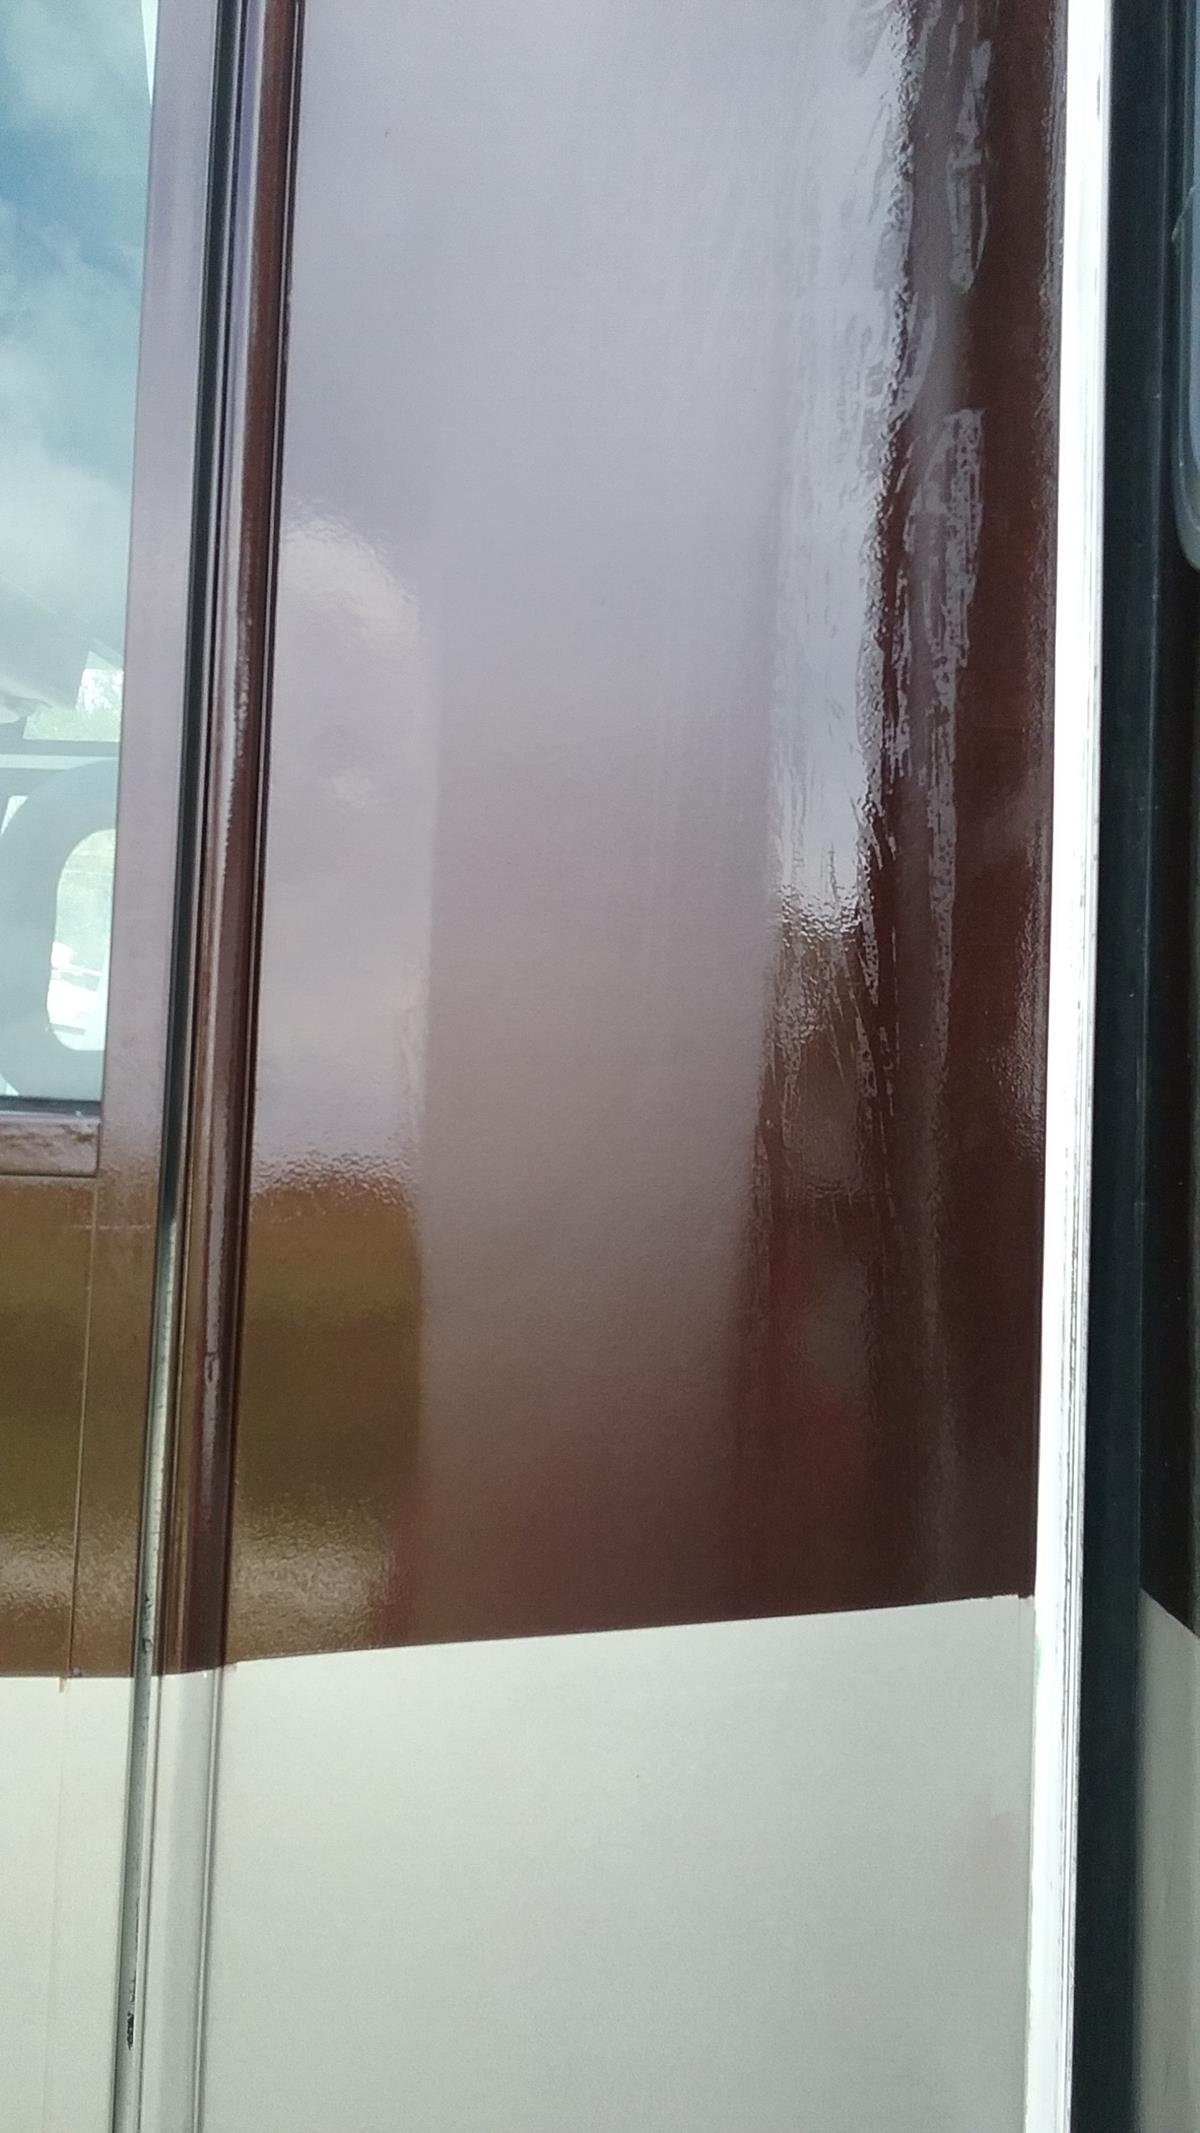
 Regardless of the quality level that will be acceptable when you’re finished, the majority of time spent on this project will be in the preparation. Any damage, holes, delaminations, etc will show up very nicely through a fresh coat of paint. So these items need to be dealt with before spraying on the paint. If you want to get a preview to see what the area will look like after its painted and has a nice glossy finish? Spray some water (or other solution) on the area and look at light reflections on the surface. The imperfections you see here will also show up through your paint.
The paint relies on a mechanical bond and won’t stick to smooth surfaces, so at minimum, any surface that’s going to be painted must be scratched or scuffed to get the paint to stick. I’ve chosen to use single stage paint as opposed to two stage, base coat / clear coat. Single stage is a little more forgiving in the preparation than two stage, its also a little more flexible as how its put on and the process and procedures that need to be followed.
 Priming – Do I need to prime the surfaces? Yes and no.. The new paint will adhere to almost any surface that is clean, scratched or scuffed, and isn’t flaking or peeling, this includes primer, gel-coat, and old paint.
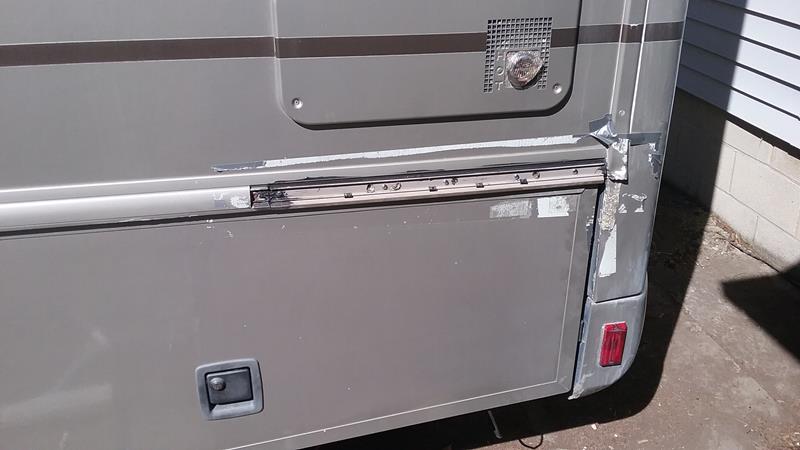
Why prime, original paint lines and Gel-coat etching – On my 18 year old Southwind, the vinyl graphics protected the underlying gel-coat from 18 years of etching and wear. Anywhere there was a vinyl graphic or paint line, the gel-coat or the old paint sticks up above the surrounding unprotected areas a tiny bit. If these transitions aren’t corrected and leveled out, they’ll be clearly visible after the new paint is applied. This is more critical on two stage paint than single stage. But these imperfections will still show up through single stage.
While doing the prep work, when these areas are wetted with water (or other solution), they’ll be obvious and stand out like sore thumbs. If they aren’t corrected, they’ll also stand out like sore thumb through your new paint job.
Dealing with them is simple; Fill in the lines and transitions with a primer / filler, then sand them down so they’re nice and smooth. When feathered properly, when you wet the area, you’ll no longer be able to see these transitions, and they won’t show up through the new paint..
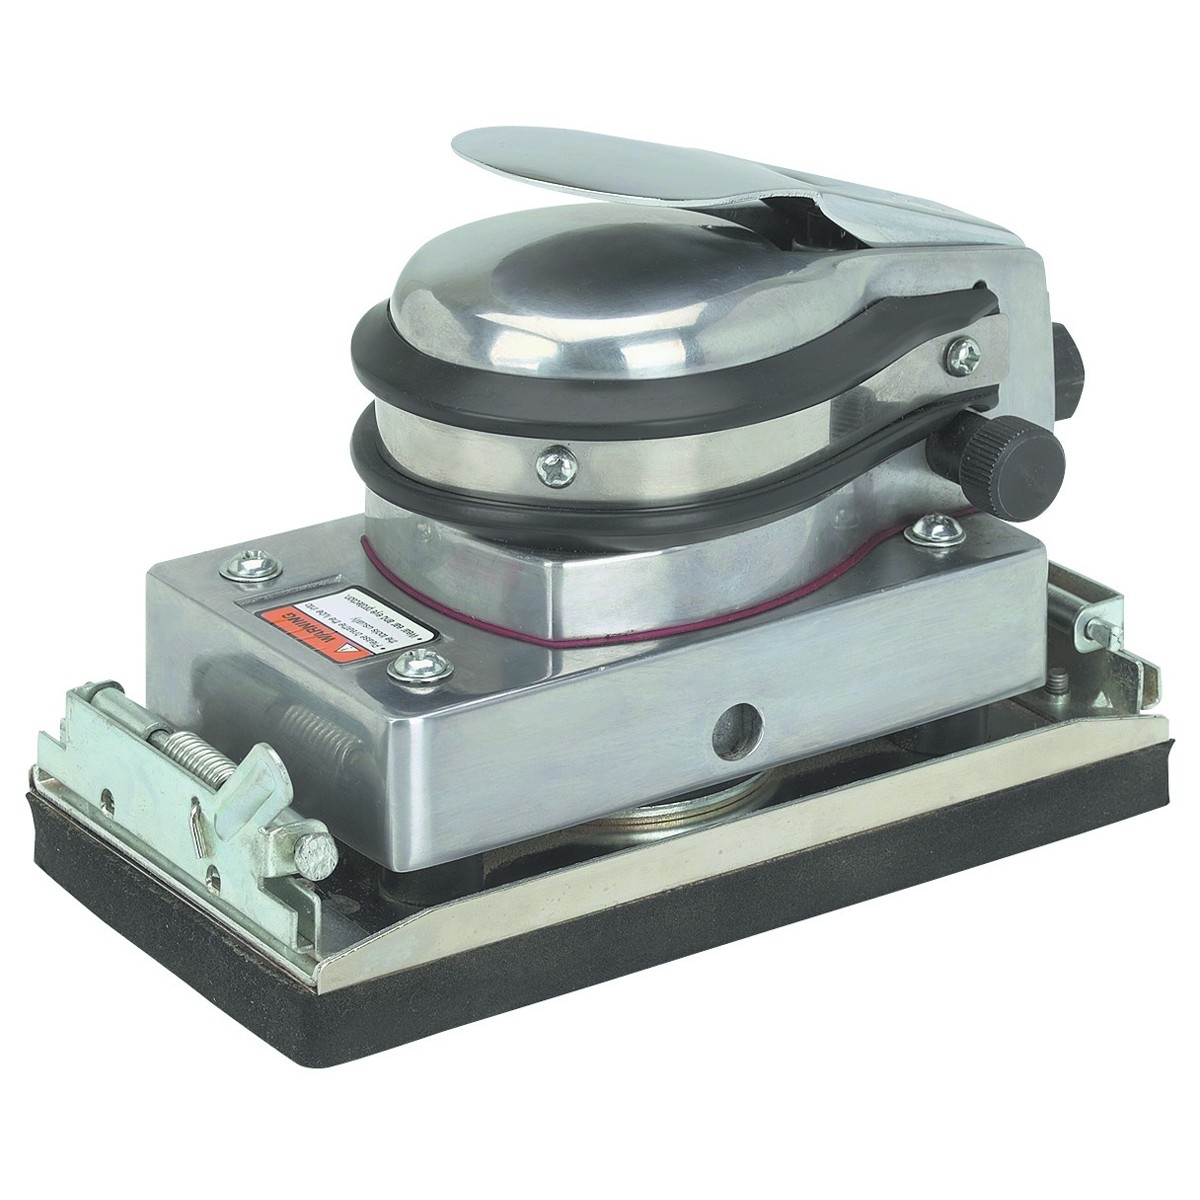 Prep Sanding – Another advantage of single stage – it’ll fill in deeper scratches from sanding. So using 180 – 220 grit paper is acceptable for bonding purposes of the primer or paint. If using a two stage system, the base coat goes on very thin and may not fill in the sanding scratches, so a finer adhesion sanding is required if doing two stage, i.e 400 – 600 grit. A jitterbug will turn hours of hand sanding into minutes of work. A Jitterbug and at least a 21 gallon compressor are a must if you take on this project.
PAINTING
SINGLE STAGE vs TWO STAGE
Both have advantages and disadvantages. My main reasons for single stage was I’d be painting outside. I’d be working on one side at a time. I’d mask and paint the light color, then a couple days later, re-mask and paint the dark color. Single stage is a little more forgiving for the type of defects that inexperience produces.
PAINT SCHEME IDEAS / PLANS
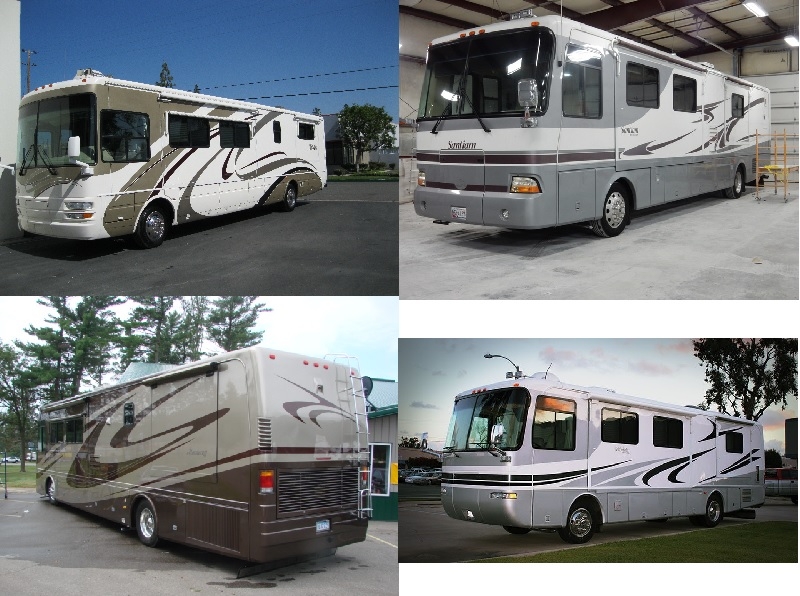
Search the internet, look at Google Images – find a paint scheme you like. These are four designs that we were considering, They are simple with two colors. Any of these would look nice on my old motorhome. The swoosh graphics and lines can either be vinyl or paint.
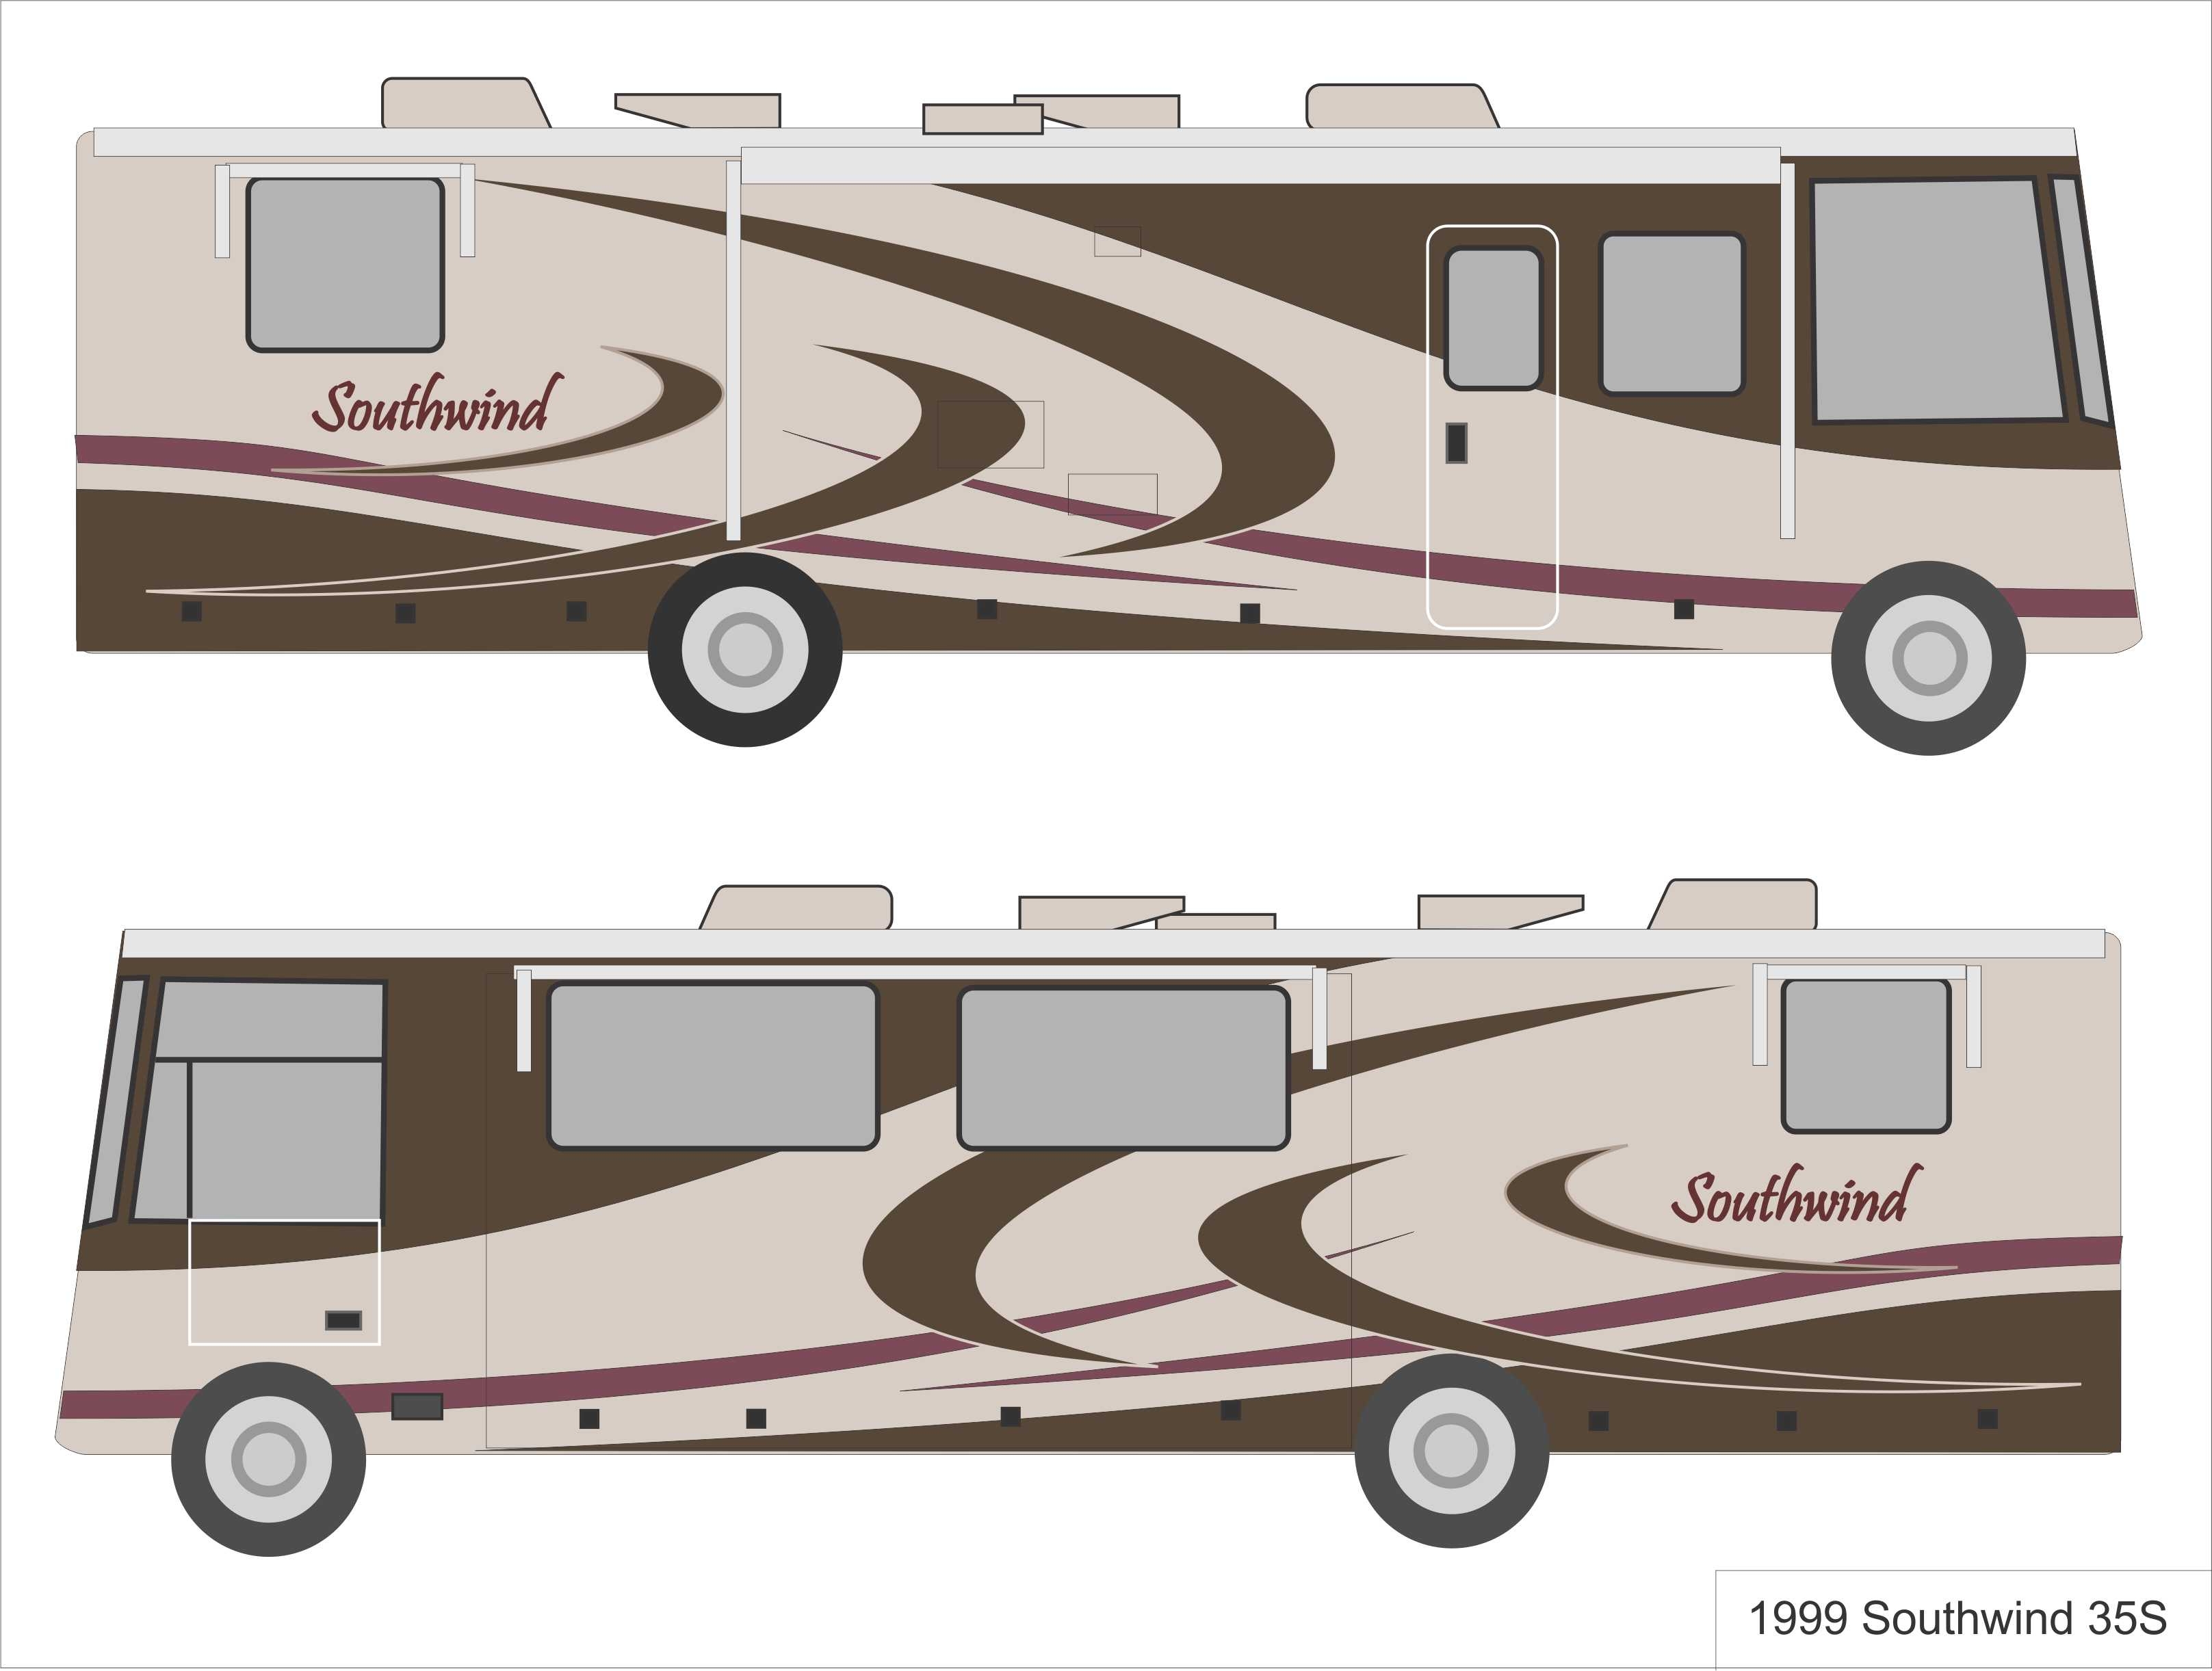 Although not necessary, draw the paint scheme in a computer drawing program, the more detail and scale the better. This makes masking or template making a lot easier. Use a photo or the drawing as a guide when masking.
I made this drawing using Corel Draw, Its reasonably to scale and made the job of coming up with a simple design and the placement of graphics easy. I made templates for the three “swoosh” things that we used when masking the m for paint. To make the templates, I used a computer projector and shined the graphics on a wall so they were full size. I then traced the graphics out of brown paper then cut them out with scissors.
PAINTING LOCATION – LOCATION – LOCATION
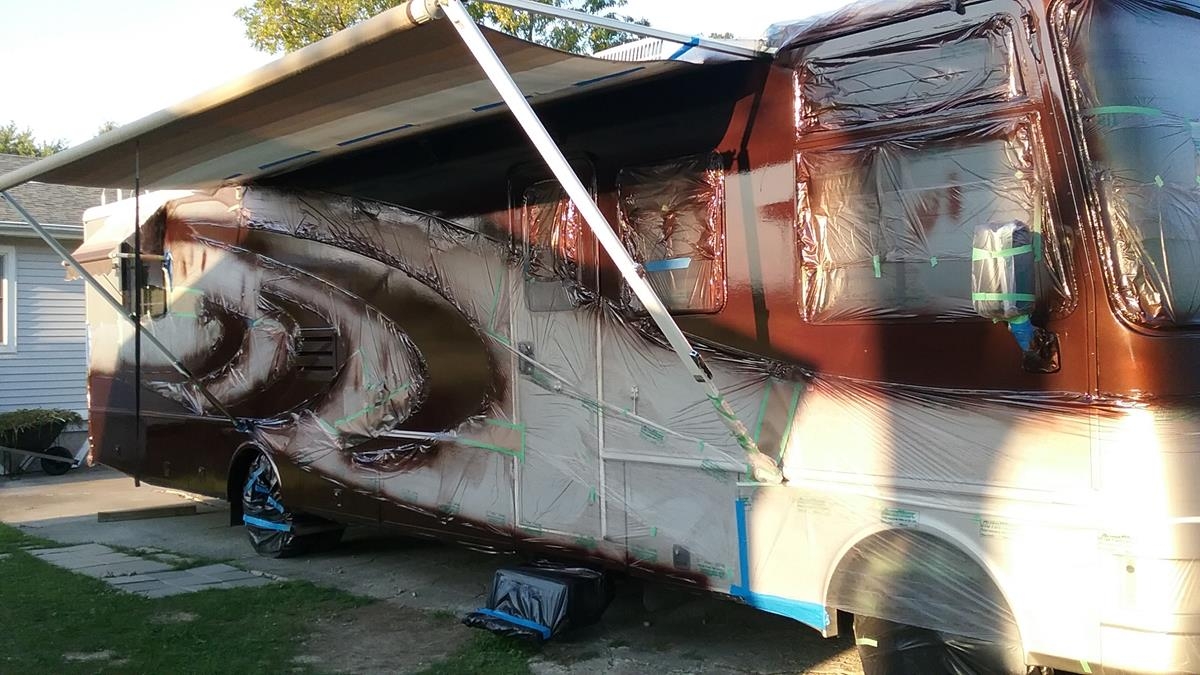 Obviously, if you can work inside, this is preferred. But if your only choice is outside, it can be done with good results, but it does change things a little. I’m not sure I’d do this in my driveway if I lived in the city, I’d be concerned with over-spray.. However, I live in the country, so I have no problems with neighbors complaining and I don’t worry about over-spray getting on the neighbors brand new BMW.
Working outside presents some problems. Mainly, I can’t leave the vehicle taped up and masked for to long, depending on the weather, a few days, maybe a week maximum. The sun cooks the tape and makes it hard to remove. Also rain and nightly condensation can get trapped behind the masking, then leak out as your painting.
Dust, leaves, flower blooming, bugs, etc while painting are also considerations.. Avoid painting surfaces that are in direct sun light. The sun heats up one area, but an adjacent shaded area is cool. This can cause the paint to set differently from shaded areas causing shadows, blotches or other problems.
SECTION OFF THE WORK
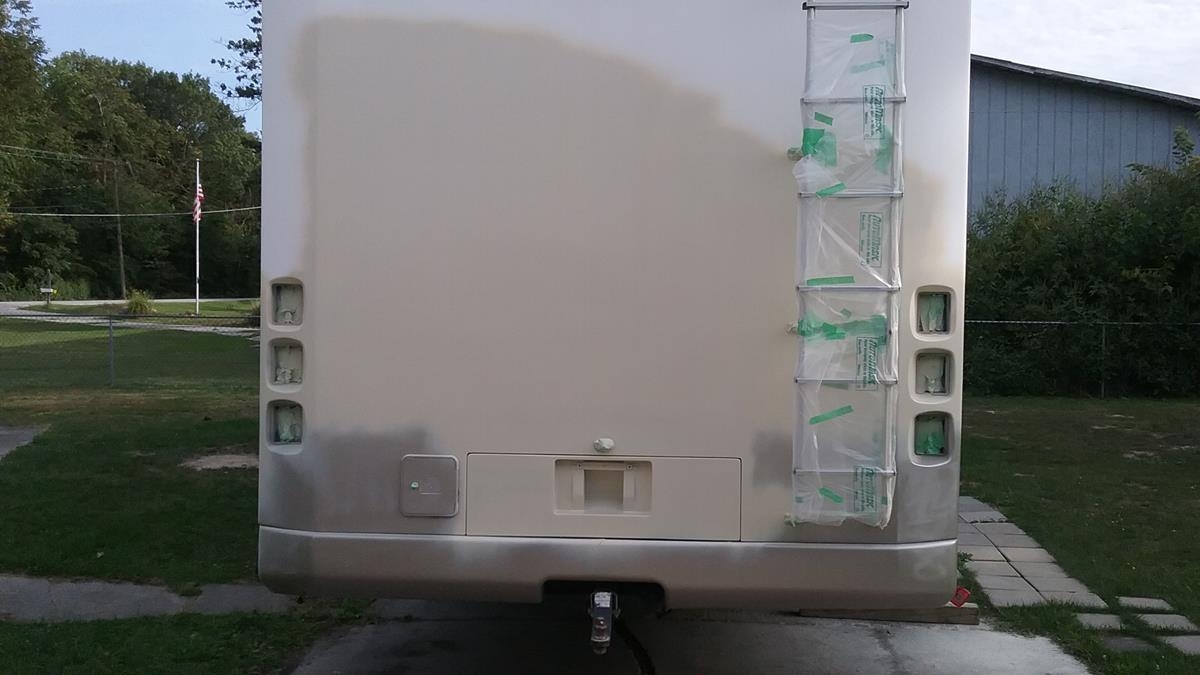
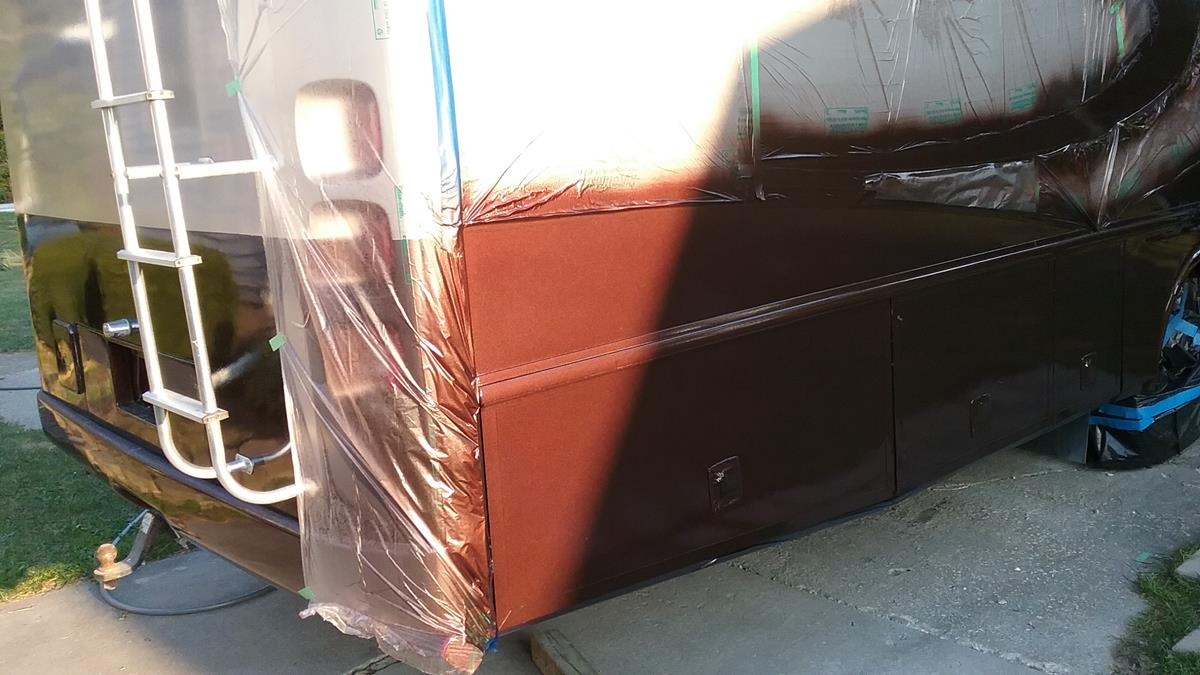 Trying to paint the entire RV in one shot can be a big problem. I divided my project into three sections, 1) rear cap, 2) passenger side and front cap, 3) drivers side. The seams where these are joined together make natural boundary lines for sectioning off the project. I masked off the sides from the caps at the seams. Any minor imperfections in paint match between a cap and the side will not be obvious because of the seam line.
Experimenting – The rear cap is a nice surface to experiment on and get the techniques, colors, etc down pat before doing the sides. I had to redo the rear cap because my first attempt was to runny and blotchy. This isn’t a problem, simply sand it so the paint will adhere, then paint it again. I consider the botched paint as a “primer”.
YOUR LUNGS
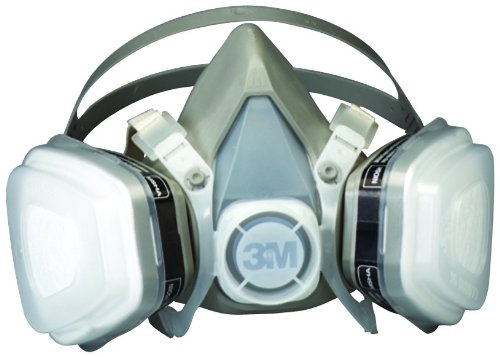 Working outside has one BIG advantage, good fresh air circulation. Even though I’m outside, I still wear a small white surgical mask when sanding so I don’t breath in the sanding dust. AND, when painting the primer or paint, I wear a full filtered face mask.
Breathing Urethane paint into your lungs will kill you, wear a full filter face mask when painting. The small white surgical mask is NOT acceptable when painting.. (NOTE – If you’re painting in a booth or indoors, consider a full face mask with a fresh air supply hose.)
MASKING GENTLE CURVED LINES
Creating smooth gentle curves that aren’t jittery is easy if you follow this little trick.
Using a photo or drawing as a guide, two people make this job easy. I stuck the tape on the surface at the starting point on one end. I had my helper gently press on the tape to hold it against the surface. I then pulled out about ten feet of tape while keeping a little tension on the tape and holding my end a couple inches above the surface.
When we were ready to start I had my helper slowly started moving toward me while gently pressing the tape against the surface.. As the helper was moving toward me, I’d slowly move my end up or down while still holding it an inch or two above the surface. The key is to have the helper moving toward me at a nice constant speed while I simultaneously raised or lowered my end of the tape to produce the nice constant curve. If the curve didn’t look right, we’d lift the tape off the surface and start over. When we were pleased with the line, we’d go back over the tape and press it firmly against the surface and finish masking.
PAINTING COMPLEX GRAPHICS
I had three “swoosh” graphics on my scheme that would be difficult for me to freehand, so I made three templates to use as tape guides.
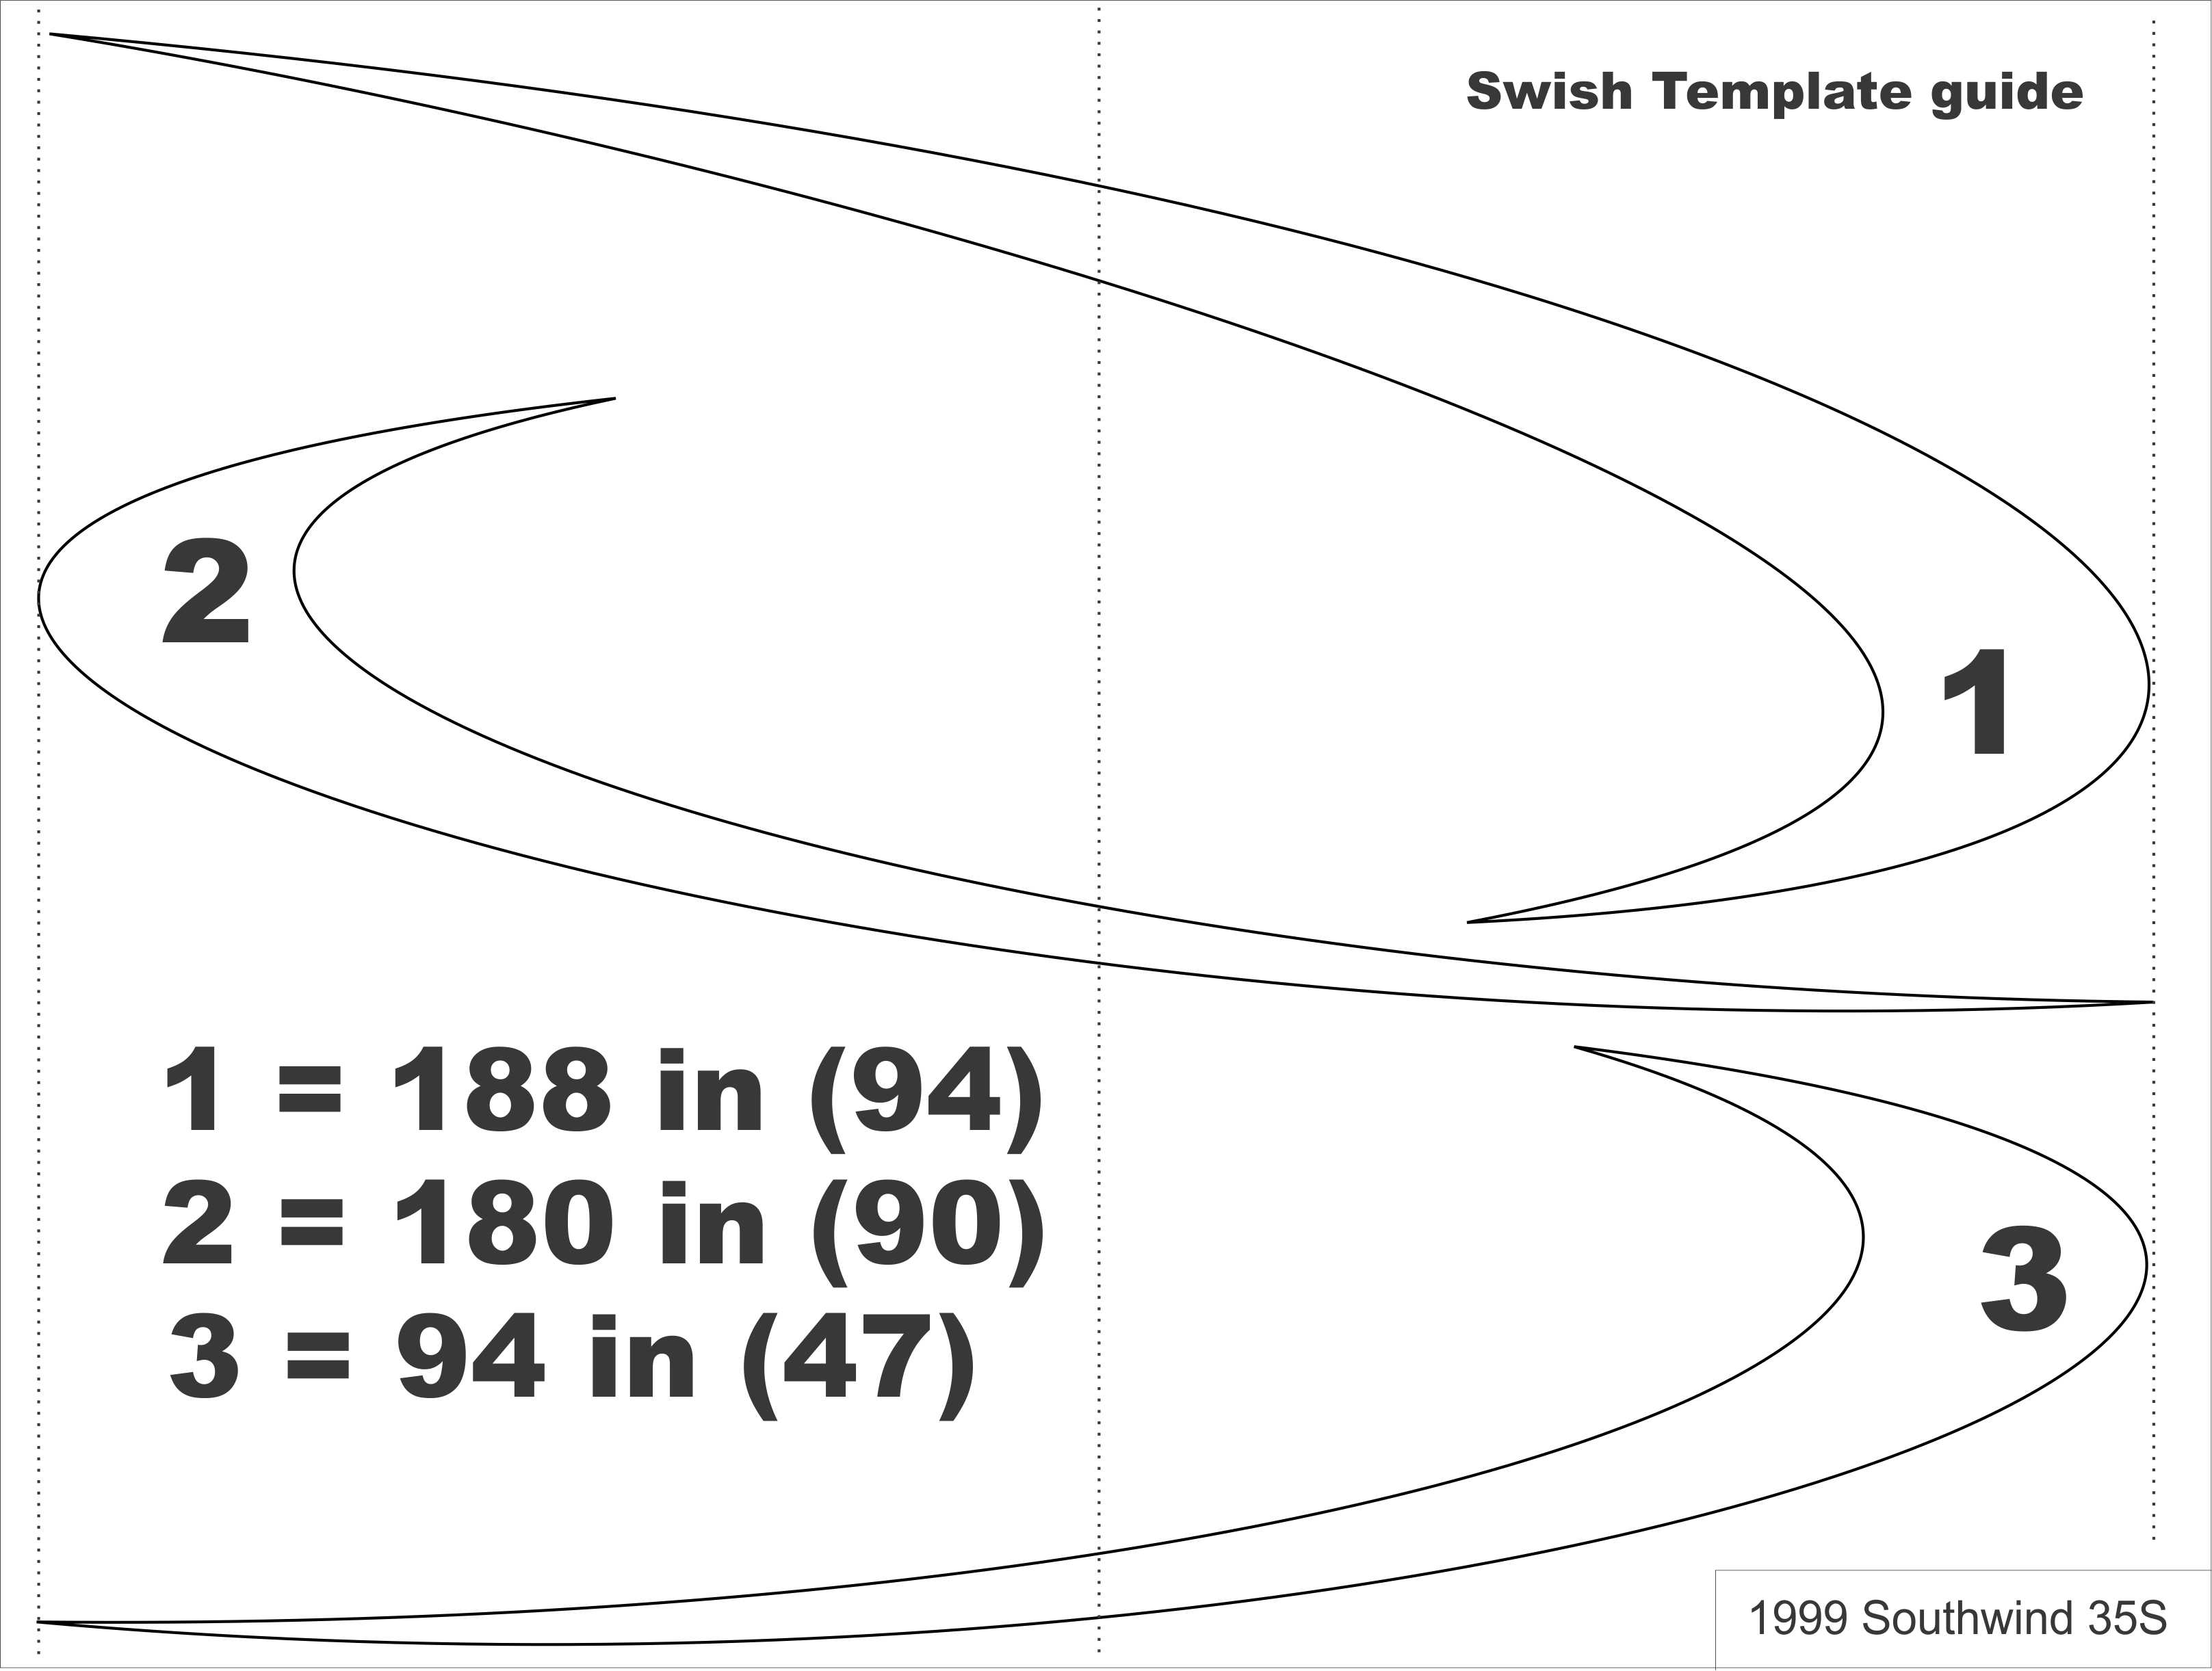 To create the templates I used a computer projector and displayed the graphics drawings on a wall, full scale. I then traced the image on brown paper. Before cutting them out, I ran clear tape on the trace lines to give the templates a little additional strength.
 The brown paper templates were positioned and taped to the side of the motorhome. I then traced the outline of the templates using thin line tape. The templates were removed and I had perfect outlines of the graphics on the side of the motorhome, ready to paint.
PREPPING AND PAINTING OUTSIDE
Weather and sun are the enemies. The sun creates hot spots on the surface and the paint dries / sets differently between the hot and cool surfaces. To avoid this, I scheduled my work so I would not be painting any surfaces that had the sun shining on them. I painted before noon, or late in the evening, an hour or so before sundown, or when it was overcast. If the sun is hitting one side of the motorhome, paint the other side that isn’t being hit by the sun. Avoid high winds, as it blows the paint and can also blow and loosen masking materials and blow it into the paint..
TEMPERATURE – Get a good forecast for the air AND overnight temperature, and dew point. Review the paint manufactures curing times and their recommended hardener for the temperature.
I used Medium hardener. This gives a good pot life at around 80 degrees. If the temperature is 90-95, the paint will cure faster and can actually start curing as it comes out of the gun..
 On the other end of the temperature scale, if the temperature drops down low, the paint may not cure or tack up very quickly. I had a problem with one overnight cure when I painted late in the evening, just before sundown. That evening, the temperature dropped down to 40 and dew (condensation) settled on many of the exposed surfaces that were just painted. The paint had not tacked up or hardened enough and the surface of the paint cured with the texture of the condensation embedded in it. I was able to buff most of this out, but I could have avoided this by painting in the morning rather than the evening.
If needed, consider changing hardener that corresponds closely to the temperature you’ll paint at.
After the area is sanded and ready for paint, I wash it with mild soap and water using a gray scuff pad. Use an air gun and blow any areas that water could get trapped, i.e. lights, seams, etc., then dry with a couple lint free towels. I’d then do my masking.
Before mixing the hardener into the paint, do one final inspection of the masking, a final wipe down with a rag wet with lacquer thinner, and do a quick test of my gun with a couple ounces of lacquer thinner, setting the gun pressure down to about 30 psi.
Once I’m satisfied, I mix the paint and hardener, and the clock is running. I’d mix in a 32 ounce cup, This would give me enough paint for two fills in the paint gun.
I’d make a note of what time it was, then start at the top on one end and spray with about a 6 – 8 inch mist, I’d keep the gun about 10 inches from the work, and the speed so that the spray was just getting the surface wet (shiny). nice steady speed, I’d overlap my passes by about 50%. Shake the gun occasionally to keep the paint mixed in the gun. Continue until the entire side is painted, then check the time.
I’d wait at least 30 minutes before doing the second coat. (check the paint manufactures recommendations)
BUGS and CRITTERS
Bugs will land on the paint, If they’re walking on the paint or easy to pick off, I pick them off, otherwise I leave them. They’ll pop off after the paint cures.
PAINT
I used just a little over two gallons of the light color and just under one gallon of the dark color. I also ordered a quart of white and a quart of black. These were used to do trim and the very top of the caps.
Special color mix paint that matches any color is available, but is more costly. I chose to use premixed colors that are off the shelf, and are substantially cheaper, about $120 for the 1 gallon kit (paint, hardener, strainers, mix sticks). TCP Global offers a “Restoration Shop” line of paint that does very well.
I used a single stage urethane. In my situation, I think single stage is a good choice over two stage – base coat / clear coat. I’m painting outside, I’m painting very large surfaces, I’m not able to dedicate large blocks of time to the project.
Advantages – BC/CC looks better and is a more forgiving, but really needs to be applied in a continuous process, i.e. the base coat is applied, then immediately followed by the clear coat.
Single stage – I applied two coats – at least 10-15 minutes between the coats. By the time I finish the first coat, I would take a short break. When the 10-15 minutes passed, I’d mix a new batch for the second coat. Fight the urge to fix mistakes. i.e If I see a spray gun pass was to light, don’t immediately spray a new pass to fix it. Catch it on the second coats.
CLEAN GUN
Immediately after finishing, empty the gun and wipe out the container with paper towels. I the put a couple ounces of lacquer thinner in the container, shake it up and spay this. I do this a couple times to make sure the gun is clear and clean. Also wipe the exterior and the lid with paper towel and lacquer thinner. There may be a small vent on the lid, make sure this is clean and clear.
When getting ready to start painting, before I mixed any paint, I test the gun and spray a couple ounce of lacquer thinner to make sure the passages are clear and I get a good pattern.
TOOLS / EQUIPMENT
The only special tools required would be a large compressor, jitterbug sander, small paint gun, and possible a heat gun.
I initially tried my small 3 gallon compressor but it just couldn’t keep up. So 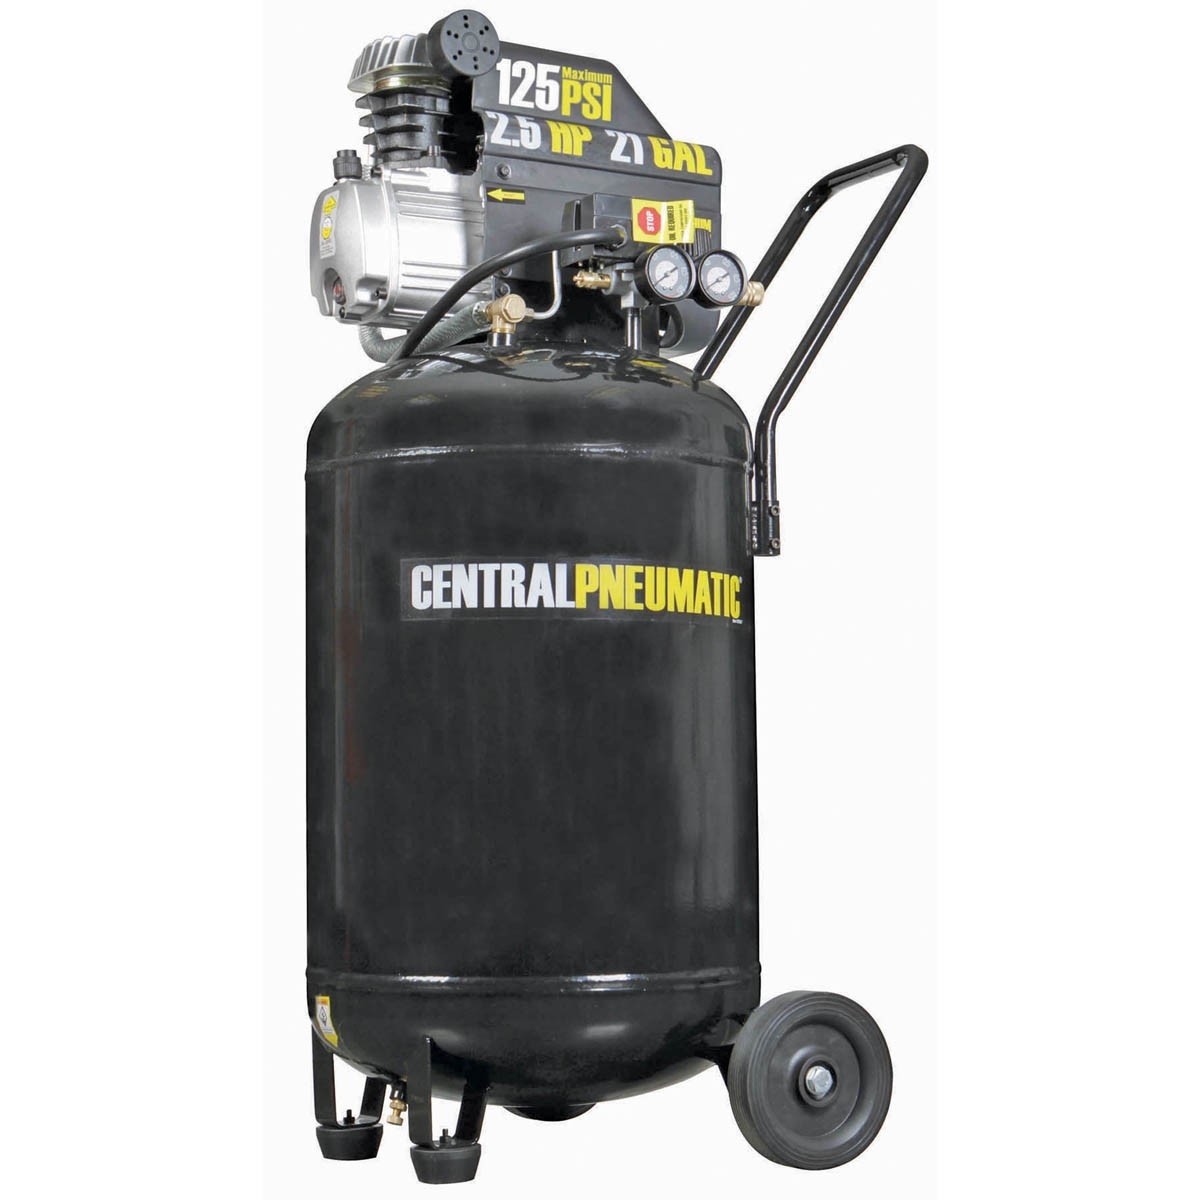 I bought a large 2 hp Harbor Freight compressor (21 gallon) for $140. This keeps up with the jitterbug for about 15 minutes of continuous run time, and has no problem keeping up with the paint spray gun running 30 psi for 3-4 minutes at a time.
I used an inexpensive HVLP paint gun. it came with a 1.4 nozzle.
The heat gun was used for removing vinyl graphics.
SPECIAL MATERIALS NEEDED
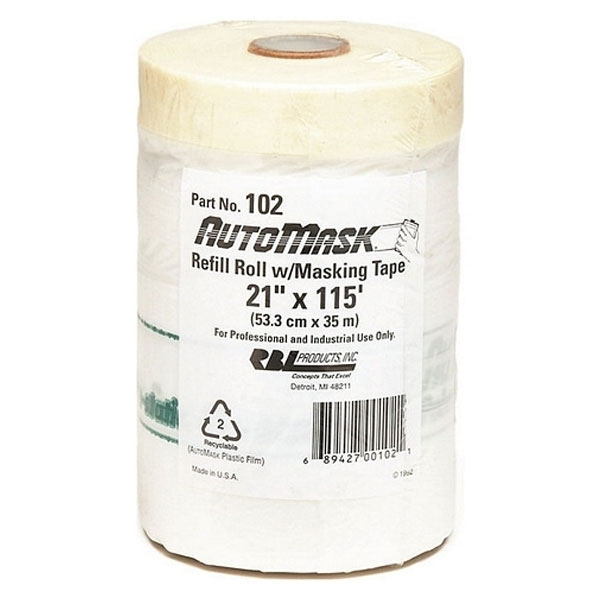 Masking plastic film – This stuff is wonderful. Its a roll of plastic with masking tape on one edge. Tape the edge then unfold the plastic . It comes in a couple different widths. I used 7 rolls of the 21 inch stuff. It cost about $10 – $15 a roll. This is well worth the money..
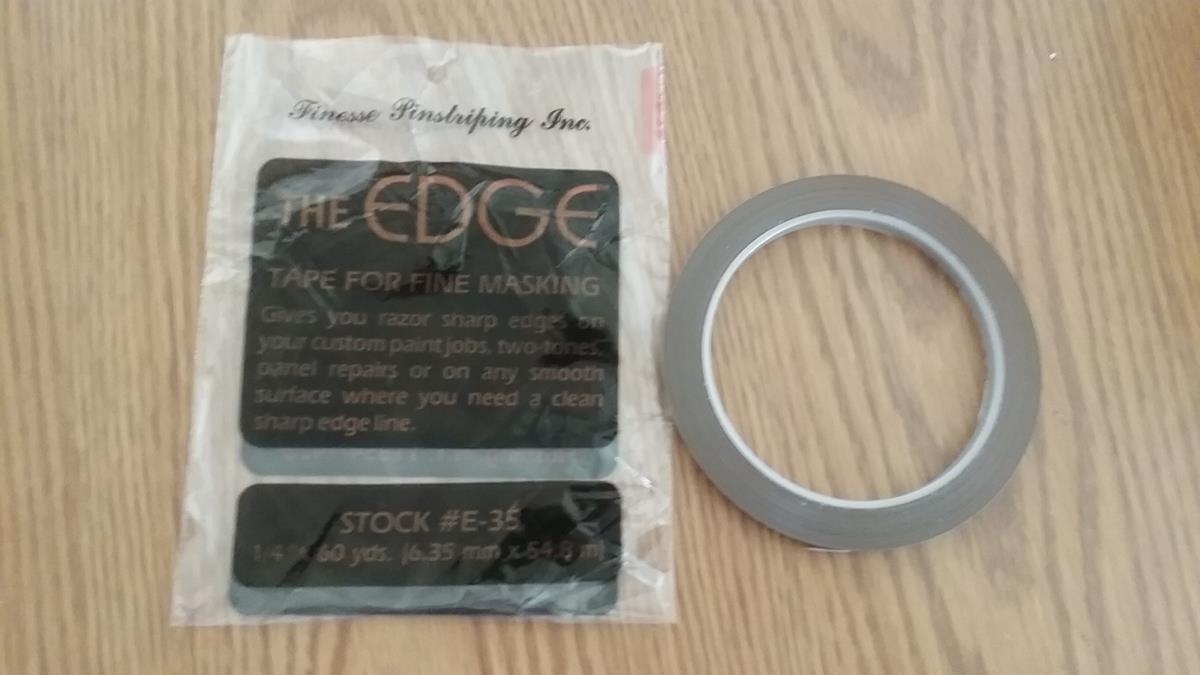 Fine line tape – When masking, this tape will produce a very sharp paint line. With regular masking tape, paint creeps under the edge of the tape and produces a thin cracking paint line. Fine line tape doesn’t allow paint to creep under the tape so you get a nice solid paint line. The tape is made of some vinyl material so can also hold up to some minor sanding.
Green / Blue painters masking tape – Buy a 6 pack of 1 inch and 2 inch. This tape comes off easy and does a good job. Like any tape, you cant leave this on for more than a few days, especially if it exposed to direct sun light (heat).
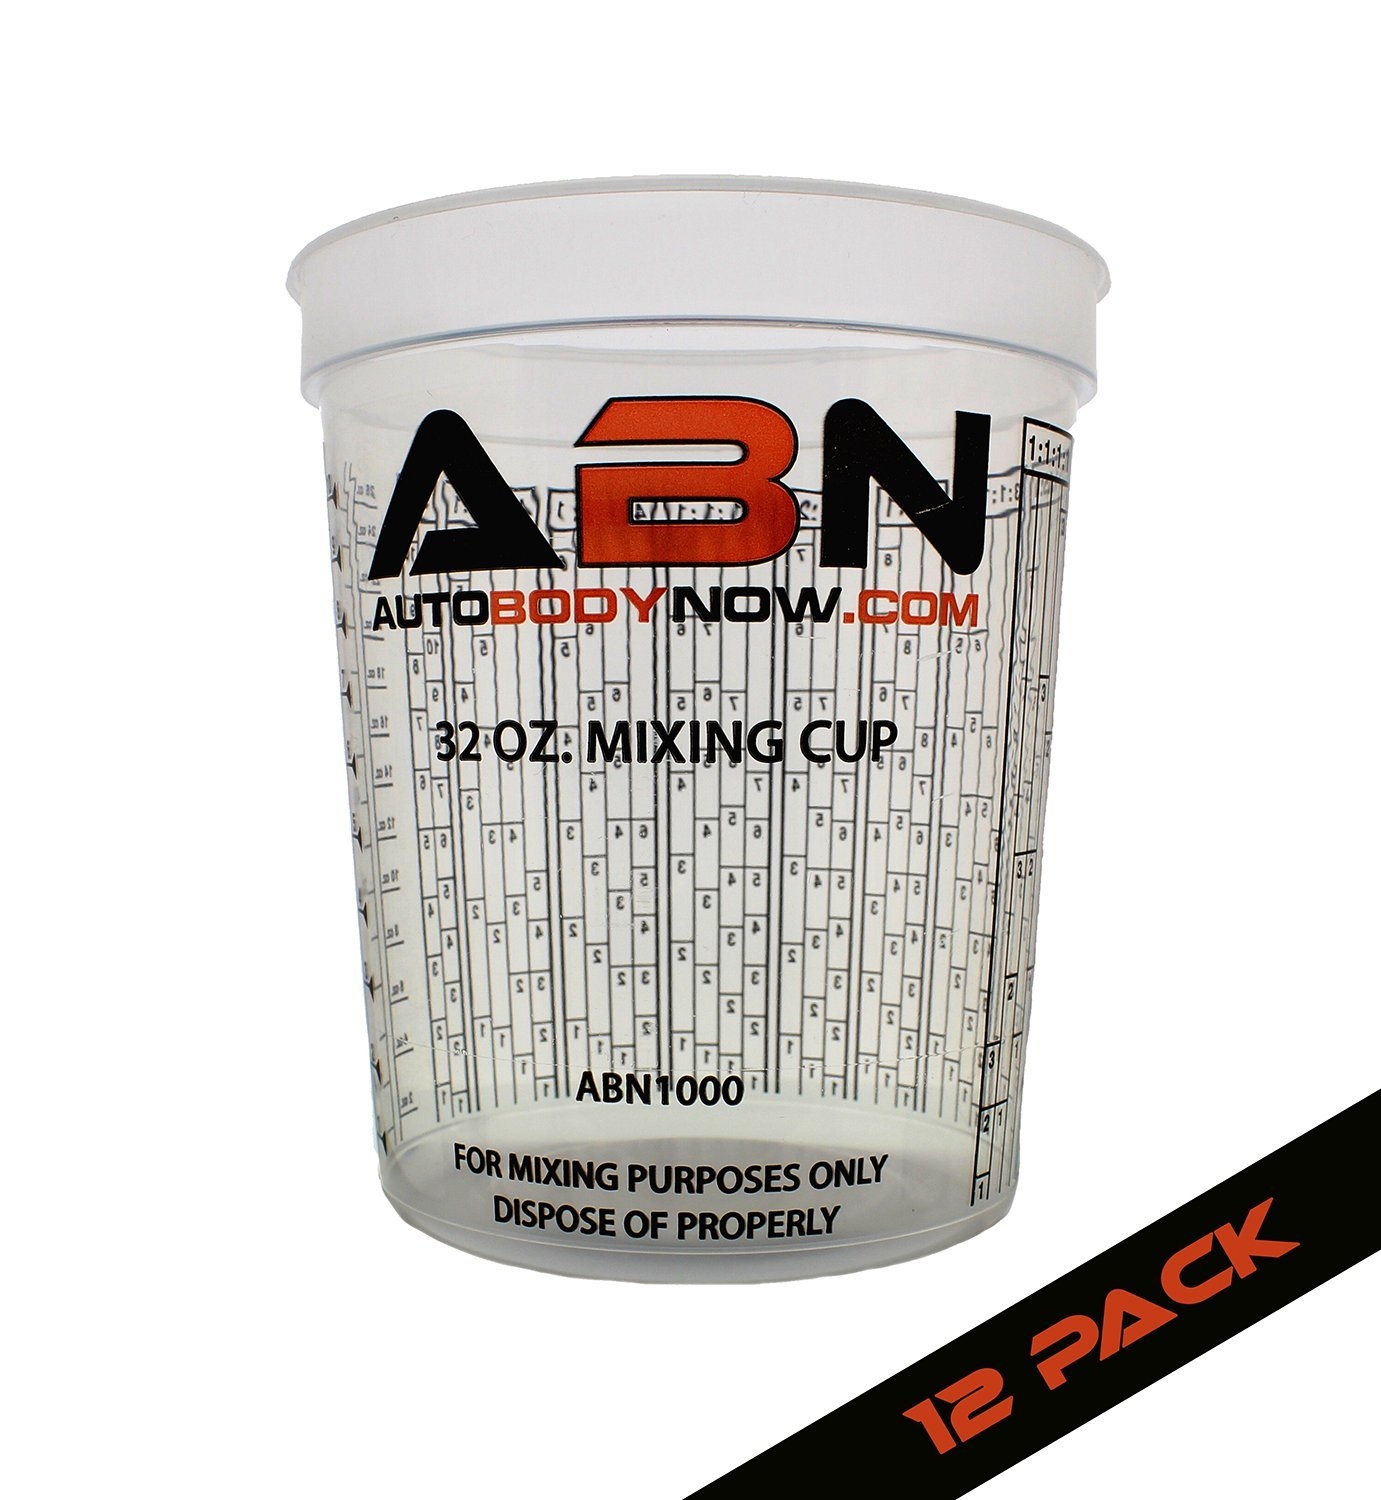 Paint Mix cups – 32 oz cups will do fine. Before starting, I used a black marker and put a big obvious mark on top of the cup over the mix scale I’d be using, i.e. 4-1-1. The mark above the scale made it easy to find the correct scale on the cup while pouring and mixing. You may or may not be able to re-use the cups.
I was doing a special mix of two paints to produce my light color, so I also used some 64 ounce cups. I’d mix 4 parts of one color (silver) to one part of another color (AZ gold) to produce my light color.
Mixing sticks and filters are usually supplied with the paint supplier.
MISTAKES I MADE
PAINT COLOR SELECTION
I used standard pre-mixed colors. They are 1/3 the cost of custom colors. The only problem is they may not be exactly what you want. I wanted a little more gold in the light color, but it was mainly silver..
HINT, When purchasing paint, buy a small quality first (quart size) to verify the color. Use the rear cap as a test panel. If you paint and don’t like it, sand it down rough and it becomes part of the primer for the next coat,.. My only regret on this job was I bought my paint in gallons before painting the light color on the rear cap.. Had I did a test panel, I probably would have bought a different light color..
RUNS –
I painted on to heavy causing runs. I tried to fix a couple errors by immediately spraying over the area again. This caused to much paint and it ran.
Paint to thin. I added reducer to thin the paint. It was to thin and ran.
BLOTCHY –
Paint blotchy. Not enough overlap on the passes.
Primer sprayed splatter. To thick, I needed to thin it.
SOLUTIONS
Gun at 30 psi, adjust for a nice pattern when testing with thinner. The paint will be a little thicker but these settings worked out to be very close for me.
No reducer in paint.
Keep gun about 10-12 inches from work.
Speed of the gun should just start producing a wet look (shiny reflection). This is sometimes hard to see when painting outdoors.
Do a 50-75 percent overlap between passes.
Use extreme caution when painting up behind stuff, its real easy to get to much paint and then a run. i.e. behind ladders, awning posts, wheel wells, etc.
Watch the time. allow at least 15 minutes before starting the second coat. This lets the first coat tack up and harden a little.
Great write up of your painting experience.
I taught myself spray painting of two part pain in my Urban Driveway.
The biggest negative was too little clear coat applied. It began to peel in about 3 years.
I like your decision to do one part and the 5 foot goal. Sometimes we forget that our old rigs are no long $100,000 vehicles and do not need to look like one.
Great job, informative read.
Good job describing your “journey”. Very informative and the review of what went wrong is quite vauable.
Well done on both your paint job and your write-up!
I have a 99 southwind storm, and can’t thank you enough for putting together this site. So many things you have encountered, I have as well.
This is great! I am going to use all of your ideas and I have enough experience to make it work 🙂
I will send pics if I can.
Can you tell me the exact colors you used?
Thanks,
David Peterson
This paint job seemed good enough, even though it was a 5ft’er. You put in a lot of hours and dedication, it’ll be a great story to share when other campers ask about the paint. Why did you want to spend money to “take it up a notch and have the professionals redo it”?