
In the last article, I removed the jack, disassembled it, and evaluated it for repair. The main problem was that the top shaft guide broke and separated from the top of the shaft, failed and broke apart. READ HERE.
Power Gear doesn’t support this jack and have deemed it obsolete. Their advise is to upgrade to the 500384HR jack at a cost of about $1600. GULP – It cost me $35 to repair the original jack, which included machining the new plastic guide for the top of the shaft.
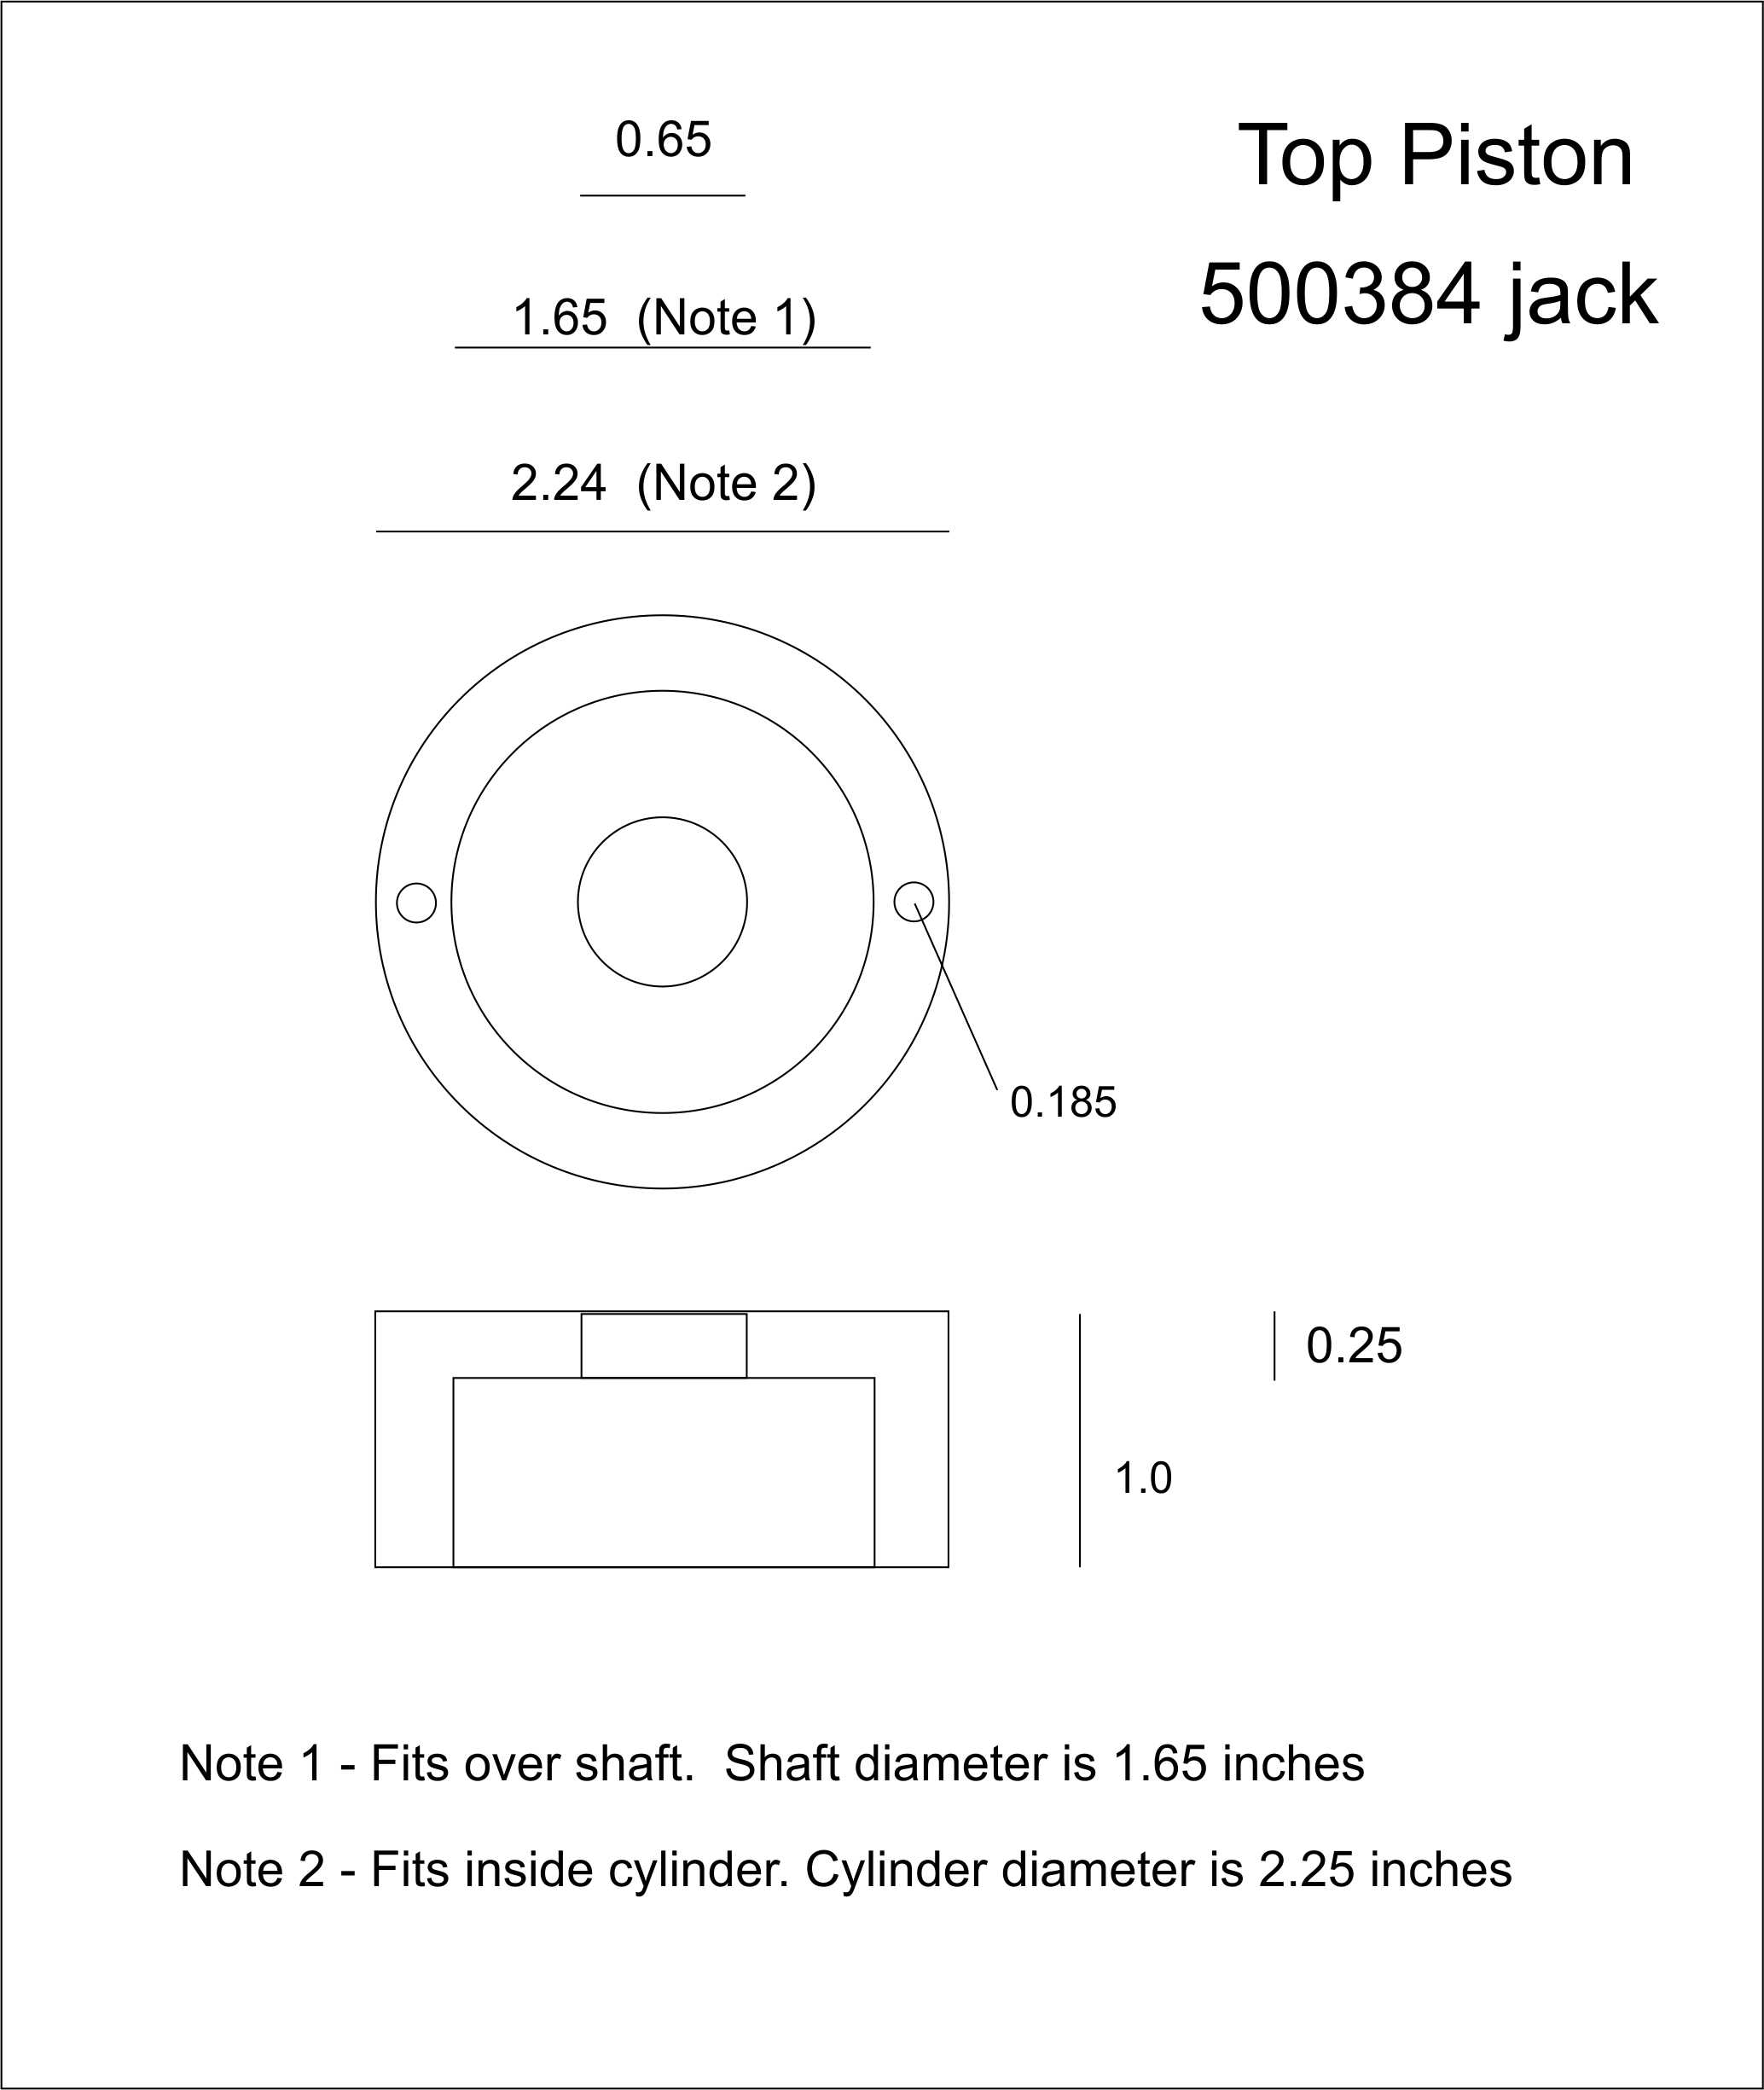
I machined a new top shaft guide out of PTFE. The machining took about 30 minutes, and should be an easy job for any machine shop. The new shaft guide is almost identical to the original one. I made a slight modification to the bleed holes to allow for a larger washer when re-assembling.
When reviewing the photos, you can see how the shafts downward forces pushed the shaft guide bolt through the plastic guide.
In the original configuration, the guide was held in place by a small washer. When the shaft is fully extended to the end stop, the shafts downward force is pushing against the center of the plastic shaft guide. The downward force loads are then transferred through the plastic to the outside of the guide that’s resting on the bottom of the cylinder. I replaced the original small washer with a much larger diameter washer. Now when the shaft reaches the bottom of the cylinder, rather than the downward forces being transferred by the plastic guide, the loads are transferred through the large steel washer to the cylinder.
PHOTOS
You can see the new top shaft guide I made next to the old broken shaft guide. The only difference, I made the two small bleed holes a little smaller as I didn’t want to weaken the outer area of the guide. The holes are needed to allow fluid to move past the guide as the shaft moves up and down
I replaced the original washer with a larger diameter washer. Note the original washer is small, you can see by looking at the photos that pressure pushed the bolt and washer through the guide when the shaft bottomed out in the cylinder. I used a larger washer. When the shaft bottoms out, the large washer will transfer forces out to the edges of the guide, not the middle. Note the washer doesn’t block the two small bleed holes.
Last photo – Shaft reassembled. I used Blue Locktite on the top bolt and let it sit all night to harden before inserting the shaft into the cylinder
I’m happy to report that we were able to make a new top shaft guide, purchase new o-rings and seals, and made one minor modification to the jack to prevent the piston from breaking again. Cost of all this was $35.
Pingback: Power Gear 500384 hydraulic jack teardown – 1999 Southwind 35S
You’re certain that it’s made from Teflon? It’s hard to tell without having it in my hands, but I seriously doubt it. It looks more like ABS or UHMW Polyethylene or Nylon. Knowing it’s use, I have confidence in EITHER the UHMW P.E. or ABS.
UHMW / Delrin, should work OK..
Do you have the PN for the seals, wipers etc?
TR-024 seal for inside of piston
568-034 O-ring for outside of the piston
575-034 Backup ring for outside of the piston
For Power Gear 800384 Jack
I hope this will help some one. Cheers
Is there any reason the 800132S seal kit parts would not work for this?
Or are the seals and o-rings readily available somewhere else?
They are totally different. Different size and number of orings, scrapers, etc.
The orings and scrapers are standard off the shelf items available at any industrial oring place, I took the old ones with me and they matched the sizes.