
Jodie got a new Amazon Echo for Christmas to use at home. Since we’re traveling on the road for the next few months, I decided to look into what it would take to add some “smart home” technology to the 20 year old Southwind.
Off the shelf smart home controlled devices are rather expensive and out of reach for my frugal budget. so in the DYI scheme of things, I began investigating building my own devices based on an ESP32 controller. While looking into this, I discovered two inexpensive smart home devices, the Sonoff wifi switch ($7.50 each), and the Shelly 1 ($12.50 each).
Smart home devices are obviously based on controlling 120 / 240 volts AC devices. (US and Europe), so to make use of these devices in the RV, some way to power and control 12 volts DC would be needed.
BEHOLD, the Shelly 1. 🙂 🙂
By moving one internal jumper connection, the Shelly 1 can now be used in a 12 volt system. PERFECT.
There are many different ways and methods to set up a “Smart Home” , but i wanted to keep my first attempt as simple as possible. All four of my Smart Home “things” would use a Shelly 1 smart switch module..
- Living Room Fluorescent light (its been converted to LEDs)
- Kitchen Fluorescent light (its been converted to LEDs)
- Hall way ceiling light
- RV Radio control
With this setup, I can control the devices locally with a smartphone app, web browser, and even my Alexa Echo Dot: I can also control any of these devices from anywhere in the world with my smartphone with the Shelly App installed.
The three light fixtures would need some minor modifications to accommodate the Shelly. I had to replace the existing ON/OFF switch with a Momentary contact switch.

I replaced the ON/OFF switches in the fluorescent fixtures with momentary switches from Amazon and they are an exact replacement.
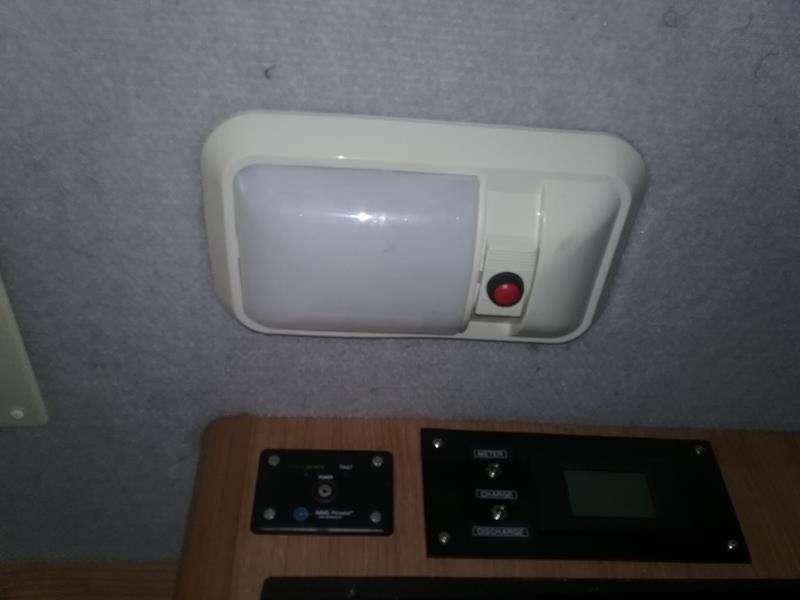
I also replaced the ON/OFF slide switch in the ceiling fixture with a momentary push-button from Amazon.
I drilled a small hole in the slider part of the switch to mount the push-button. I used Silicon sealant to secure the switch and the Shelly inside the fixture.
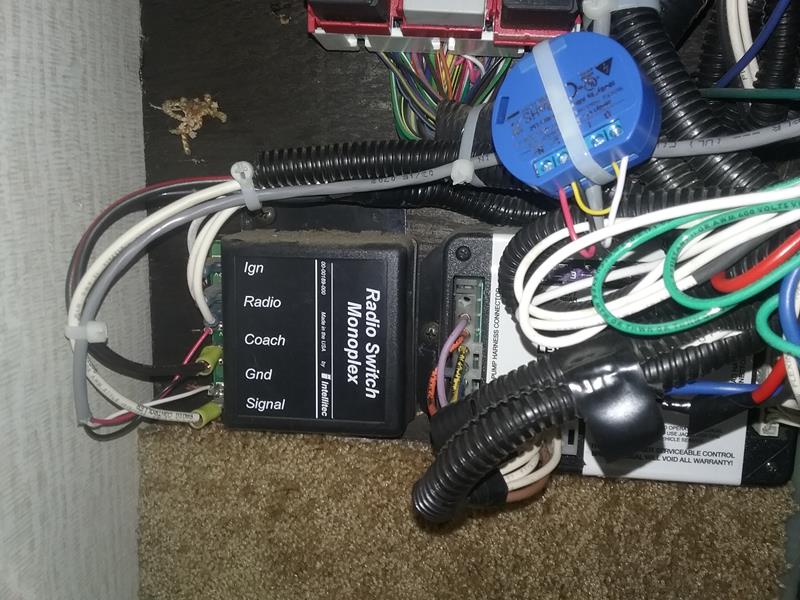
The RV Radio ON/OFF currently uses an Intellitec controller to control power to the dash radio using two remote push-buttons, one in the kitchen and one in the bedroom.
The RV Radio Shelly 1 is wired / configured to mimic a push-button and provide a 1 second ground pulse whenever it commanded to turn ON. This pulse will turn the radio ON or OFF. There is no switch connected to the RV Radio control Shelly 1. It gets its commands from either the web interface or the Amazon Echo Dot.
NOTE: The way the Shelly 1 is configured to control the RV Radio, it only triggers a one second pulse when the “Turn On” command is given. Nothing happens when a “Turn Off” command is sent. What this means, the “Turn On” command will send a pulse and turn the RV Radio ON if it was off, or turn it OFF if it was on. The command ” Alexa, turn RV Radio ON” is used to turn the radio ON and OFF.
PUTTING IT ALL TOGETHER
All the devices need to be on the same wifi network. I set up a wireless router wifi network dedicated to the Southwind to accommodate this.
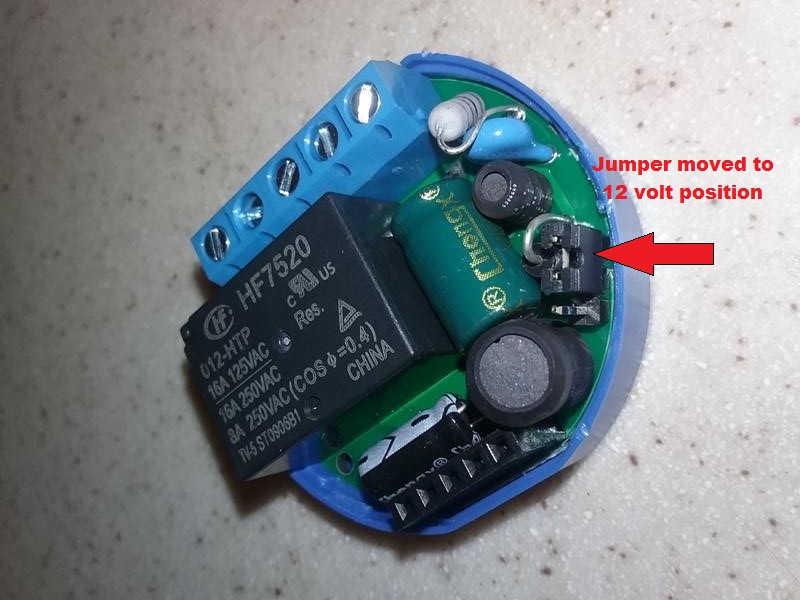
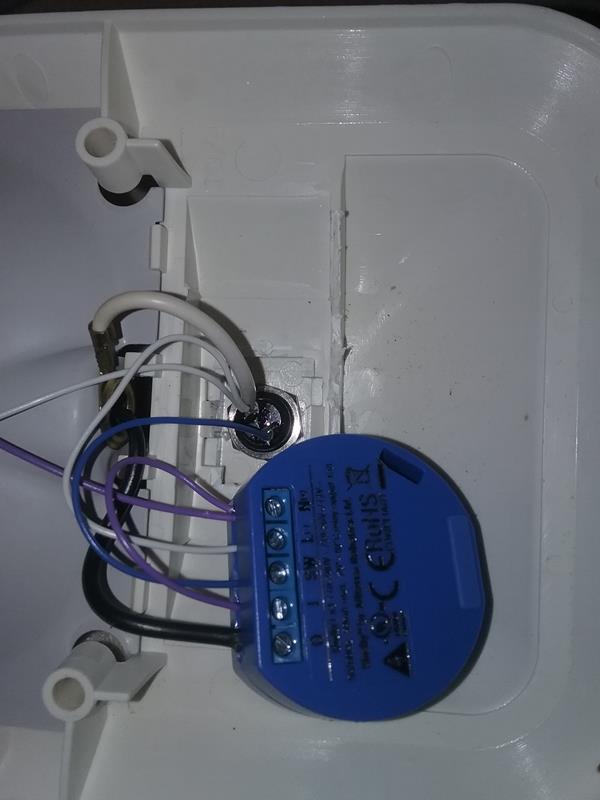
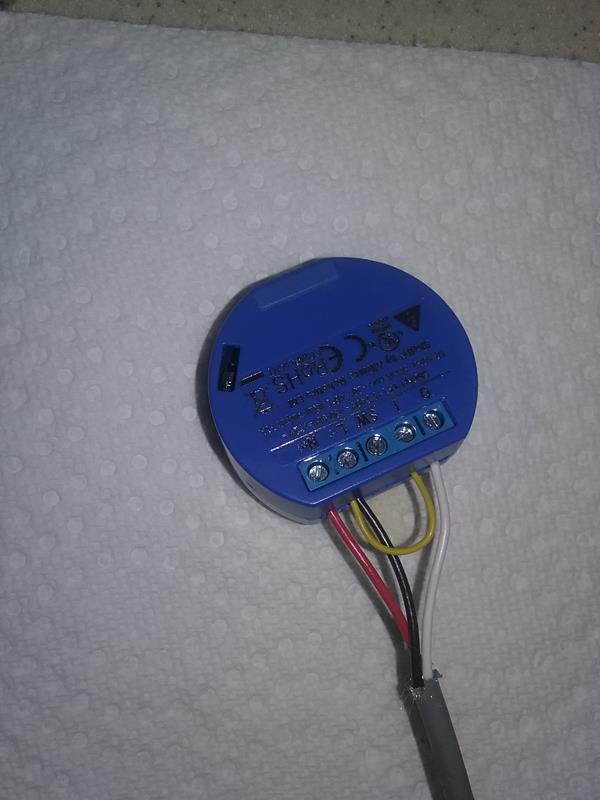
Move the jumper on the Shelly so it will operate on 12 volts. It may be easier to do this if the top cover is removed.
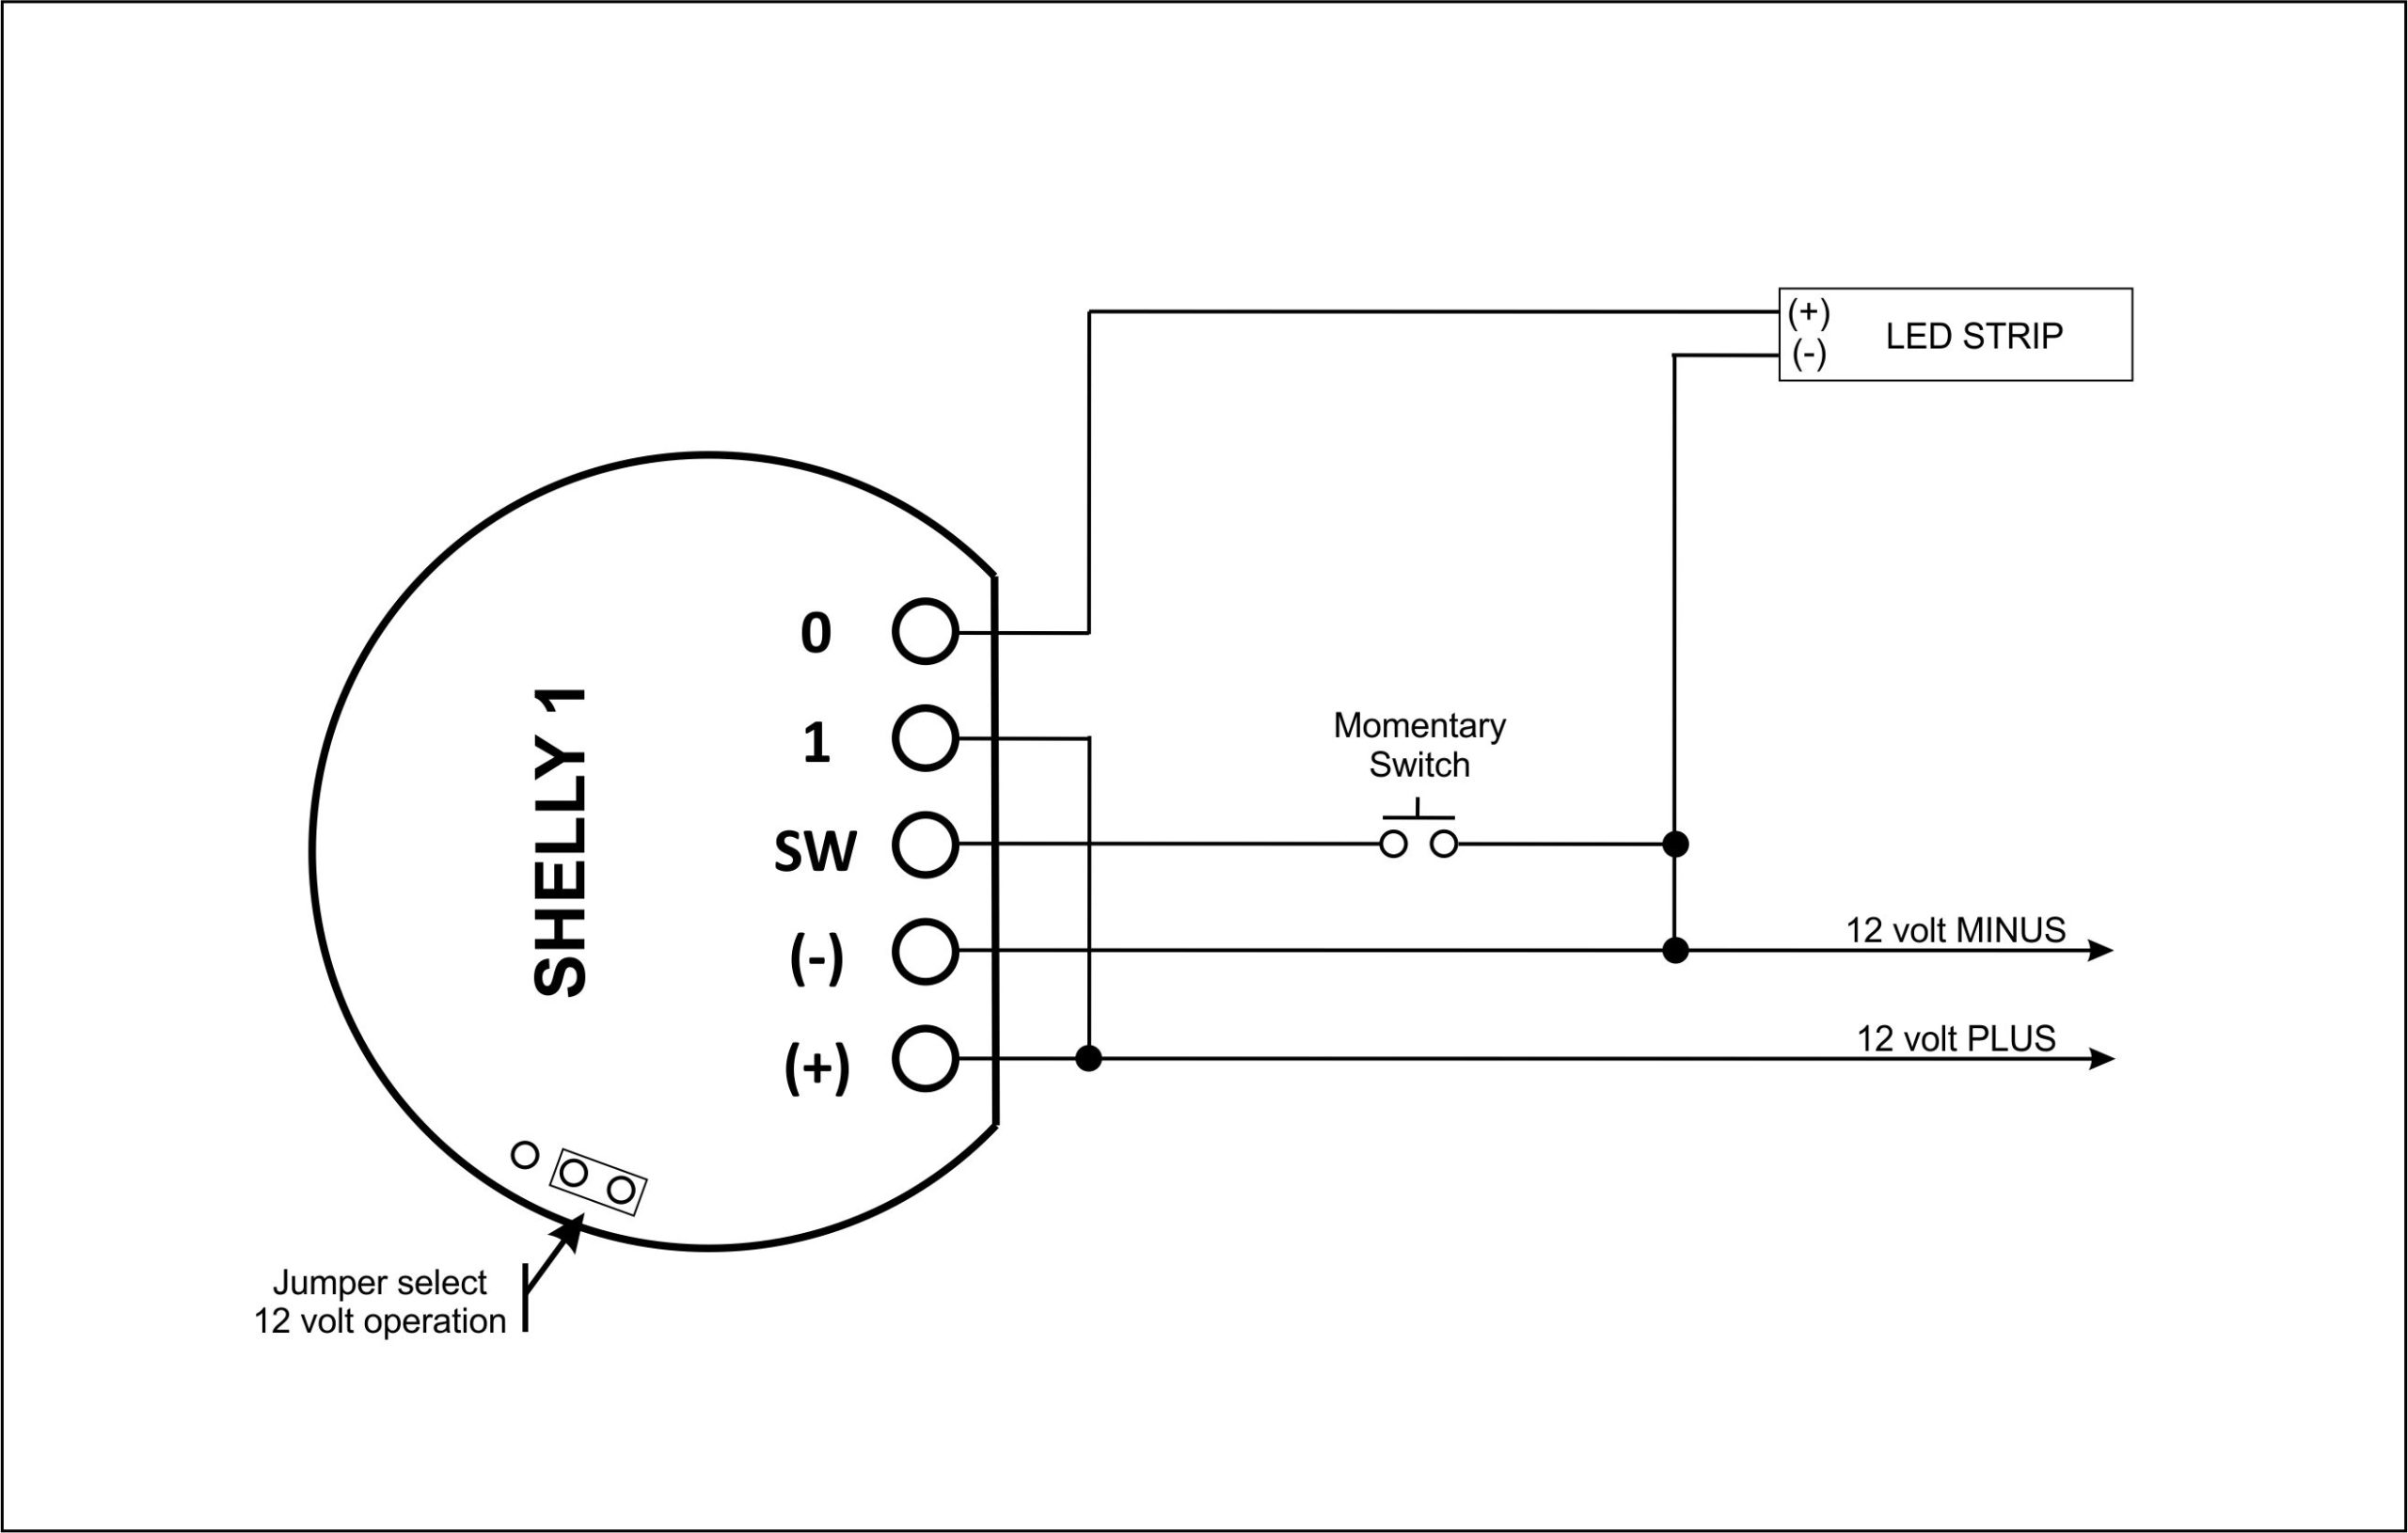
Wire the Shelly up to 12 volts, a light, switch, and ground. The diagram above shows a basic wiring to control lights. Note the switch pulls the SW terminal to ground. The controlled relay contacts “I” and “O” are normally open isolated contacts capable of 10 amps.
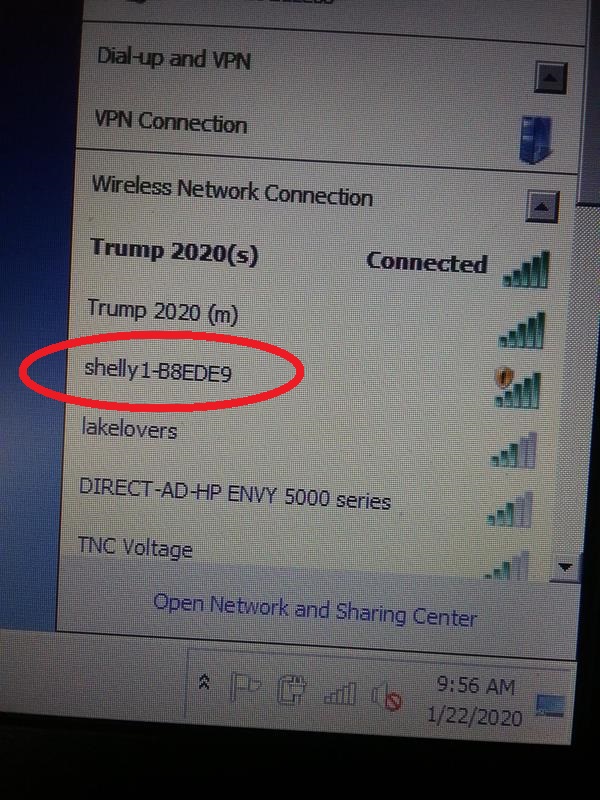
Once its all wired up, we’re ready to configure it. Apply the 12 volts to the Shelly. The Shelly has its own built in web server thats used to perform the initial setup. Using my laptop, I looked for the Shelly’s SSID. its named “Shelly 1 xxxxxx”. Connect to it.
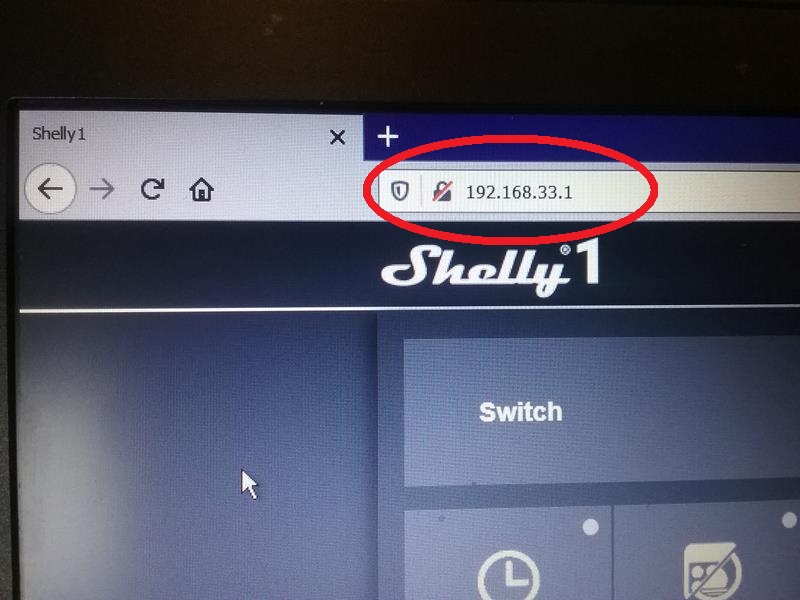
Once connected to the Shelly’s SSID, open a web browser and point it to the URL “192.168.33.1”. There are several settings that need to be changed, depending on how you’re using the Shelly.
These are the items that I needed to change on the three Shelly’s that control lights.
Settings > BUTTON TYPE > Momentary : This tells the Shelly whats connected to the SW terminals. I replaced the ON/OFF switches on my lights with a momentary switch. One press turns the light ON, press again to turn the light OFF..
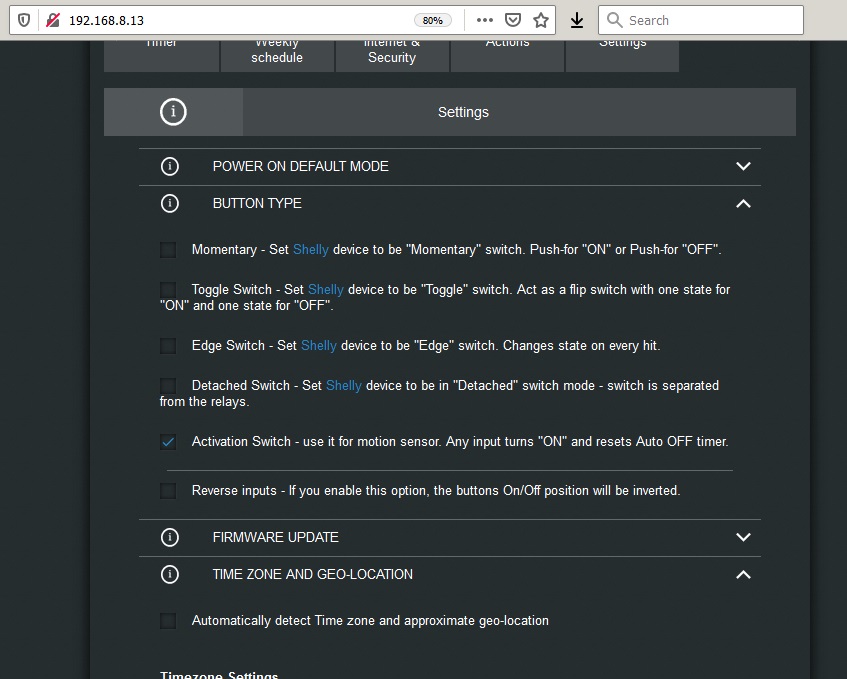
These are the setting I changed for the Shelly that turns the RV Radio ON/OFF. This turns the relay on for one second then turns it back off any time the Shelly is commanded to ON. The Shelley OFF command has no effect.
Settings > BUTTON TYPE > Action Switch: Allows the use of the timers to pulse the output relay
Timer >Timer > AUTO-OFF > Checked and set to 1 second
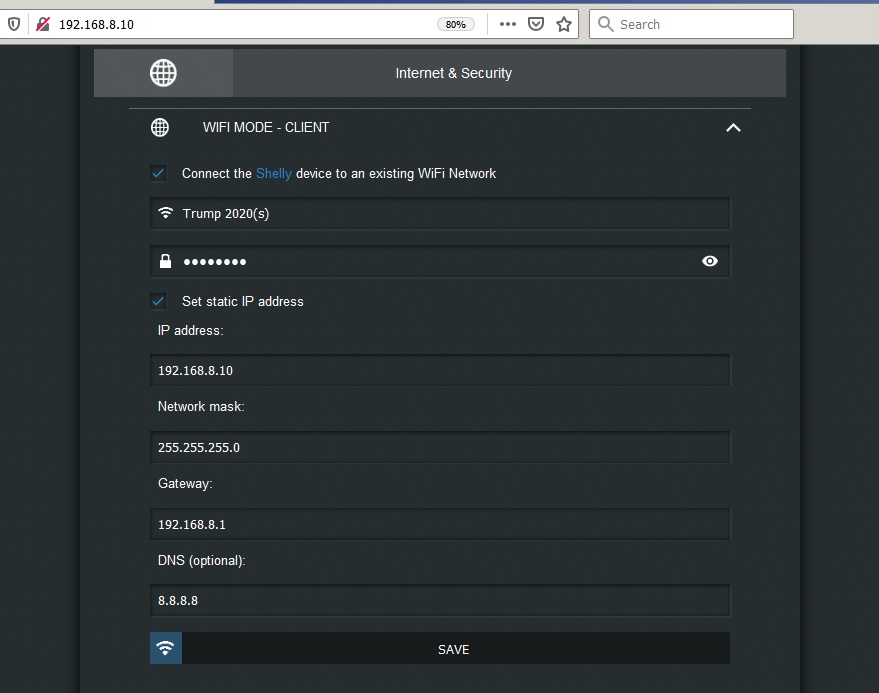
Internet & Security > WIFI MODE – CLIENT
Enter the SSID and password for the wifi network that the Shelly will reside in.
I chose to assign each of my Shelly devices their own unique IP address, so I checked the “Set Static IP Address” box. I assigned IP addresses to the different Shelly’s: (NOTE – My routers DHCP will assign addresses in the 100-255 range, so make sure the static IPs that I assign will not conflict with these addresses)
- 192.168.8.10 (Kitchen light)
- 192.168.8.11 (Living Room light)
- 192.168.8.12 (Hall light)
- 192.168.8.13 (Radio toggle)
The mask is set at 255.255.255.0
The Gateway should be the wifi routers IP address. In my case the routers address is 192.168.8.1.
The DNS server I assigned is the Google servers URL in this case, 8.8.8.8
IMPORTANT – When you hit SAVE, the Shelly will drop its current SSID server and connection. It will switch over and connect to the SSID you assigned with the IP address you assigned.
Once all these settings have been made, reboot the Shelly, it should now appear on the SSID wifi network that you set up. Switch the laptop over to the wifi routers SSID. Start the browser and connect to the IP address you assigned to the Shelly. You should see the configuration page exactly the same as with the initial setup. There needs to be a couple changes here:
Settings > FIRMWARE UPDATE : If you have a internet connection, the Shelly will check for updates of the firmware and update it if you desire.
Settings > TIME ZONE : Disable the auto time zone detection, then select your time zone from the dropdown. click SAVE to save these settings.
Internet & Security > CLOUD : Click ENABLE If you wish to remotely control your devices, OR use the Amazon Echo Dot (Alexa), the CLOUD must be enabled and configured for your Shelly devices.
SETTING UP THE SHELLY CLOUD
I tried to do this with my laptop, but didn’t get very far. So I ended up doing it with my android smartphone.
Make sure the smartphone is connected to the same SSID wifi network as the Shelly’s. Goto the Play store and search for “Shelly Cloud”. Load and run this app.
You will need to create an account in the Shelly Cloud. make sure to remember the details as you’ll be asked for them later when you attempt to connect the Amazon Echo to the Shelly “Skills” that are contained in the Shelly Cloud.
When the app is open, go to the menu (three bars in upper right corner) click “Add Device by IP”. enter the Shelly’s IP address. then hit “CHECK DEVICE”.
When it finds the device, You’ll need to give the device a name. Use a name thats simple and easy to remember. IMPORTANT: This will be the name used when connecting to the Alexa.
- KITCHEN
- LIVING ROOM
- HALL
- RV RADIO
You’ll also need to select a room to place it in and the icon to use for the device. I used a light icon for everything .
EDITING A DEVICE IN THE CLOUD
If you need to change anything on the device, name, icon, etc, there is a way to edit it from the Shelly Cloud. When you open the Shelly Cloud app, select the ROOM that you put your devices in. You will see the devices listed in that room. At the top right side, click the menu (three bars). At the very top of the mune list, click on the pencil icon. You will note that the devices listed now have a pencil and a trash can beside them.. Click on the pencil icon to edit the device.
SETTING UP ALEXA TO CONTROL SHELLY DEVICES
Follow the instructions for setting up the Amazon Echo on your smart phone.
Follow the instructions on enabling the Shelly Skills for the Amazon Echo. Pay particular attention to naming / renaming Shelly devices so Alexa can recognize them more easily.
One the devices have been discovered, you should be on your way..
Try it:
Alexa, Turn the Kitchen light ON.
Alexa, Turn the Kitchen Light OFF
CONCLUSION
This has been a very basic Turn ON / Turn OFF walk through. As I learn more about these devices and the capabilities of the Internet-of-Things technology, I’ll add a couple more devices to my RV’s Alexa and smart home network.
Pingback: Convert fluorescent fixtures to LED - 1999 Southwind 35S