
The Ventline range hood had a couple problems;
1) The water pump switch (Momentary contact) was jammed and stuck ON.
2) The vent blower was very stiff, and the exterior exhaust door was stuck in the open position.
REPLACING SWITCHES
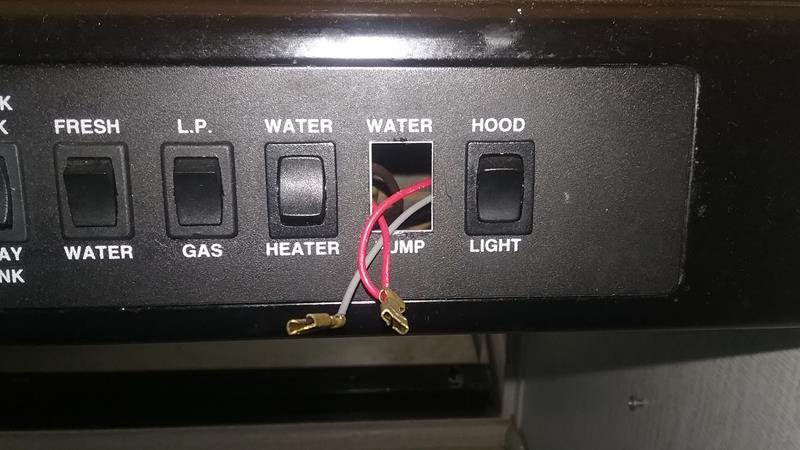 The switches can be replaced without removing the front piece. I used two small putty knives, wedge between the switch and the panel. Then push a little to release the clip on the switch and you pry the switch up and away from the panel. Alternate between the top and bottom of the switch and work it out slowly.
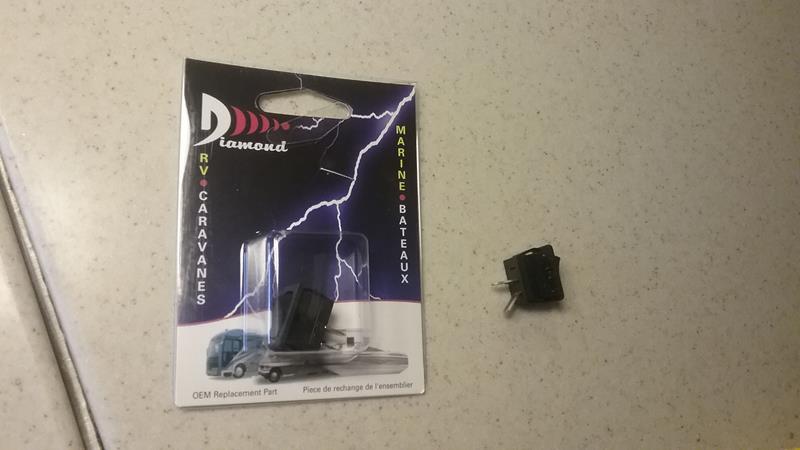 The local Camping World has a good selection of replacement switches. I was able to find the Momentary ON – OFF switch for the water pump, and two other switches (ON-OFF) that were hard to move. The new switches popped in and the water pump, light, and water heater switches now work like new.
VENT CONTROL
 The sliding exhaust lever does two things, It turns the blower on (two speeds) and at the same time opens/closes the exterior vent door via a short control cable. The lever on mine was very stiff and hard to move. and the exterior door was stuck in the open position.
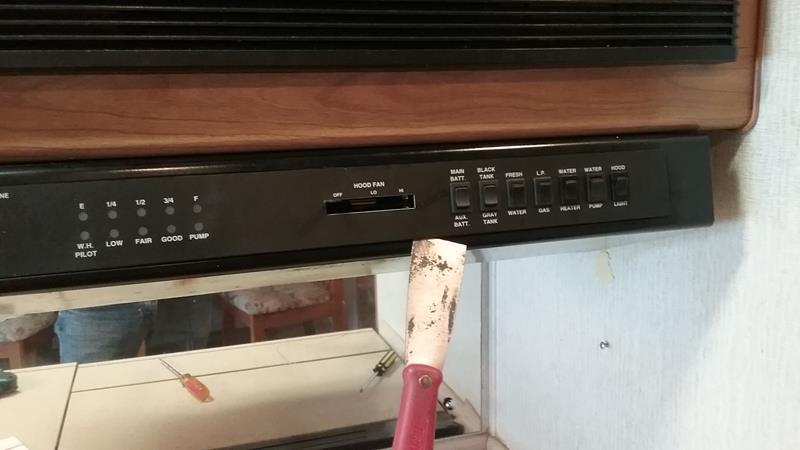
To gain access to the lever and switch, the front panel needs to be removed, the filter and light cover need to be removed, and the fan blades need to be removed from the motor.
To remove the front panel, there are four clips on the top and bottom of the panel. I used the putty knife to wedge under the panel, and pried a little at each clip location to free the bottom of the panel.
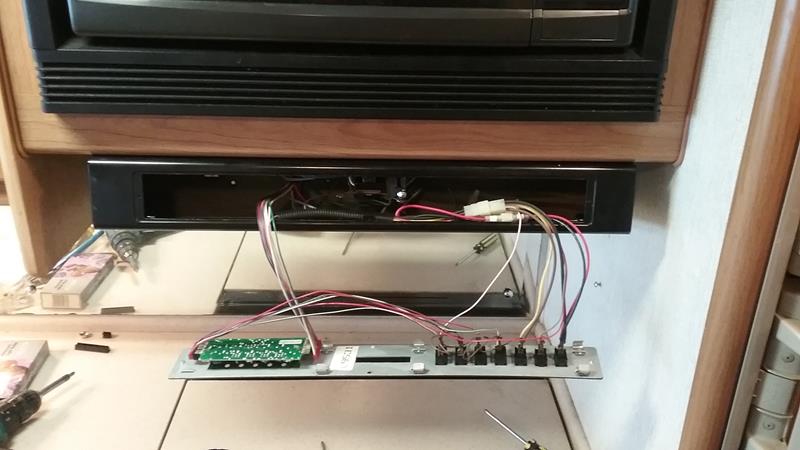 Cable Assembly
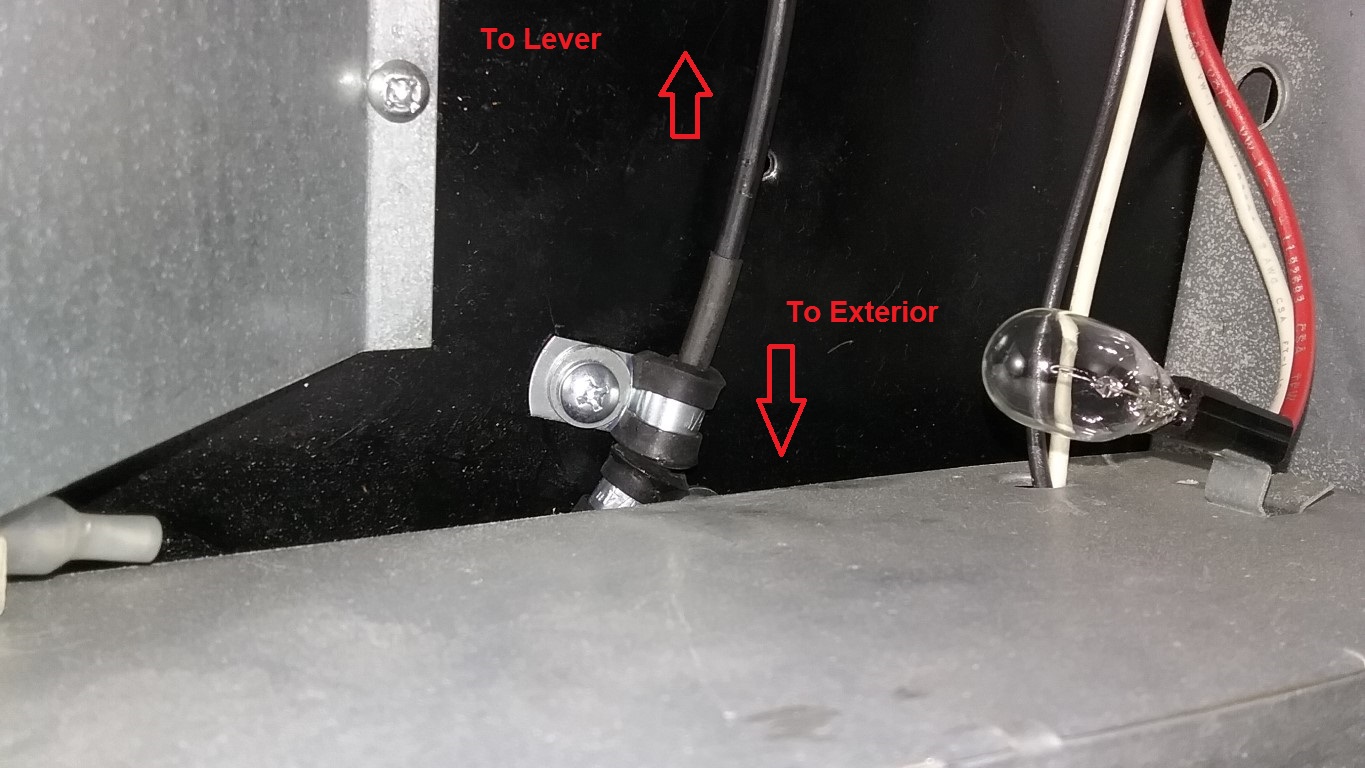
The vent cable assembly runs from the front panel lever assembly to the exterior vent cover. The way its supposed to work, when you move the lever to turn on the blower, the lever also pushes the vent cover open via the cable.
On mine the lever was very stiff and hard to move. On close inspection, I seen the cable housing (the tube that the cable goes through) had melted and was deformed, not allowing the cable to move freely inside the housing tube. This caused the tube to slide out of the cable clip on the lever, and then the vent door jammed open..
I used a razor knife to remove the melted section from the middle of the housing tube (about 1 inch). I then cleaned and lubricated the rod and tube. I used a couple small pieces of plastic tube and some heat shrink tubing to connect the two sections back together. This didn’t effect the ;length of the rod, but made the tube about 1 inch shorter.
Since I broke the little clips that attach the cable to the vent door and the lever, (they were very brittle). I used a short #10 stainless bolt and a nylon self locking nut. The housing clip on the door end was OK, but the lever end wouldn’t hold the housing. Every time I moved the lever, the housing would come out of the clip and the door would jam open.
I tried to put a clamp around the clip, but this didn’t work either.
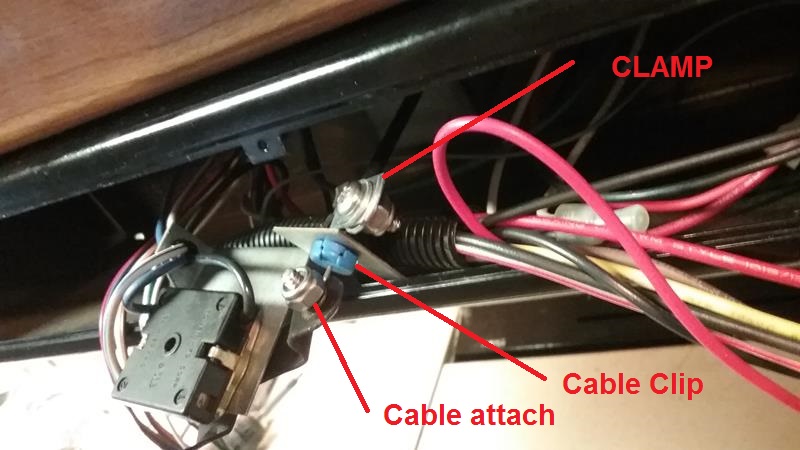
The goal was to secure the cable housing so it would not move when the lever was moved. Instead of relying on the cable clip at the lever, I decided to use a couple adel clamp and secure the cable housing to the hood just as it comes through the opening in front of the blower.
Clean and lubricate the lever and switch assembly, then reinstall it in the hood.
ADJUSTING THE EXTERIOR DOOR
Place the lever in the OFF position, make sure cable housing is inserted correctly in the exterior door housing. Reach up in front of the blower and slowly pull the cable housing toward the exterior. Attempt to keep the cable housing so its a straight shot from where your going to install the clamp and the lever assembly.
 The exterior vent door will close as the cable housing is pulled. When the door is closed, screw an adel clamp around the cable housing to prevent it from moving. Don’t make the clamp tight yet. Test to make sure the lever opens then closes the door. Once I was sure the door opened and closed correctly, I tightened the clamp, then to make sure the housing didn’t move, I installed another clamp.
While I had the blower apart, I removed the motor and lubricated the bearings on both ends with Silicon spray.
Once everything was reassembled and tight, the blower works smoothly, an, doesn’t bind, and the exterior vent door opens and closes perfectly.
I’m not sure why the cable housing melted, It could have been from the hood light ???
First ,stellar write up. Very well done. I have been looking for the vent line panel you have displayed in your write for a little while while. I wanted some kind of manual for it and or I want to be able to repair it if any thing goes wrong. Any suggestions?
Respectfully,
I’ve searched high and low for information on removing the monitor banal from the range hood.
Your article is the only one I’ve found with this information. Thanks
Wow….your tutorials have helped me with my 2000 Fleetwood Southwind 36T no less than 10 times! Now I can vix my Ventline switches! Keep up the good work!
Any chance you can take a closer picture of the wiring on the backside of the switches for me? I took my apart and having a hard time putting it back together.
Does anyone know where I could find the green board parts for the LED lights? I’m in need of the microchip and 2 diodes. I did find a repair place online but they want $404 no matter what is wrong with it.
What are the chip and diode part numbers?? Take a photo and you may be able to read the numbers on the chip.
Just bought my RV it has the same control panel in my hood, but I have no information so I can order a replacement. Can anybody help?