
UPDATE – June 19, 2019
I made a couple mods to the frig to help it when on the inverter;
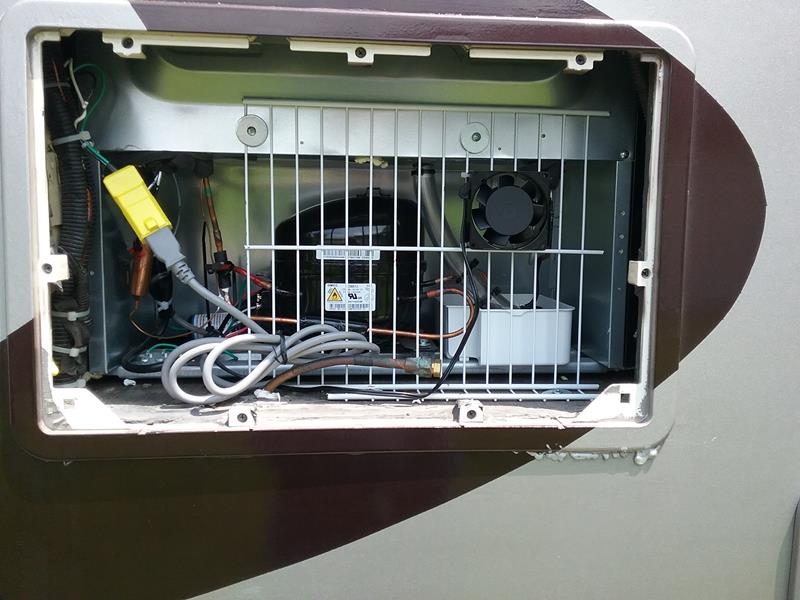
I removed the large white condensate drain pan that was directly above the compressor. When it got full (it never did), it overflows into the smaller pan on bottom right Again, it never got full or overflowed. I installed a hose on the drain so condensate will flow directly to the lower pan. Removing the large pan will help airflow around the compressor.
I added a small low power fan to help circulate air over the lower condensate pan and around the compressor. This should help dissipate heat from the compressor. In the photo, the white screen thing I installed is there just to support the fan.
I’m also upgrading the coach 12 volts system to help improve the operation while boondocking, I’ll write this up when I finish.
DONE – The new frig and 1200 watt Pure Sine Wave inverter are installed and working. The Frig is a Criterion 10 cu ft, purchased at Menards for $325. The Inverter is a 1200 watt pure sine wave made by AIMS I bought at Amazon for $170.. (NOTE – I upgraded the inverter to a 2000 watt unit.)
Total cost for the frig, inverter, wiring, nuts, bolts, switches, trim, etc was around $600.
If you check the motorhome forums, one of the hot topics will always be comparing an absorption frig to a standard residential frig.
It really comes down to two main items: How do I use the motorhome, does the existing frig need repairs.
1) How do we use our motorhome? Our Southwind spends the vast majority of its time plugged into shore power. The exceptions are when we are actually on the road, perhaps 8-10 hours a day for three or four days, or occasionally boon-docking or over-nighting with no hookups.
2) Replacement costs – if repairs are required? What are repair/replacement costs of the absorption vs. replacement cost using a residential. Last year I put a new Dinosaur control board in it and also a new thermocouple. Our ole Dometic absorption was in good shape and worked, but we wanted to install a residential, .
NOTE – The old frig is for sale, send me a note if interested. Dometic Model 3862 Royale. Works on gas or electric. $150 (** SOLD **)
REMOVING THE OLD UNIT
 I spent a lot of time thinking about how I was going to get the old unit out. I made measurements and it was just a tiny bit to wide to get out the main door. However, after removing the unit from the wall, I found that if I removed the doors and hinges, and turned it sideways, it would just barely fit out the main door sideways.
Unplug the 110 volt power, turn off the propane at the main tank. Remove the propane fitting from the old frig and cap it with a 3/8 inch flared plug. Disconnect the 12 volt leads, cap them with electrical wire nuts.
I didn’t find any screws on the back of the frig. Mine were on the front, at the very top, under the control panel, and at the bottom. When these screws were removed, the frig was ready to slide out, almost.. Last year I used some spray foam to seal a big gap at the bottom of the frig that was blowing in cold air. The foam acted like glue so I had to use a long knife to cut through it before the frig would slide out.
Before removing the frig from the compartment, I removed the doors and hinges. Don’t lose the small plastic inserts that the hinge pins slide into. By removing the frig doors, the frig would now fit out the main door if its laid sideways. Our main door has a 24.5 inch opening. the frig is 24.5 inch front to back when the doors are removed.
The frig compartment sits above the electrical compartment, its about a foot above the floor, so we stacked some wooden boards on the floor so the frig would slide out and onto the boards. The frig is heavy, about 200 lbs. We used a small appliance dolly, and tilted the frig off of the wooden stack and onto the dolly. We then moved the frig to the door opening and positioned it so it would go out sideways. Lay a couple rugs upside down on the floor of the door opening so the frig won’t scratch the floor.
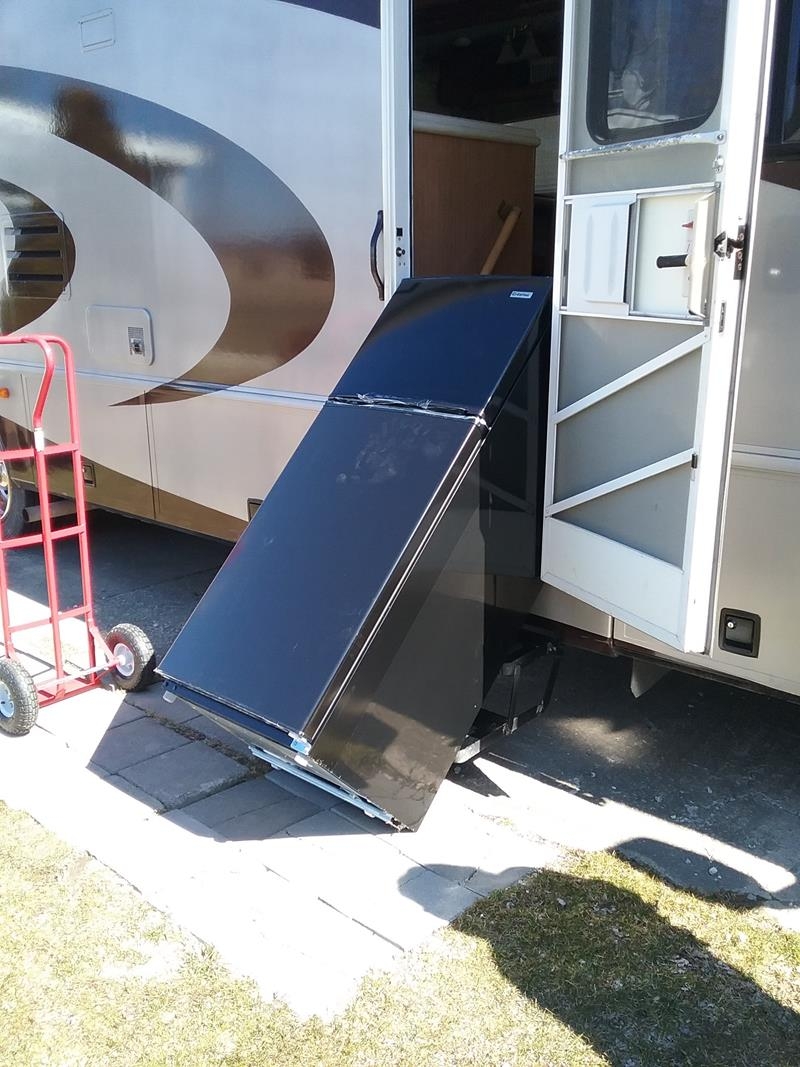
To get the frig out the door, we kind of “rolled” the frig out the door sideways. With the frig at the top of the stairs in the doorway, We then tilted the top of the frig out the door, kind of laying it on its side through the door opening. It was a snug fit. With the frig now on its side laying in the doorway, we continued to lower the top to the ground, almost upside down. The frig kind of slid out the doorway, When the top of the frig was resting on the ground, we then pushed the bottom of the frig up, and out the door.
As we tilted the frig upside down to get it out the door, we could hear fluid inside the absorption unit sloshing around. The frig was now completely outside, resting on the ground, upside down.. This went a lot easier than I had envisioned..
Once outside, we flipped the frig so it was upright, re-installed the doors, and its ready to put up on e-bay.. NOTE – This frig was working when we removed it. It has a new Dinosaur control board, and a new thermocouple.. It works on gas or 110 volts.. Our main reason for replacing, we wanted to upgrade to a residential.
GETTING NEW FRIG INSIDE
 This was fairly easy. The back of the frig is smooth with nothing protruding. With a couple rugs on the floor, we tilted the frig on its back in the entry door, then picked up the bottom of the frig and pushed it into the entryway. Once inside, we tilted the frig upright and were ready for a test fit.
EXISTING OPENING TO SMALL
The existing frig compartment opening was about 1/8 inch to narrow, so I needed to cut about 1/4 inch off one of the sides of the opening frame. I used painters tape on the right side opening and marked a cut line, then cut about 1/4 from the right side with a saber saw..
Test fit. We lifted the frig up and pushed it into the opening. The fit was good. When pushed all the way into the opening so the front was flush, the doors opened OK and didn’t hit cabinets. There was also good clearance on the sides and the back of the frig.
SIDE CLEARANCE IMPORTANT
This frig doesn’t have a normal condenser coil like that found in a lot of refrigerators. Instead, it routes the condenser tubes to the side of the frig and uses the skin of the frig as the condenser radiator. This means there must be an air gap on the sides to allow air to flow up past the sides. The frigs manual says it needs at least a one inch air gap around the sides is the minimum required for adequate operation.
THERMAL INSULATION
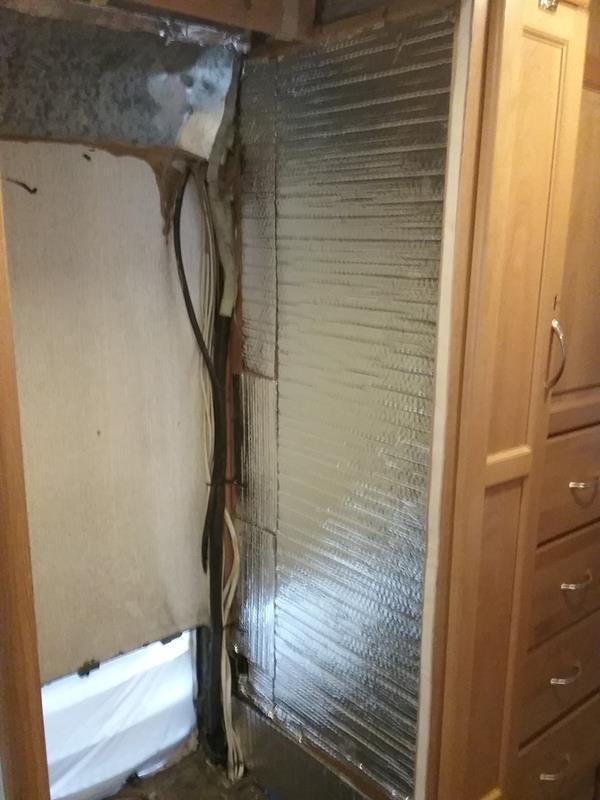 The frig compartment is exposed to the outside air so the walls of the compartment need to be insulated, but I need to make sure I maintain at least a 1 inch clearance on the sides. The original frig compartment had one inch thick fiberglass insulation on the walls of the frig campartment. This did a good job of insulating the walls and reducing airflow along the sides of the frig. Unfortunately, the new frig needs that one inch air gap on the sides I removed the glass cloth and glued aluminized bubble insulation material on the side walls. This material is about 1/4 inch think. Its not as good as I’d like, but should provide good insulation and also have enough sidewall clearance for the frig.
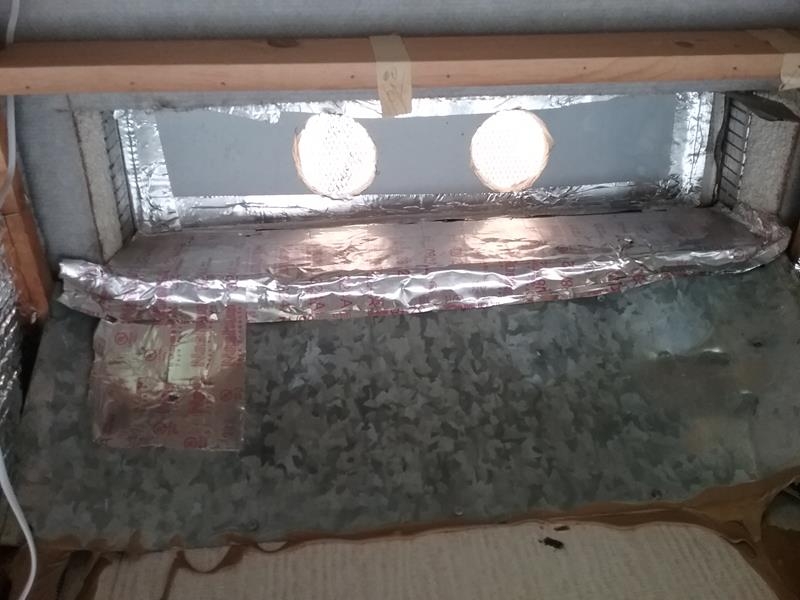
I cut a foam sheet (24×5) and used aluminized tape to secure it up in the roof vent. I wanted to provide a little airflow so I cut two small round holes in the foam the let some air out thru the roof vent.
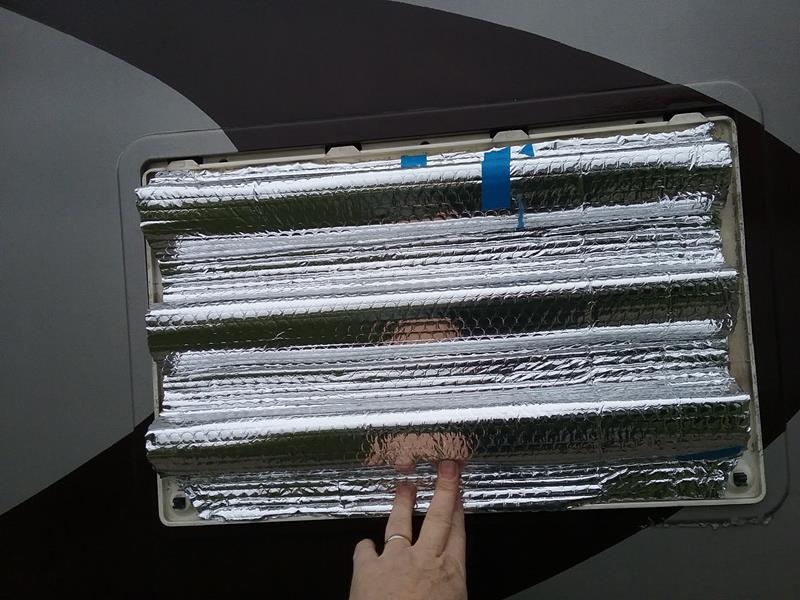 I used a small (20×20) sheet of bubble insulation and glued it to the inside of the exterior compartment cover. This will reduce air flow thru the vents and also help insulate it a little. The door is still removable so I can get to the back of the frig.
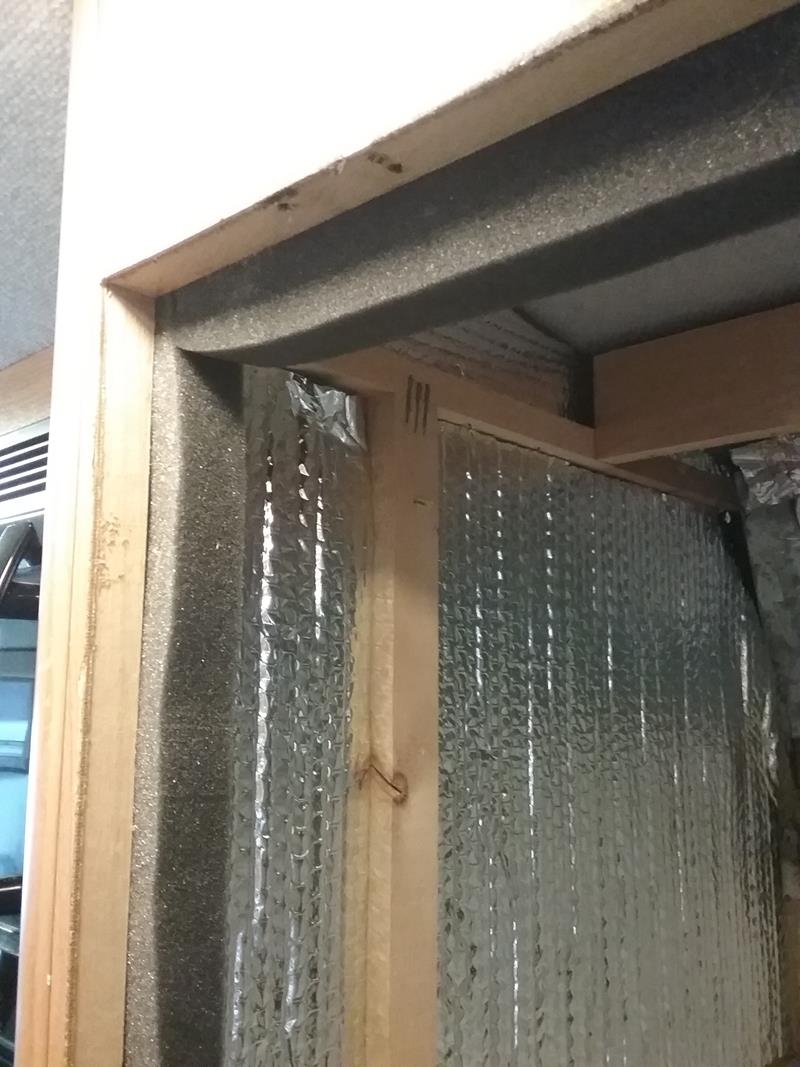 Before installing the frig into the compartment, I glued some 1×1 inch spongy foam around the front of the opening . This will help seal the compartment when I push the frig into the opening.
SECURING THE FRIG
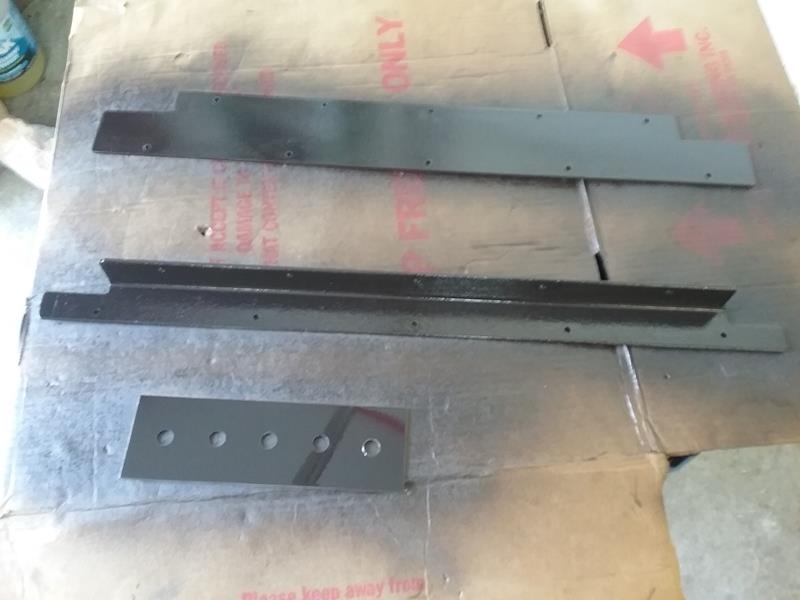
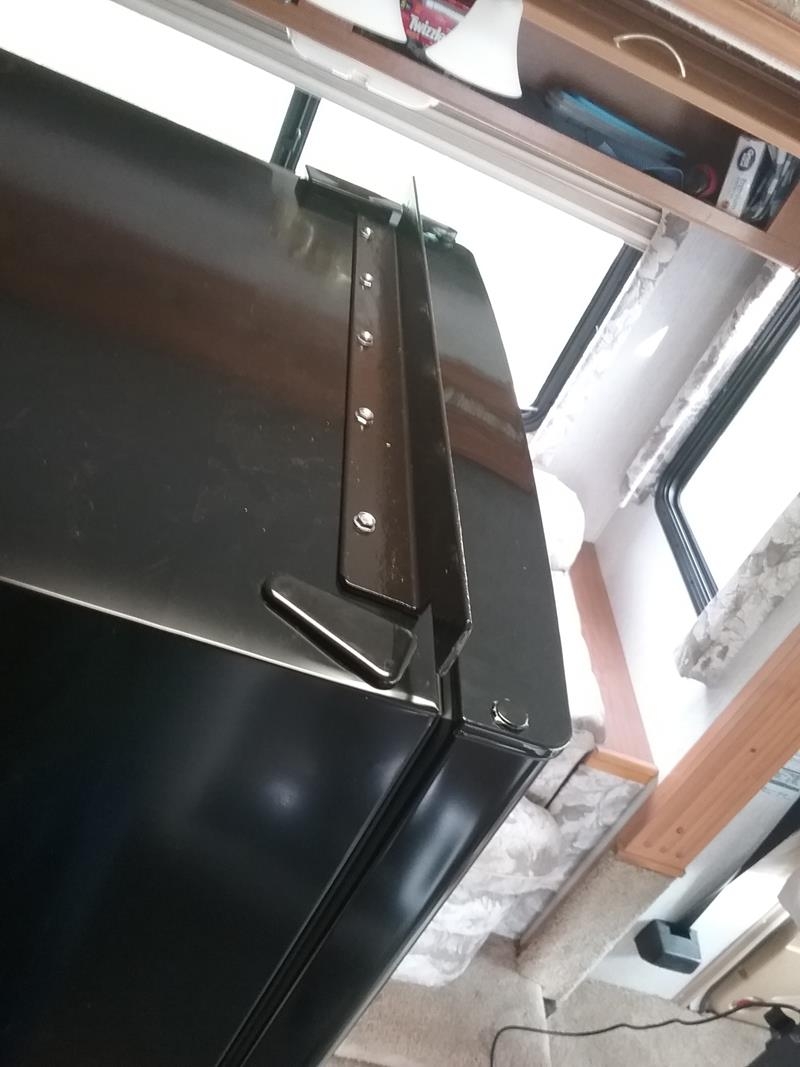 To bolt the frig to the frig compartment frame, I made an angle bracket for top front and a plate for the bottom front. These brackets screw into the skin of the frig, then screw into the wooden frame of the compartment. With these two brackets installed, the frig can’t slide or tilt out.
The sides of the frig protrude out from the walls by about 1/4 inch.
I used self adhesive foam on the sides, and stuffed 2 inch foam in at the top and bottom to help seal around the frig.
I then used self adhesive trim around the sides to cover the gaps. Looks very nice..
VIBRATION WHILE TRAVELING
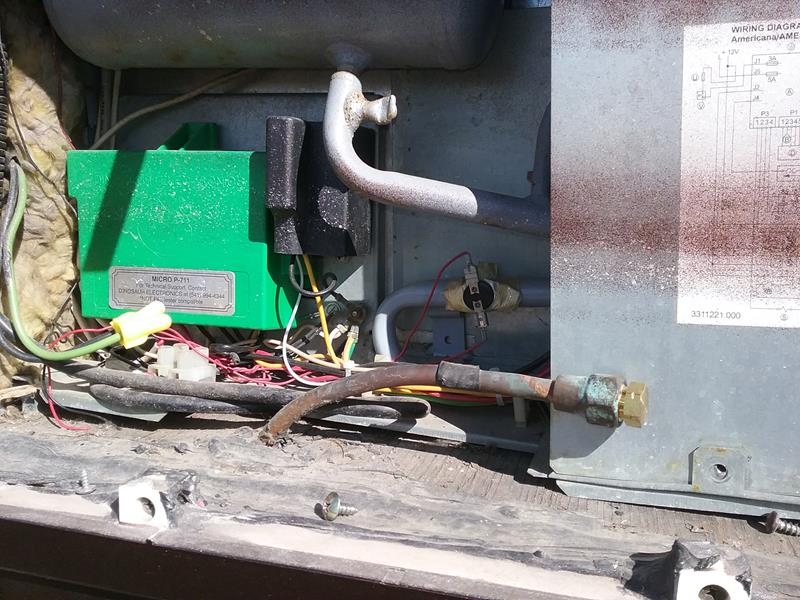
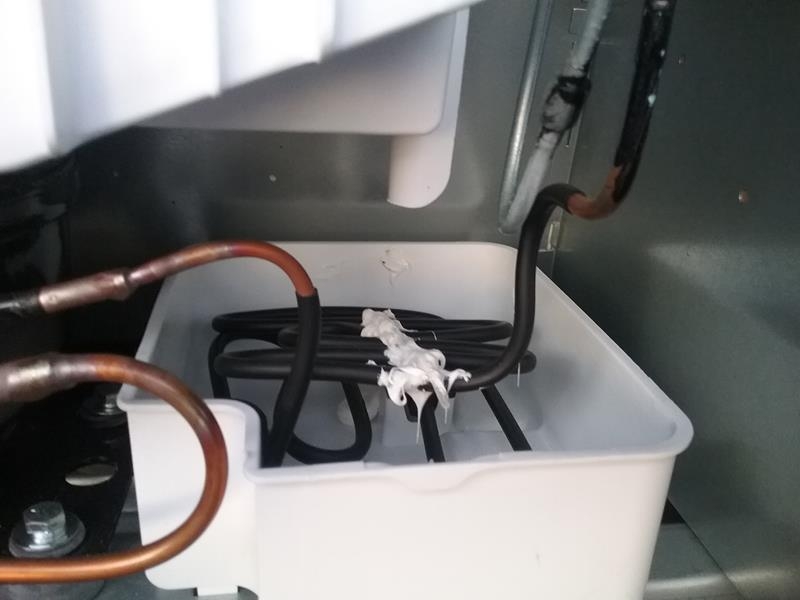 There are a couple tubes / refrigerant lines that can vibrate while traveling and these could break. I used a couple tie wraps to loosely secure these, then used a large dab of silicon sealant to keep them from vibrating.
Also in the condensate tray, I laid a piece of scrap plastic on top of the coils, then placed a bead of silicon sealant on it to secure the coil in the tray. This should help dampen any vibration these lines may see while traveling.
POWER – ADD Inverter for Frig and other 110 volt requirement (READ HERE)
DOOR LATCH – I added door a door latch to keep the doors from swinging open while we are traveling. (READ HERE)
Why the change out? Can’t the original frig be replaced or rebuilt?
Great documentation. Thanks for taking the time to do this.
I replaced the control board and the thermocouple last year. It works OK on electric and gas, we used while boondocking a few nights and of course when we were on shore power.
The flame would blow out when we were traveling. I decided since we spend most of our time with shore power, I’d just replace it with a residential..
why install a frig that will not be covered by warranty ??
Why wouldn’t it be covered by warranty?? If it breaks, I take it back.
read your owners manual – it states not for RV installation – since refri will open doors while bouncing down the road in RV – it cant stay closed unless you install locks for the doors- to modify unit with locks would also void your warranty – this is the mistake that customers make when installing residential refrigerators in RV. – your refrigerator that you took out was made for RV’s – locking doors !!! – and if doors cant stay close how will it operate correctly – it cant !!!
Yup, says not to install in RV, I guess thats a risk you’ll need to decide if you wish to take.
Yes, I installed locks on the doors so they won’t swing open.
Although its now several years beyond its warranty period, if it failed during the first year, I would have removed it, taken the locks off the doors, and returned it to Menards.
and per your statement you would have been in violation of their warranty terms and not covered !!!!!
Yup, Fortunately, the frig has been working great and the warranty issue is a non-issue.