
NOTE – I now have new fabric on both bedroom valances. Very nice, and what a difference.
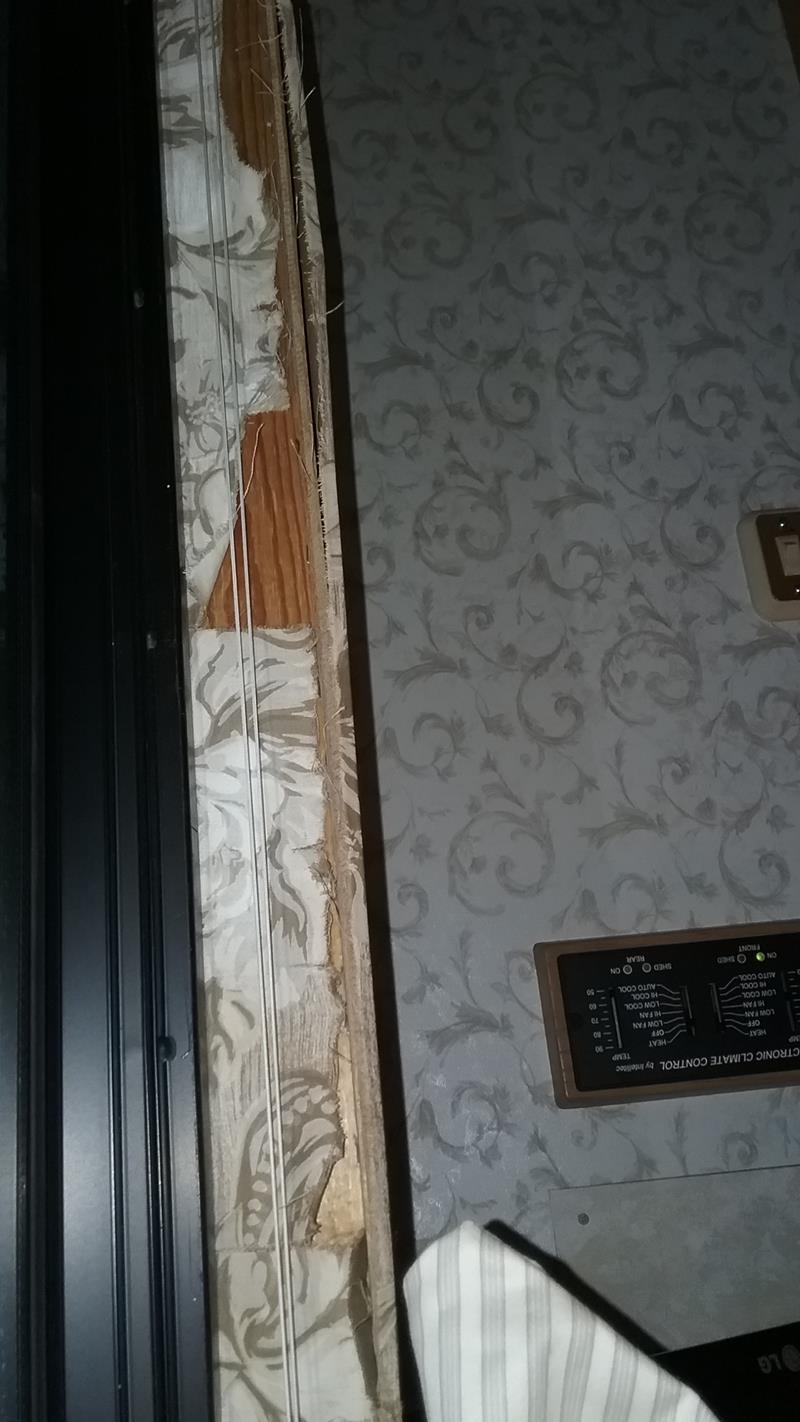
The shade valance fabric on both bedroom windows was sun faded and torn.. The fabric was very brittle from UV exposure and was jamming up the shades, making them very difficult to move up and down… Whats curious, these were the only two windows effected.
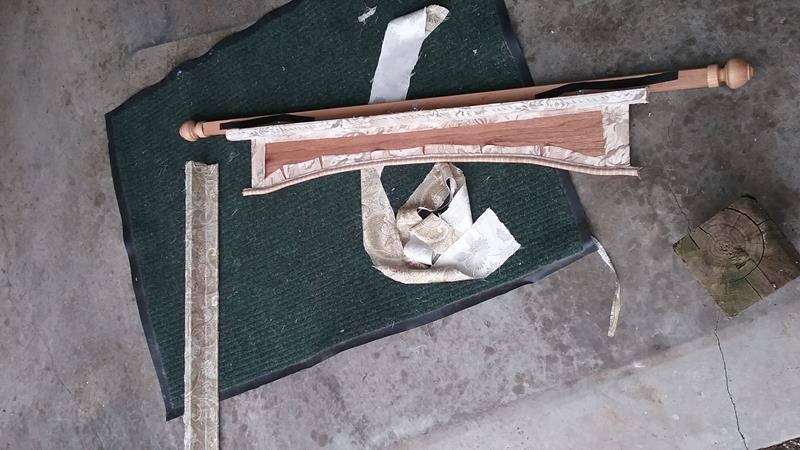
REMOVE VALANCE
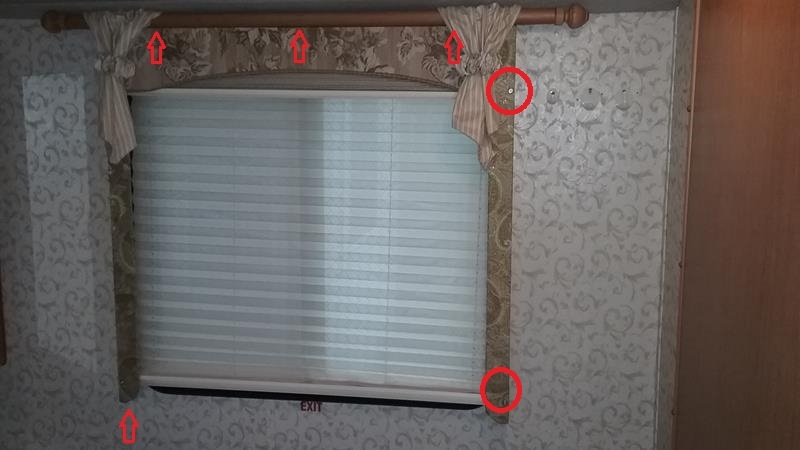
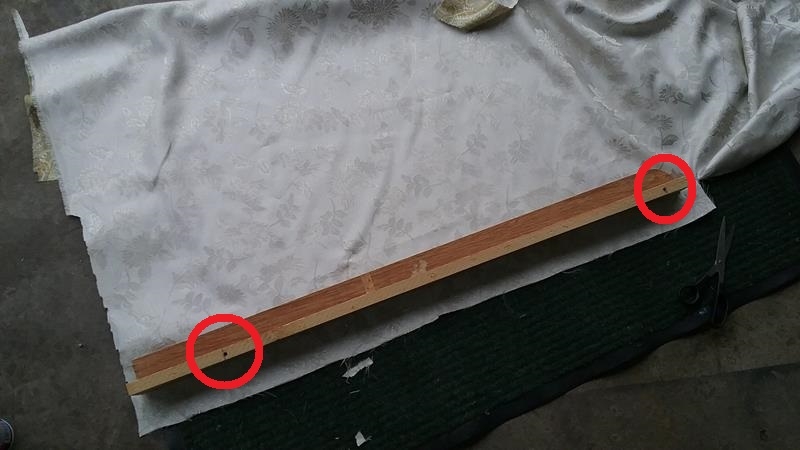
The valance is held on by six screws at the top and two at the bottom. See the arrows in the photo, The two bottom screws go up at an angle and may be hard to see. The six screws at the top are up inside the valance. I used a long Phillip screw drive to reach up inside the valance. Opening the window helps as you can see the screws by sticking your head out the window and looking up. NOTE – It might be easier to remove the shade from the valance. The shade is held on by two screws
REMOVE SHADE
The shades are screwed to the valance, it can be removed easily after removing the valance. Also remove the bottom cord holding thimble thing. The cord may be threaded through a couple holes in the thimble, or may be simply wrapped around the thimble.
DISASSEMBLE VALANCE
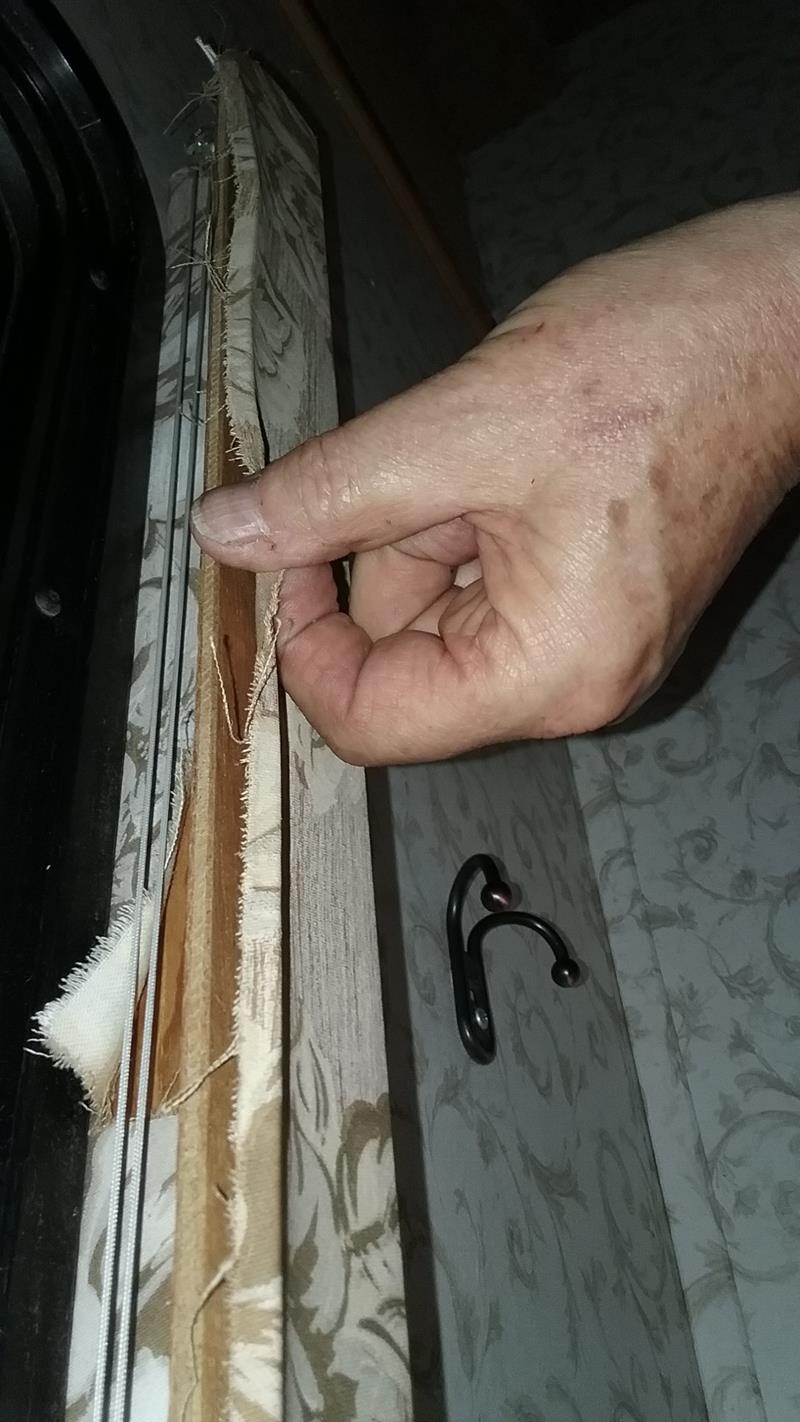
Look at the inside of the valance, you’ll see that the sides are held on by a bunch of staples and nails . You may not be able to see the nails until you remove some of the fabric from the sides.
I removed the staples, then used a hammer and gave the side piece a firm wack to knock if free from the top section. I cut the old nails off from the side and top pieces
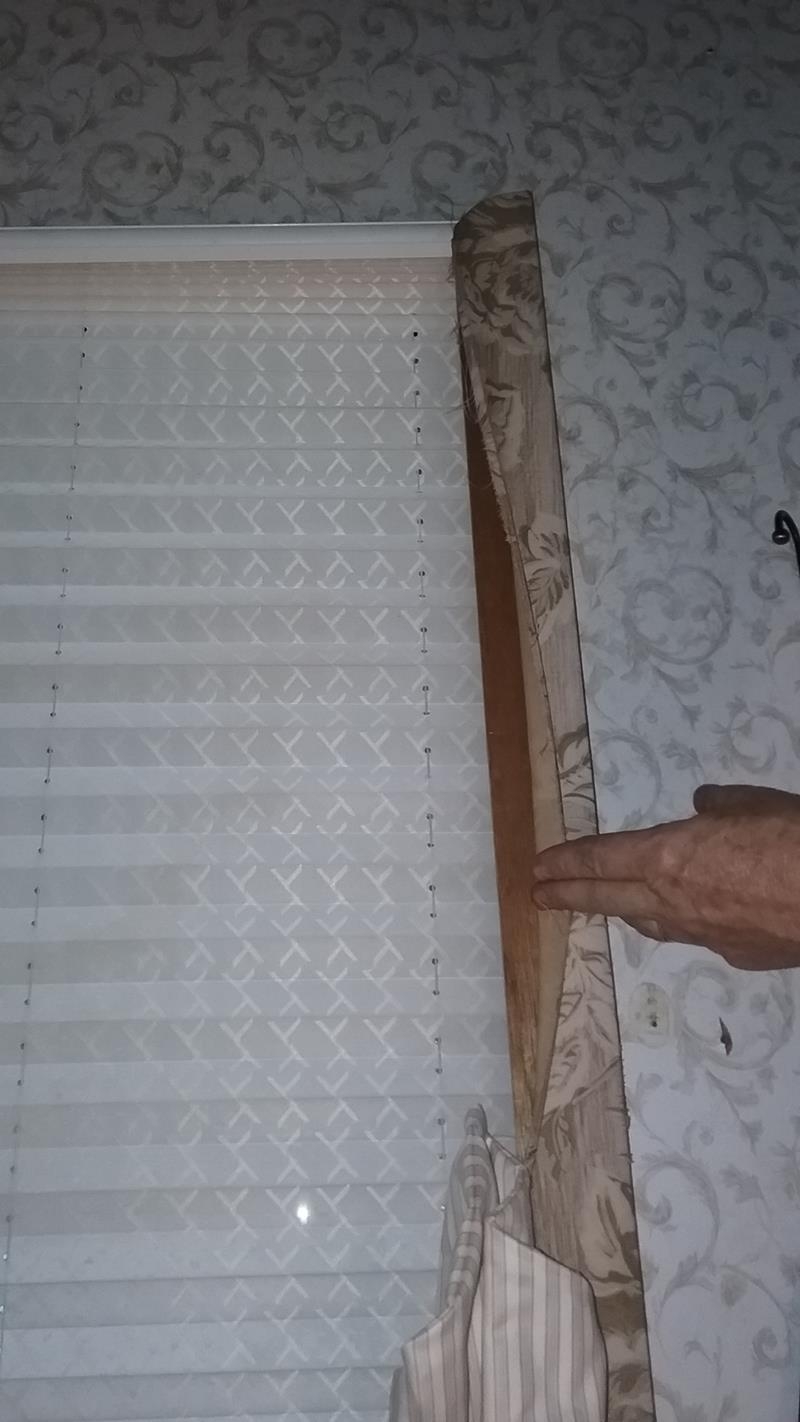
REMOVE FABRIC
The fabric should come off easily, I removed the old staples and cleaned up the sides. If you plan on recovering the top piece, you’ll need to disassemble it also.
NEW FABRIC
Before I installed the new fabric. I pre-drilled new mounting holes in the side pieces. These holes are for the 3 inch long #10 screws that I’ll use to hold the valance sides to the wall instead of using the screw at the bottom.
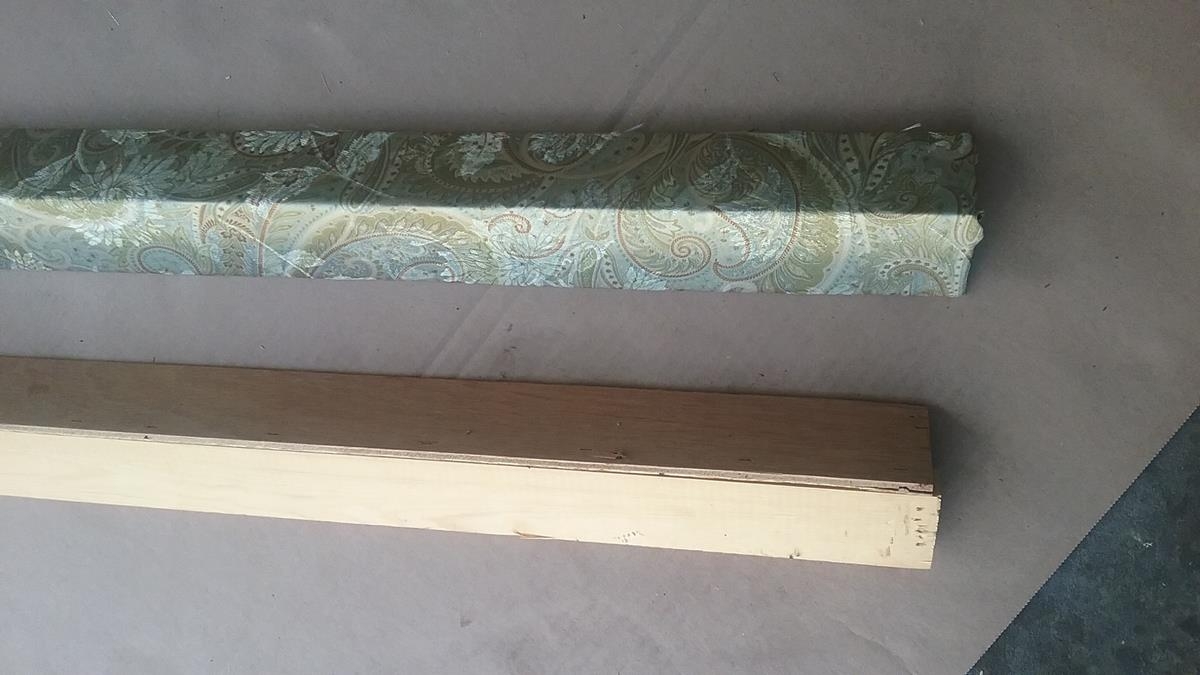
I started the fabric on the board, the same way the original was done I used a JT21 stapler with 1/4 inch staples. I sprayed some adhesive on the inside corner, pulled the fabric as tight as I could against the adhesive, and ran staples all along the inside corner. The fabric then wrapped around and I stapled it to the board. I put extra staples across the bottom.
Use a magic marker and mark to hole where the cord thimble screws into. Also mark the two mounting hole location on the side pieces.
REASSEMBLY
When both pieces sides were re-covered I used a couple 1 inch brads to nail the sides back to the top piece. I then put a bunch of staples into the top and side plywood sections to hold them together, the same way they were on the old one.
REINSTALL
I installed the shade back into the valance, then put the top screws to secure the valance to the wall.
I then use 3inch #10 screws with finish washers to secure the sides. I did not re-install the two bottom screws.
Reinstall the two bottom thimbles, the shade cords can then be looped around the thimbles.
Stand back and check it out.
LUBRICATE THE SHADE CORDS
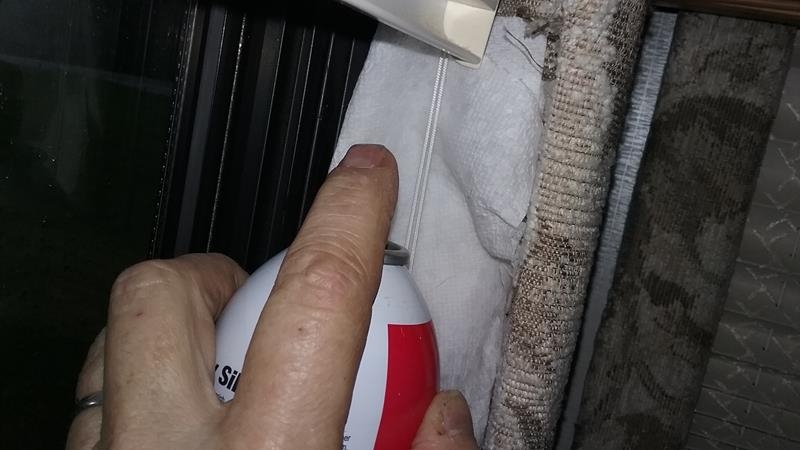
I lubricated the cord on both side. Raise the shades so they are all the way up. I took a paper towel, folded it up and put it between the cord and the valance side. I then used Silicon Lube and sprayed the entire length of the cord, using the paper towel to keep from getting spray on the valance fabric
I was AMAZED how much easier the shades moved after I sprayed the cord.