
The brake hoses on my F53 are almost 20 years old and I have no idea when (if) the brake fluid has ever been changed. While I have the Southwind up on jacks and the front wheels removed, this is a good opportunity to take care of these two items and bring them up to current maintenance. (Scroll down to view photos at bottom )
The front brake pads look fairly new. I suspect they were changed just before we bought the Southwind a year and a half ago, so I’m not going to change them.. Next year I’ll repack the front bearings. I wasn’t able to look at the rear pads.
PARTS NEEDED
- Brake clean spray- 4 or 5 cans
- PB Blaster
- Lot of paper towels
- 5 qts DOT3
- Speed Bleeder (4) bleeder fittings
- Speed Bleeder bag
- Brake hoses and banjo washers
- Small funnel and cup
HOSES
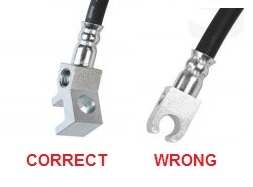
My Chassis is a 1999 F53, 20,500lb chassis. There are two different styles of the rear center hose, supposedly depending on the chassis weight. Note the hose Rock Auto specifies for my chassis is the wrong one. The hose I need, the end is square shaped, the hose they specified has a rounded end.
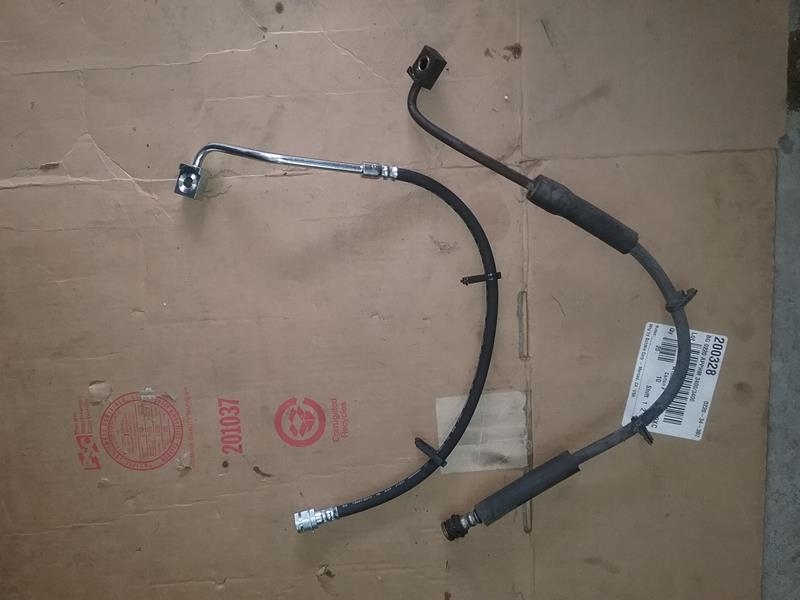
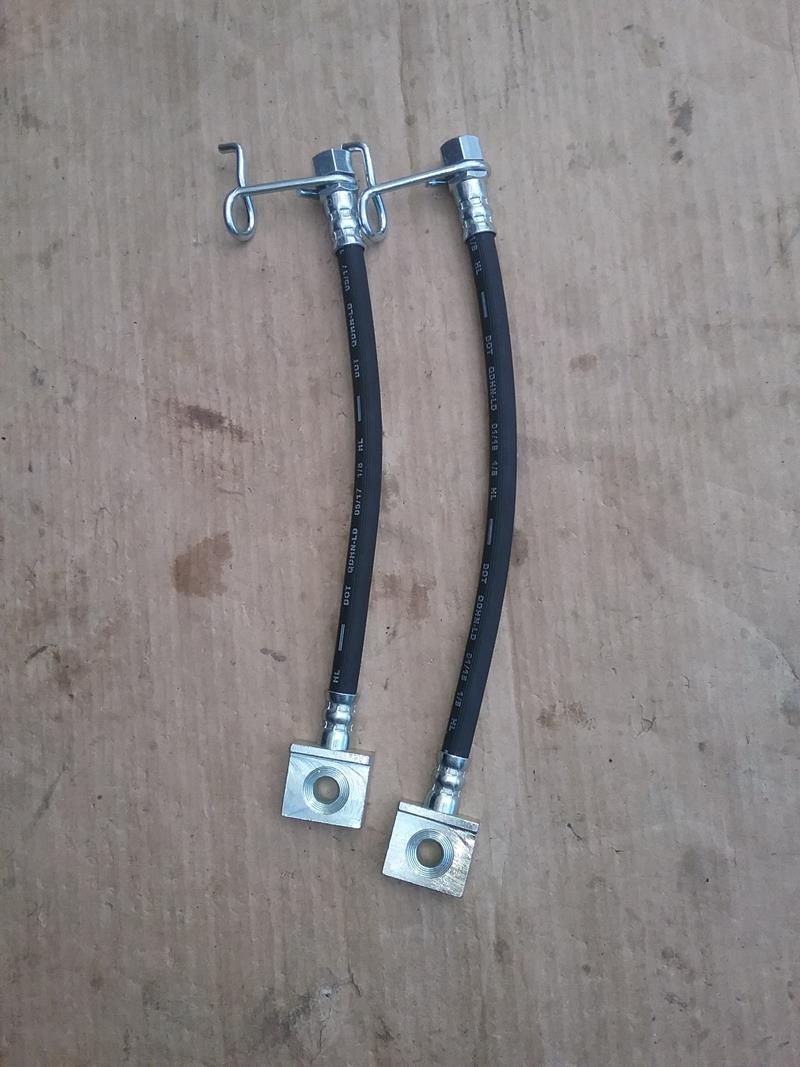
 These are the hoses I got from Rock Auto.
- SUNSONG 2204086 (Rear Center – listed for 15,500 and 18,000lb chassis) [Square end]
- CENTRIC 15065123 (Front Right)
- CENTRIC 15065122 (Front Left)
- CENTRIC 15065501(Rear Right)
- CENTRIC 15065489 (Rear Left)
FLUID RESERVOIR
My reservoir is a two part reservoir, a section for the front and a section for the rear. Each section has its own cap.
The reservoir is high up under the hood, its impossible to see down from the top. Mine had years of accumulated dust and dirt. Before removing the caps, clean the top of the reservoir, we don’t want dirt and crap getting into the reservoir. Use paper towels that are moist with brake clean and wipe the top clean. Loosen the caps a little and try to wipe under the caps before removing them. Clean the caps with brake clean.
To see the level in the reservoir, I was able to use a bright light on top of the reservoir, shining down into the reservoir with the cap removed. I could then see the level on the translucent side of the reservoir. If its near full or empty its hard to see anything, so I’d stick my finger down in the reservoir to check the level. (clean fingers of course)
The most challenging part of this whole project was keeping the reservoir full while changing hoses and bleeding. I used a small funnel and a small cup. When the reservoir was about 1/2 full, I’d pour about 4-6 ounces in the cup, then pour this into the reservoir using the funnel.
Start with new fluid. Before starting the hose replacement, I drained as much fluid out of the reservoir as I could using a small hand pump. I then filled the reservoirs with new fluid. A lot of fluid will leak out while changing hose, so I kept an eye on the reservoir to keep it full with new fluid. The less air in the system, the easier the bleeding job will be.
PRESSURE DIFFERENTIAL SWITCH
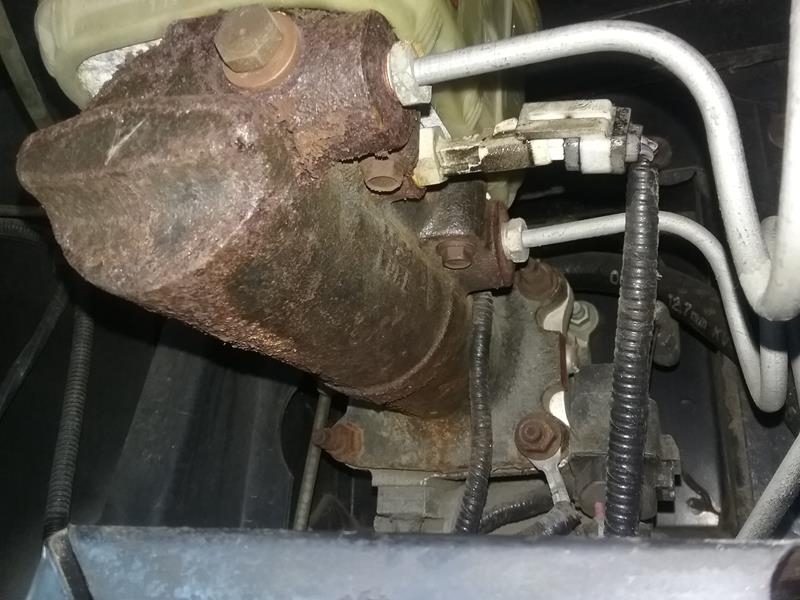
When bleeding the brakes, the pressure differential switch may trigger and not re-center. (High pressure on the front or back, and no pressure on the other) To keep this from happening, I removed the switch. When I was finished bleeding and everything checked good, I put a little silicon paste (di-electric grease) on the tip of the switch, and re-installed it.
FRONT HOSES
Front wheels removed and supported with jack stands. I sprayed all the connections and the bleeder screw with PB Blaster. I loosened, then re-snugged the fittings and bleeder before starting the removal. I want to make sure everything can be loosened on the hose before committing to actually replacing the hose.
The hose connections are located on the inside of the frame rail. Squirt some PB Blaster on the fitting and the clip. To remove the clip, I first used a long screwdriver and tapped the edges of the clip to rotate it a little and knock it lose. I then used a large flat blade screwdriver and was able to pry it out.
REAR HOSES
The two rear hoses are almost identical and could easily get mixed up. The right hose is about 1 inch longer than the left. I had to re-bend the wire clips holders so I could get the bolt in the hole.
The right hose is accessed from behind the right rear wheel. I didn’t need to jack the motorhome or remove the wheels.
The left hose and the center hose can be accessed from in front of the left wheel.
REAR CENTER HOSE
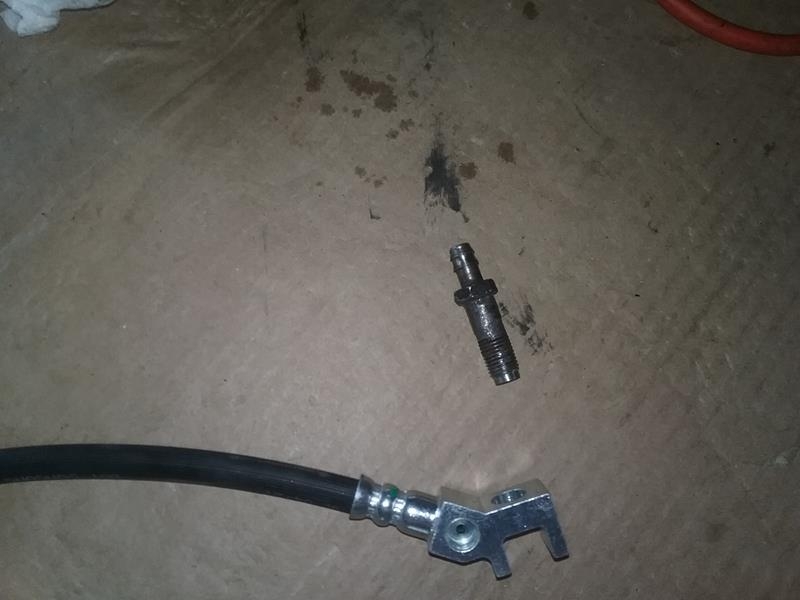
There was confusion on what rear center hose I had, so before ordering, I climbed underneath and looked carefully to determine the correct hose. Mine uses the rear differential vent fitting to secure the brake line hose and the end of the hose is kind of square, not round.
I was able to get to the center hose from the front of the left rear tire. With the Southwind’s slide extended, there’s a lot of room to work on the center hose and the left wheel hose.
When replacing the hose, the vent fitting was rusted to the old hose, so I had to remove them both together. I then used an oversize socket as a punch and pressed the vent fitting out of the old hose. I cleaned the rust off of the vent fitting, and used anti-seize around the vent fitting when I installed the new hose.
I also installed a new vent hose (1/4/ inch fuel line) as the old hose was very brittle.
BLEEDING
 I purchased SpeedBleeders and a bleeder bag. This saves a lot of time and does a better job of bleeding the brakes. The bleeder screws have a small one way check valve inside, so fluid can only go out, and doesn’t get sucked back in.. The SpeedBleeders stay installed on the caliper.
- I ran the engine during the bleeding process to take advantage of the power brakes.
- Verify reservoir full, re-install cap or you’ll have a mess
- Install the SpeedBleeder screw
- Open the bleeder about 1/2 turn
- Install bag on bleeder.
- taking about 2-3 seconds, press the brake to the floor,
- release the brake
- wait a second or two, then repeat.
- Watch for air in the bleed hose and bag.
- watch for clean brake fluid
- monitor the reservoir level
When the bag gets full, it can be emptied and re-used. Below is a short video of the bleeder in process. Notice the fluid color change at about the 23 second point.
Re-install the wheels using the sleeves|
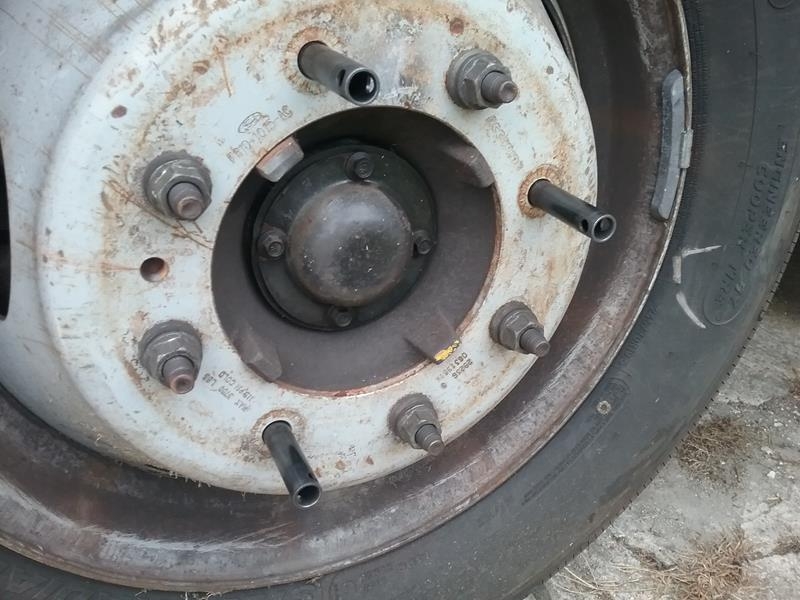 Older F53s had a TSB on this for a funny vibration at certain speeds. I bought the sleeves and use them when installing front and rear wheels. This centers the wheel on the studs and the vibration is eliminated..
Pingback: F53 – Brake pads and wheel bearings – 1999 Southwind 35S
Pingback: Upgrade report – A little more power and better fuel economy – 1999 Southwind 35S
wow fantastic site with all the common problems and fixes . I’m getting into window with all the same items you have gone through with my 06 Safari on 22,000 f53 chassis . This years project is all new brake lines and hoses .
Hi Rod, I am planning the same thing , replace the lines and hoses. I can not find the fitting sizes for the ABS connections that appear to be several sizes and not sure if bubble or flare , same for the master cylinder and the 1/4 to 3/8 reducer between the master and ABS any help would be a great help
Great walk through!!! Thank You!!!