
Changing the belt on the older F53s looks like a task best left for a contortionist. But its actually fairly easy once you’ve done it about 50 million times.. When I had my chirping problem on my ole Mirada, I must have had the belt on and off 100 times… SEE NOTE BELOW
When you order a new belt, do a double check if the vendor tries to sell you a belt that is shorter than 109.5 (110) inches. There are a lot of errors in vendor supply books. On the V10 F53 before 2006, you will need a 110 inch belt. I’m not sure about after 2006, but I suspect its the same.
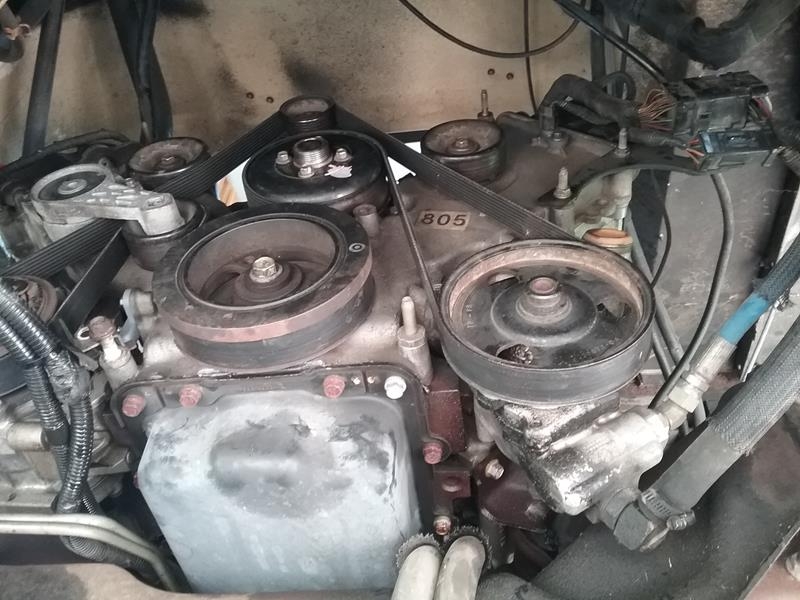
Study the drawing and also the photo to see how the belt is routed. The photo was taken when I was removing the heads to fix broken exhaust studs. Its taken from underneath looking up with the fan, radiator, shroud removed.
REMOVE THE OLD BELT
Before removing the old belt, climb underneath and look at how the belt is routed, compare this to the drawing and photo. Its not as bad as it looks 🙂
Its easier if you have a helper on top and you work from the bottom, but I’m able to do this myself in less than 5 minutes.
I use a 1/2 inch ratchet with the longest handle I can find (12 – 18 inches). However, if the handle is to long, its difficult to remove the ratchet after the belt is off and the tensioner travels farther upward. There isn’t a lot of room between the engine and fan blades to get the ratchet up there, but I’m able to insert the drive into the tensioner and pull the tensioner down to loosen the belt..
With belt tension removed, the belt will slide off either the A/C compressor (9) or the Power steering pump (6). Once the belt is off either pulley, you can slowly release the tensioner and remove the ratchet.
INSTALLING NEW BELT
Depending how much reach you have from the top doghouse, its easier to do the first step from the top. Although I can’t see what I’m doing, I kind of do it by fell.
STEP 1 – Note the red arrow in the diagram. With the belt groves toward the inside, squeeze the belt to form a small loop about the size of a quarter. From the top, push this small loop down through the opening between the idler pulley (2) and the tensioner pulley (8) ( the red arrow ). This loop goes underneath the tensioner arm. Push about 1 foot of the belt through the opening. This should be enough so it can then get looped around the A/C pulley (9).. You won’t be able to see what you’re doing, so it may be easier to first reach down and find the opening, then push the belt through the opening.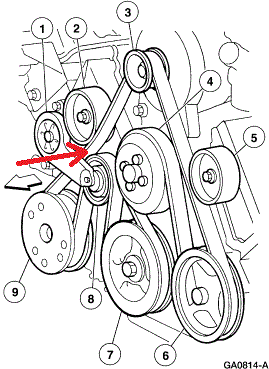
STEP 2 – I drape the belt over the Alternator (3) and push the rest of the belt down so I can get at it from underneath. The groves on the belt should be engaged in the groves on the Alternator pulley. A helper will need to hold the belt against the alternator to keep it from slipping off, OR, I use a small clip or cloths pin to hold the belt on the alternator pulley.
STEP 3 – From underneath, loop around the A/C pulley (9). loop around the crankshaft (7), then the water pump (4). I do the Power Steering pump last. Keep a little tension on the belt so it doesn’t slip out of any of the pulleys or grooves. Pull the belt loop down so its ready to slide onto the Power steering pulley, then make sure all the other loops are in the groves.
STEP 4 – With the ratchet wrench, pull the tensioner down and then slide the belt onto the Power steering pump (6).
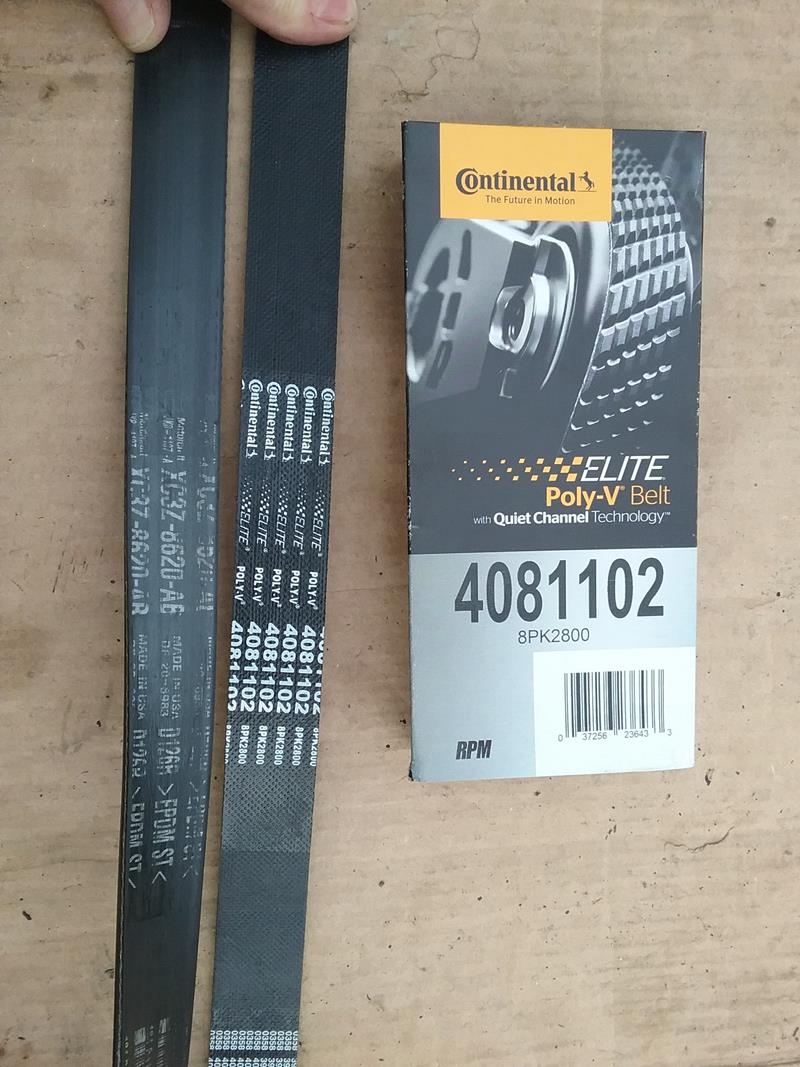
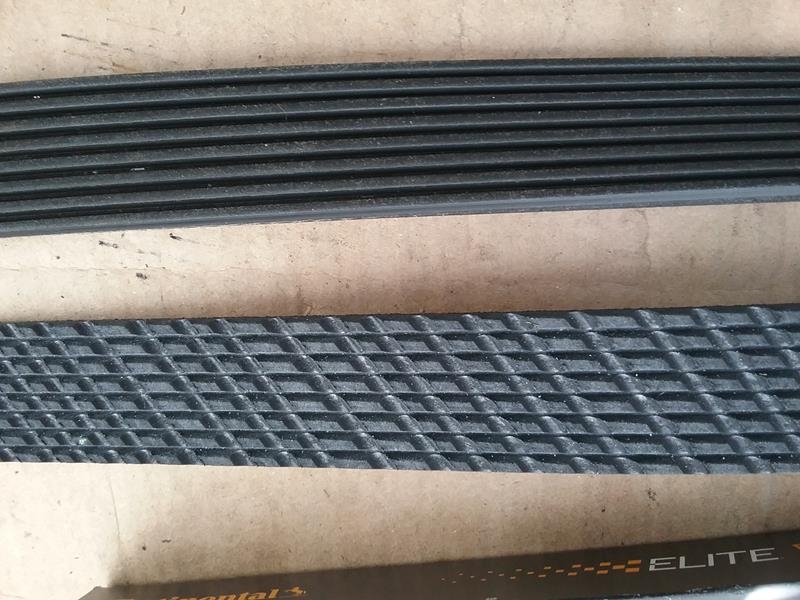
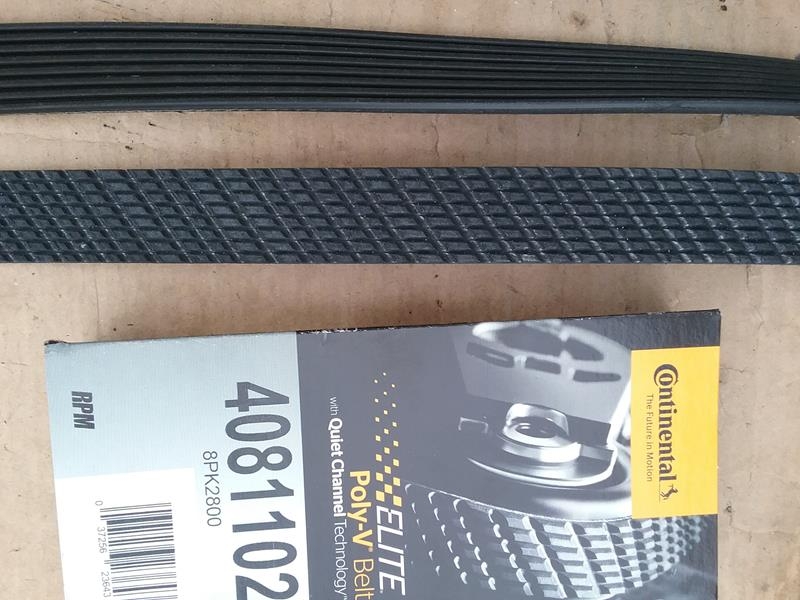
 ** NOTE – On my Old Mirada, It had a problem with a chirping belt, I had the belt on and off 50 times trying different things to eliminate the chirp. I finally used a Continental belt (#4081102) that that has a set of cross groves I tried everything. CLICK HERE to read about it.
Kind of a dumb question….So is the continental #4081102 belt the correct replacement on the Ford v10 engine?
It was on mine. I believe Ford used a different belt on newer versions. The rib count is different. Mine has 8 ribs, I think the other belt has 6 ????
This worked perfectly on a 2008 F53 chassis with V10 Triton (2009 Winnebago Sightseer). Identical replacement belt was a Gates K061105 I got from Amazon.
I had to pinch belt together and feed past tensioner pulley from below until I could loop over alternator. Used a binder clip to hold the belt on alternator. (Walter, you are awesome). But rest of directions worked as written.
Old belt felt stiff but had no cracks. 42,556 miles on the belt.
The belt listed here was a fit for my 2001 Itasca Suncruiser, Triton V10 2 Valve. Thanks Much for the write up.
Doug