
Ford F53 CHF – Cheap Handling Fix. I’ve know about the CHF for many years, so immediately after buying the Southwind, it was one of the very first modifications I performed. When I did the front, I extended the original links by 3 inches, but when I did the rear, I used the original unmodified rear links links.. READ HERE. Over the past two years, we’ve put over 15,000 miles on the Southwind. After performing the CHF, the handling is much improved.
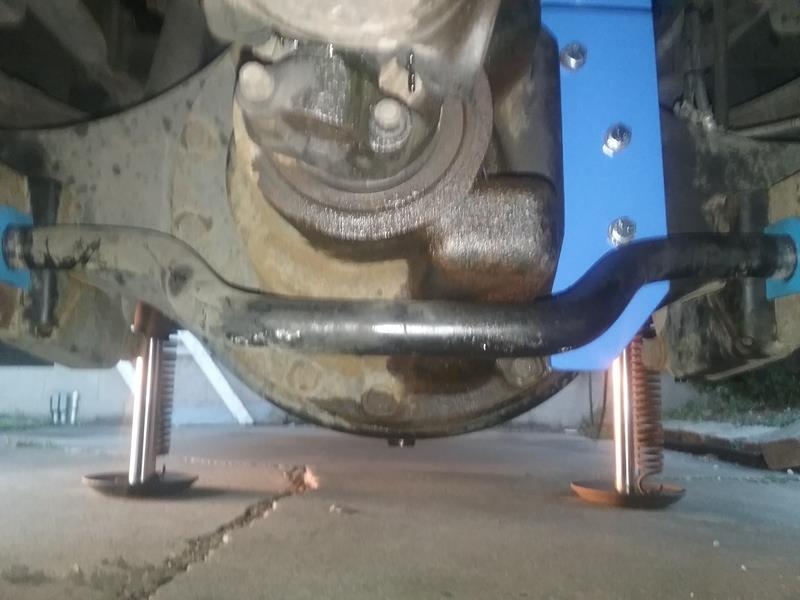
Earlier this week, I had the MH on jacks with the rear wheels off the ground to service the differential and make some measurements for my track bar. The rear wheels were off the ground and I noticed the sway bar was resting against the bottom of the differential and the links were hitting the Z brackets. NOTE – This is a 1999 F53 with a S135 differential.
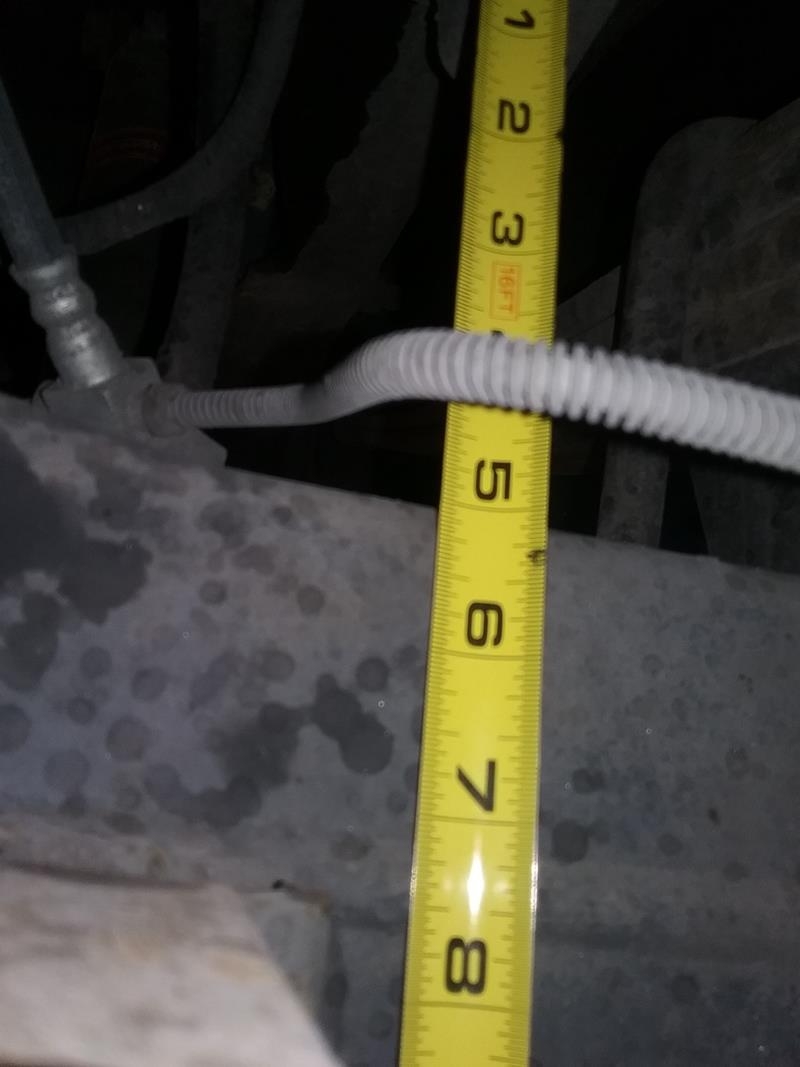
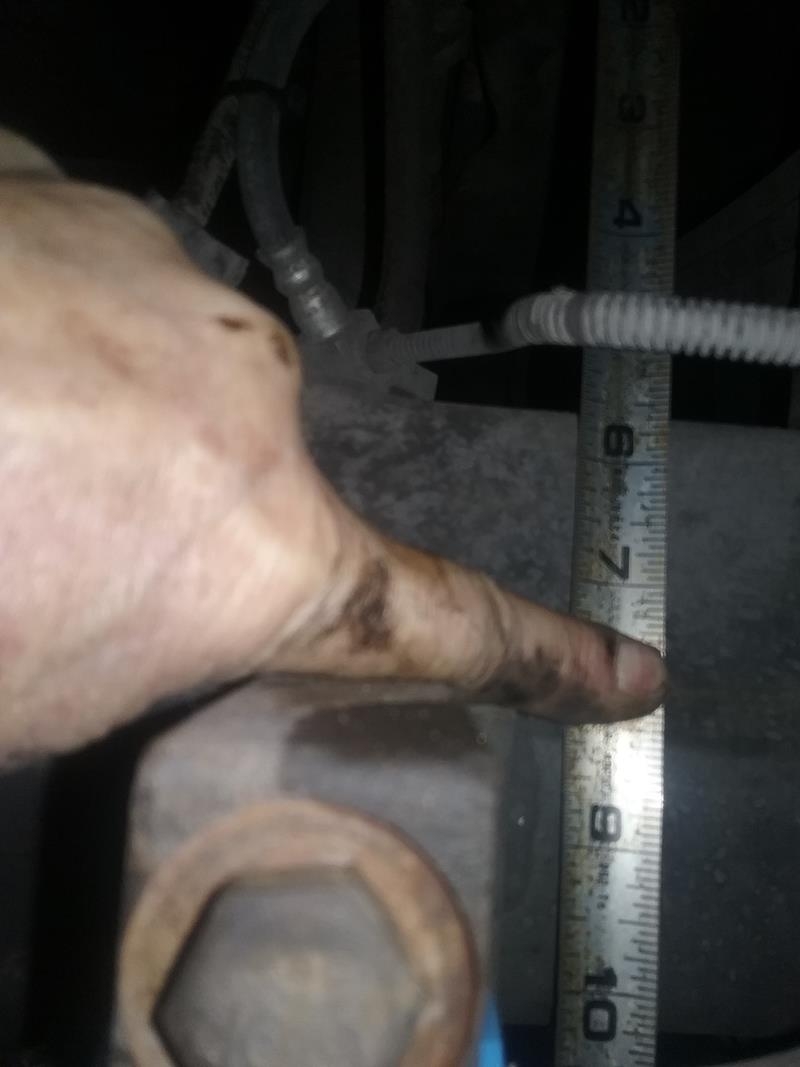
 The axle should be hanging from the shocks, but was hanging from the sway bar and links. I made a measurement from the top of the axle to the rubber frame stop, it was 5 inches.
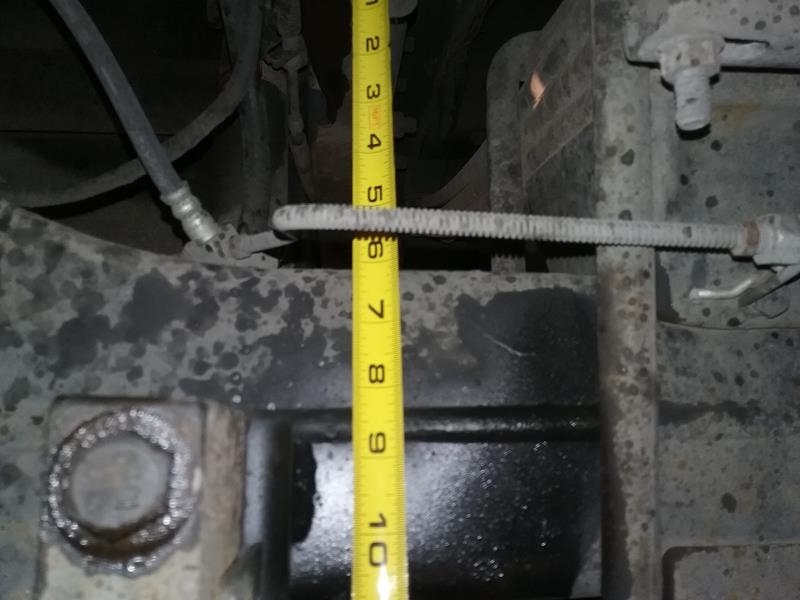
I lowered the MH off the jacks and removed the rear sway bar links from both sides. I then raised it back up so the wheels were off the ground again. The axle was now hanging from the shocks. I re-measured the axle to rubber stop, it was now 6 inches. I left the sway bar disconnected so I can complete the work on my track bar, more on this in another article.
FRONT SWAY BAR LINKS
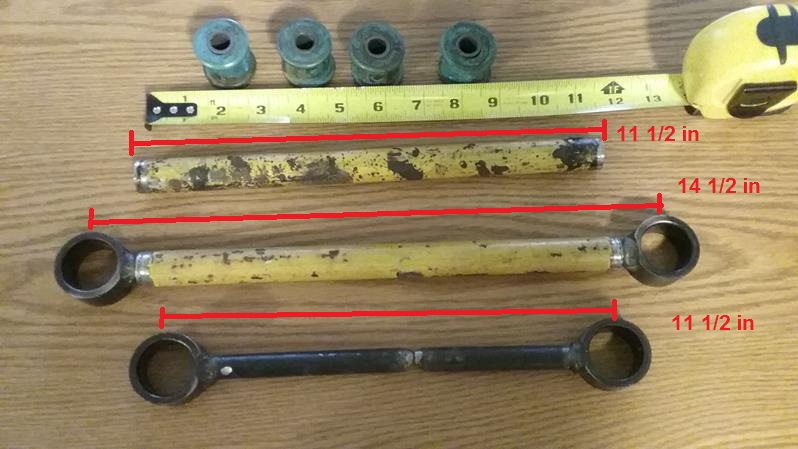
When I originally did the front CHF, READ HERE,, I removed the front links and modified them to make them 3 inches longer. This seemed to be the optimal length, It gave the maximum sway bar travel, and when the wheels were lifted off the ground, the axle wasn’t being supported by the sway bar / links, it was supported by the shocks.
I wanted to verify this and re-make the links if necessary, so I ordered two new links (MEF-66). These are 11.5 in center to center.
REAR SWAY BAR LINKS
When I originally did the rear CHF, I reused the original, unmodified links. These links are 10.5 inches center-center. At the time I didn’t verify the axle travel or if the sway bar was hitting the axle.
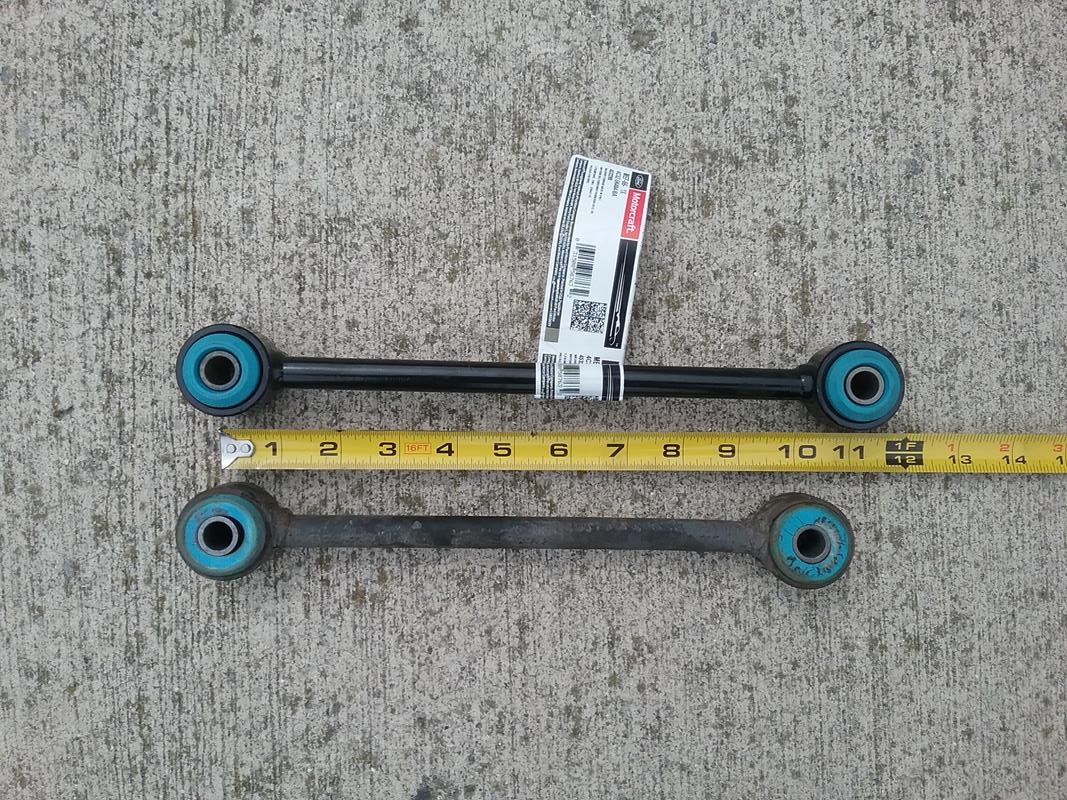
The photo shows a new front link (11.5 in) and an original rear link (10.5 in)
LONGER LINKS HELP
I installed the longer links (MEK-66) on the rear CHF. This increased the clearance to 5 3/4 inches, I’m going to run this until I can verify clearance when the springs are fully compressed. When the sway bar swings down (leafs compressed) I want to verify that the sway bar doesn’t hit the bottom bolt on the new track bar mount.
While I had the sway bar apart, I also installed new sway bar bushing..
Pingback: Upgrade report – A little more power and better fuel economy – 1999 Southwind 35S
I really enjoy your posts. They are well described and your work on the MH is inspiring. However, I am confused as to where you ended up with the front and rear CHF’s regarding lengths of the links. I have done the front CHF on my 2007 Fleetwood Bounder 32W with a marked improvement in handling, especially in gusty wind conditions. But as I am using the original links I am a bit concerned about the angle of the stabilizer bar. I appreciate there are Ford parts that can help with this as I have no welding ability. I would also like to do my rear. What length links did you end up with?
I find your post the perfect road map to keep my 99 Southwind 32V in top shape. I have done so many tasks from your posts, I can’t thank you enough. I would like to perform the CHF, front and rear. Without welding ability and the confidence to cut the original front connecting link, I prefer to purchase off the shelf links of the correct length. Any advice on length and availability will be greatly appreciated. I hope the rear link p/n MEF-66 is still a good part since it is still available on Amazon. Another question, how in the heck did you find part MEF-66 in the first place. I looked high and low for a similar part for the front. Do you have a secret code book? lol
Thanks in advance for your help.
On mine, The original front and rear links were different lengths. I believe the MEF 66 are used in the front (11 1/2 inch)
The OEM rears are about 10 1/2 inch.
You are probably OK with using the OEM on the front, and use the new MEF-66 11 1/2 on the back.
So are you saying that i can use the longer front links on the back?
Have you researched how to put aluminum wheels on your rv? Mine are the same as yours.
Not really.. They would be nice but not worth the cost. and I believe the inside dully still needs to be a regular steel rim?
I replaced the bushings to frame at rear stabilizer with silicone from ebay 40 bucks handles MUCH better
We drive our MH “off road” a lot, like 50% on dirt roads. Is there anything that can be done to improve the handling on rough roads? My MH has the air bags up front. Other than new shocks ?? Just wanted a few ideas before I jump into bigger repairs. thanks
Not sure… If you’re motorhome is older, the shocks are probably worn out.;
Hi, really enjoy reading all your postings….question: when you were replacing the front links; did you have difficulty in removing the top brackets on the passenger side? I don’t really see an easy way to get a wrench on the back of the top brackets…. thanks
I don’t recall any real difficulties.
Thank you so much for sharing some great information!
Just picked up a new to me 2017 Jayco Precept 31UL (2016 F53) and it certainly could use stiffer sway bar adjustments. The previous owner installed an aftermarket front bar.
Do you have the full Ford part number for the 11.5″ “MEK66″?
My MH has 10.5” 9U94-5K484-BA from the factory, I assume this is the same as 9U9Z-5K484-A shown by fordpartsgiant.com for the 16K-22K chassis.
I suspect the optional rear link 8U9Z-5K484-A links for the 24K-26K chassis are the longer ones???
The front parts lists show 4C3Z-5K484-BA for 16K-22K GVW and
8U9Z-5K484-B for 24K-26K GVW.
Does anyone know the lengths for all these Ford parts?
My 99 F53 is on an 18k chassis. I found that when I did the front end CHF, the geometry seemed wrong (as I recall, the strut and the sway bar ended up almost in line with one another).
So after putting it back to stock configuration, I read your original CHF write-up. I was ready to extend my struts, but then I saw this update.
So my question is, why did you go back to the shorter length up front? Also, what is kind of angle are you seeing between the strut and the sway bar these days?
Thanks for all the great info.
The goal is to make the sway bar twist more for a given vertical movement on on side of the motorhome. Extending the struts a little will help with the geometry, but reduce the twist.. The CHF is somewhat of a compromise, especially when making the struts a little longer. I explored moving the top attach point (where it attaches to the frame, to the rear a few inches, This would help with the geometry, and also maximize the twisting.
IN THE MEANTIME, Almost anything you do to increase the twist will improve sway.
Ah, so the geometry might look bad, but it actually has the desired effect. I guess I need to crawl back under there and have another look.
Thanks again.